
- Top Links auf dieser Webpage:
Mein Youtube Kanal:
Astronomy Equipment
 On this page I summarise the equipment I currently use for stationary and mobile astrophotography. Over the last decades, I have owned and sold a lot of equipment. I have made the experience: if you buy cheap, you buy twice. This is especially true of the many Chinese bullets that have been flooding the market for some time. On paper, those telescopes and mounts look nice. In practice, however, many of these devices are unusable or at least extremely unsatisfactory due to poorly implemented mass production and lack of quality control. This applies to optics - poor colour correction, insufficiently stable mechanics, faulty correctors - as well as to mounts in particular - very poor guiding performance due to high periodic error and backlash, cheap bearings, immature electronics and software, etc.
On the other hand, it is fair to say that production in the Far East has made it possible to acquire astronomical optics and mechanics at an affordable price. This was different 30 or 40 years ago, when a simple 80mm f10 Fraunhofer refractor on a wobbly mount was the ultimate and broke the bank.
Over the years I have owned a total of nine mounts, and sold seven of them because they were impractical or even unusable. The only mounts I have kept and currently own are from 10micron - high-end precision equipment made in Italy!
One mount, that I have used for over a decade is the 10micron GM2000QCI, a heavy-duty observatory mount that, once set up, does its job reliably - full stop and done. No fiddling around with worm-gear adjustment or the like. It simply works.
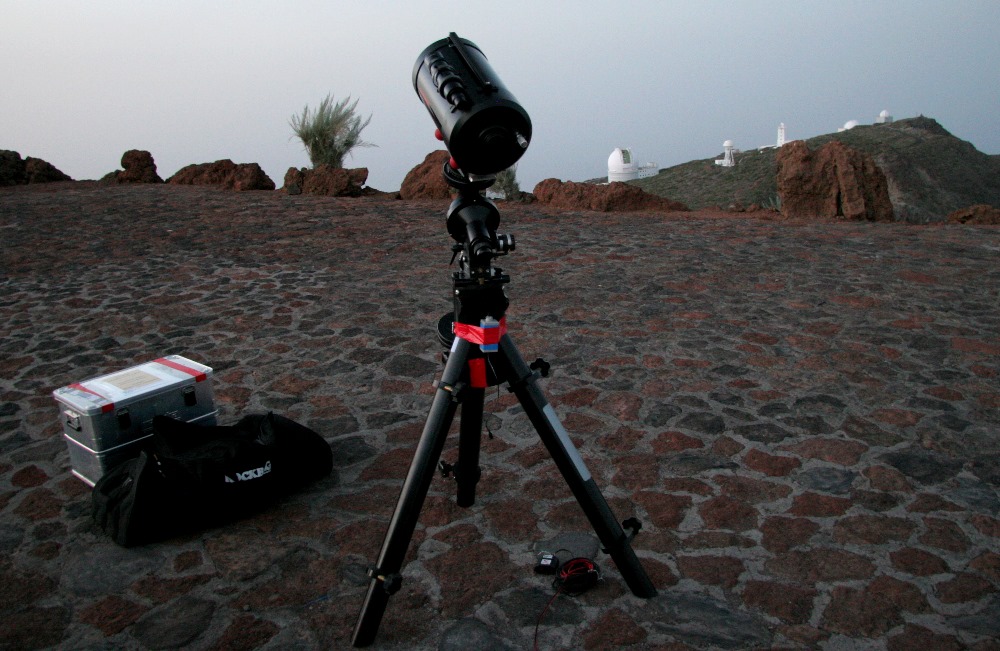
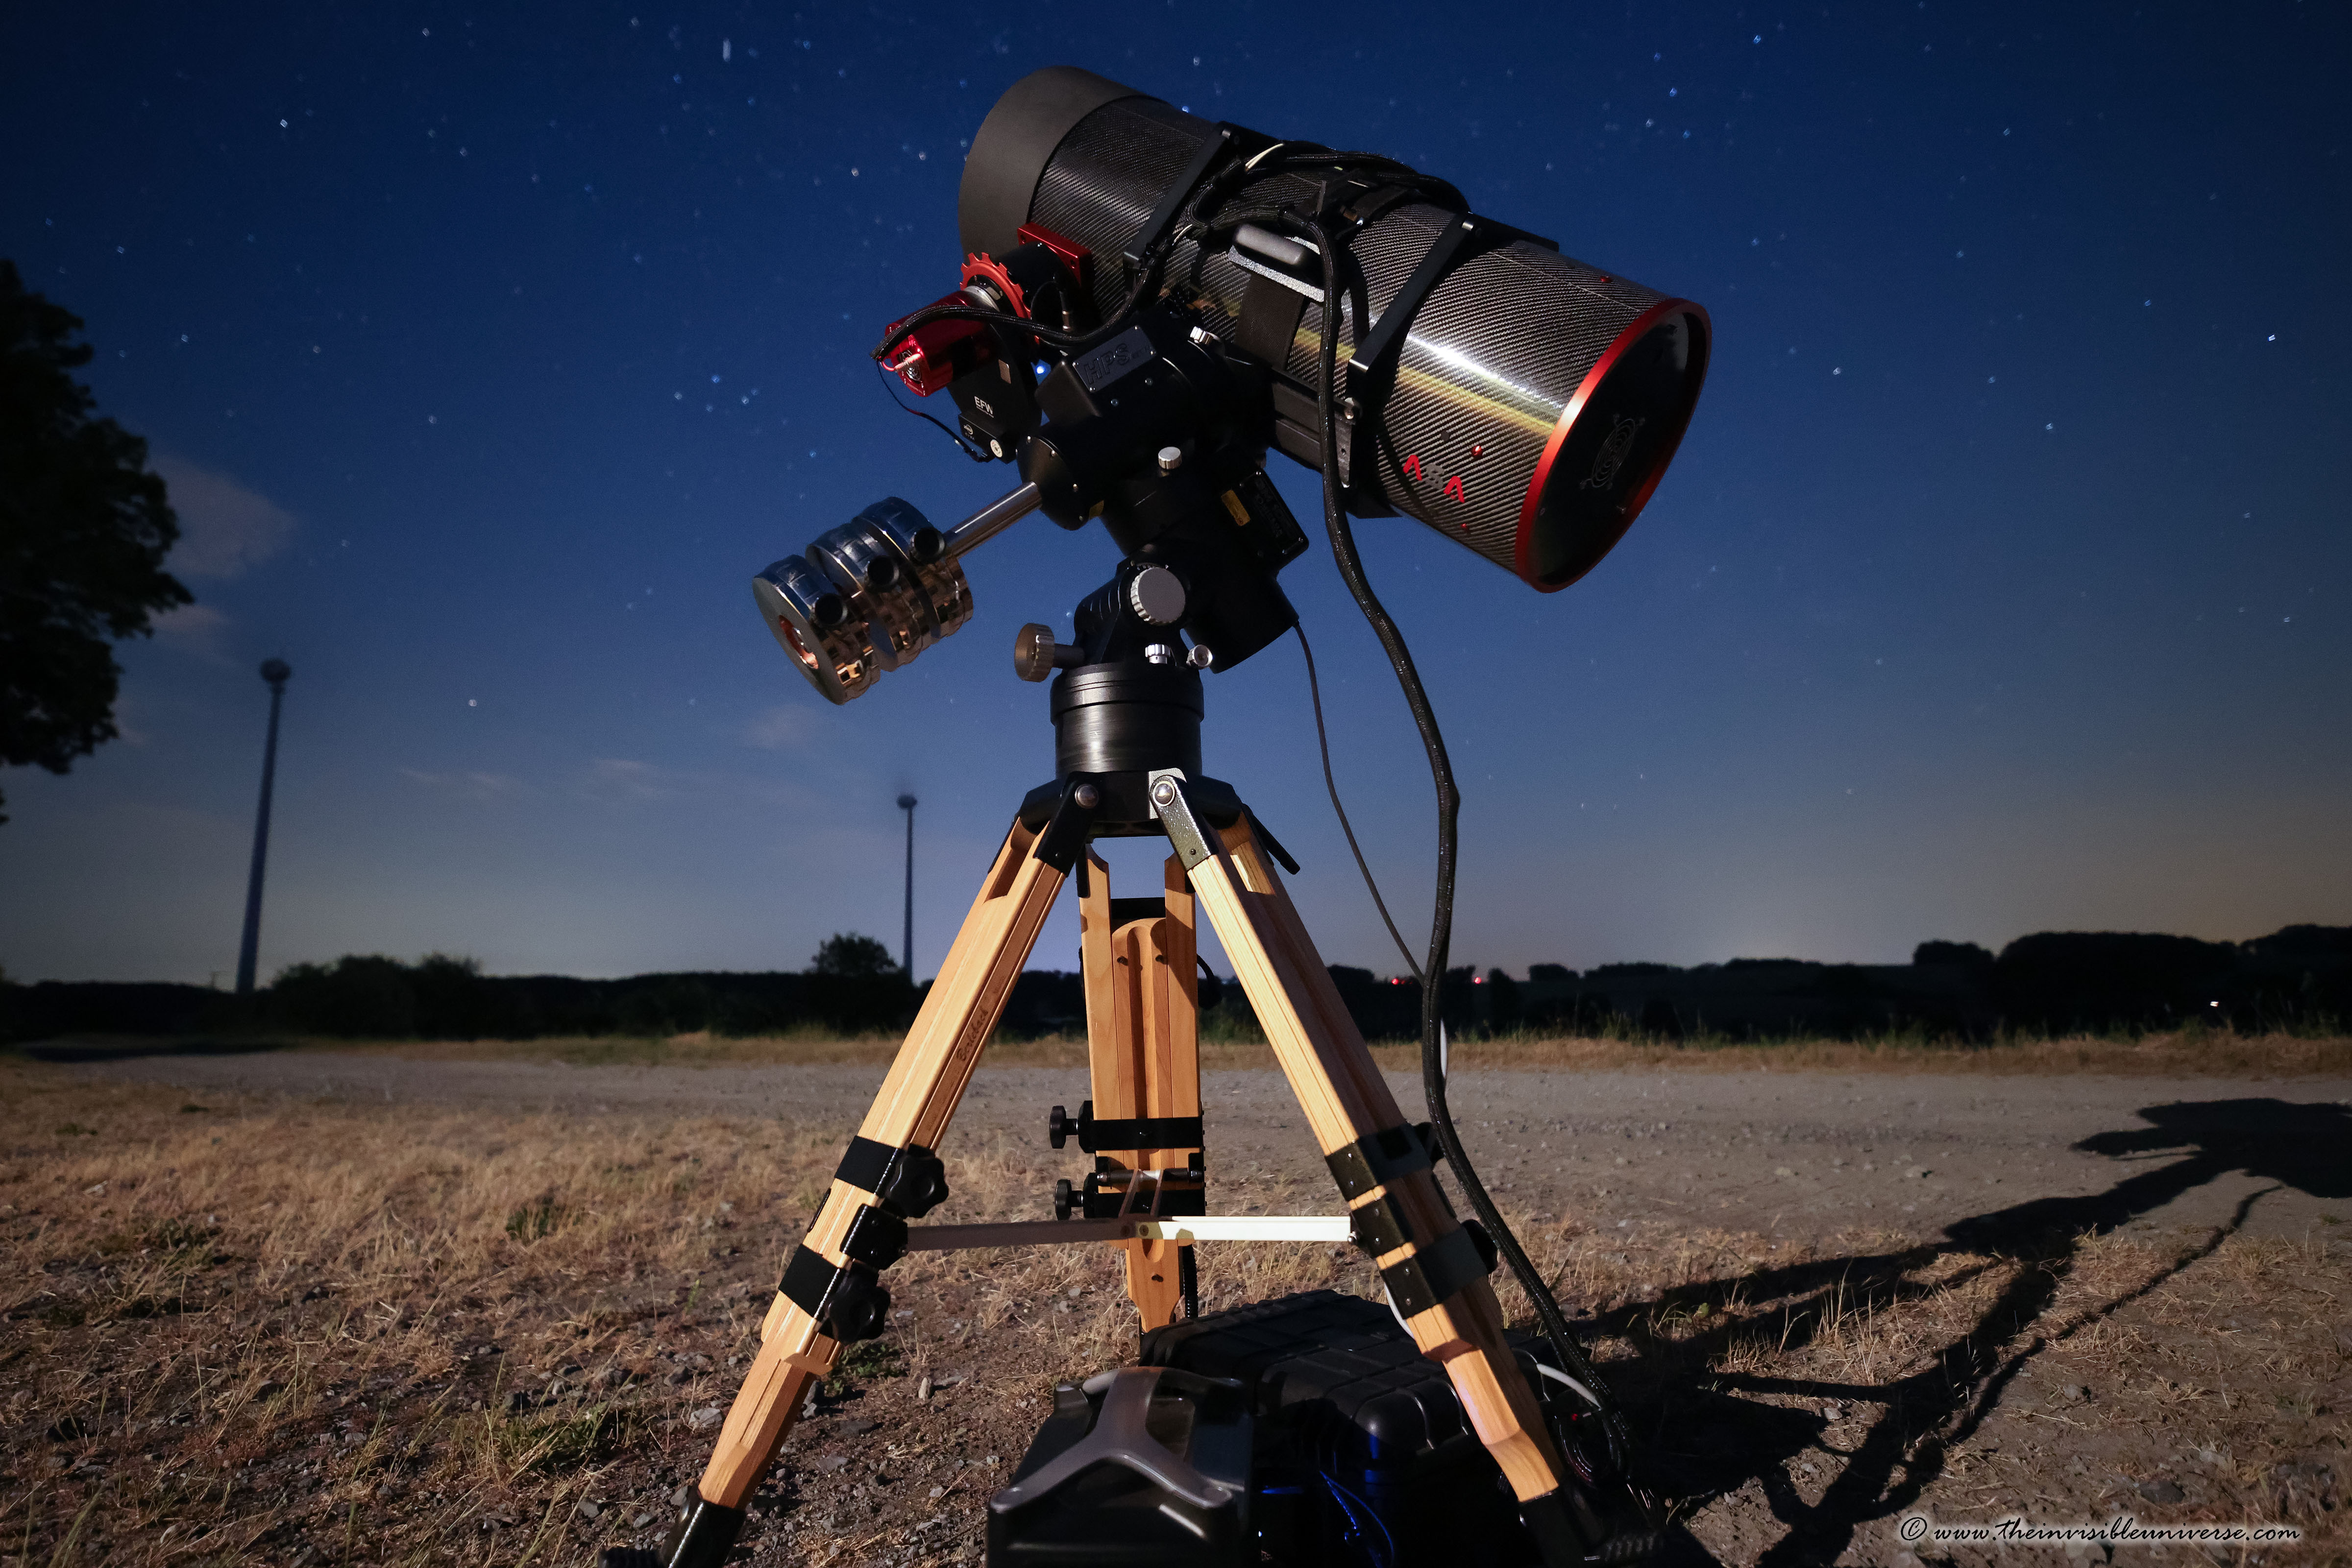
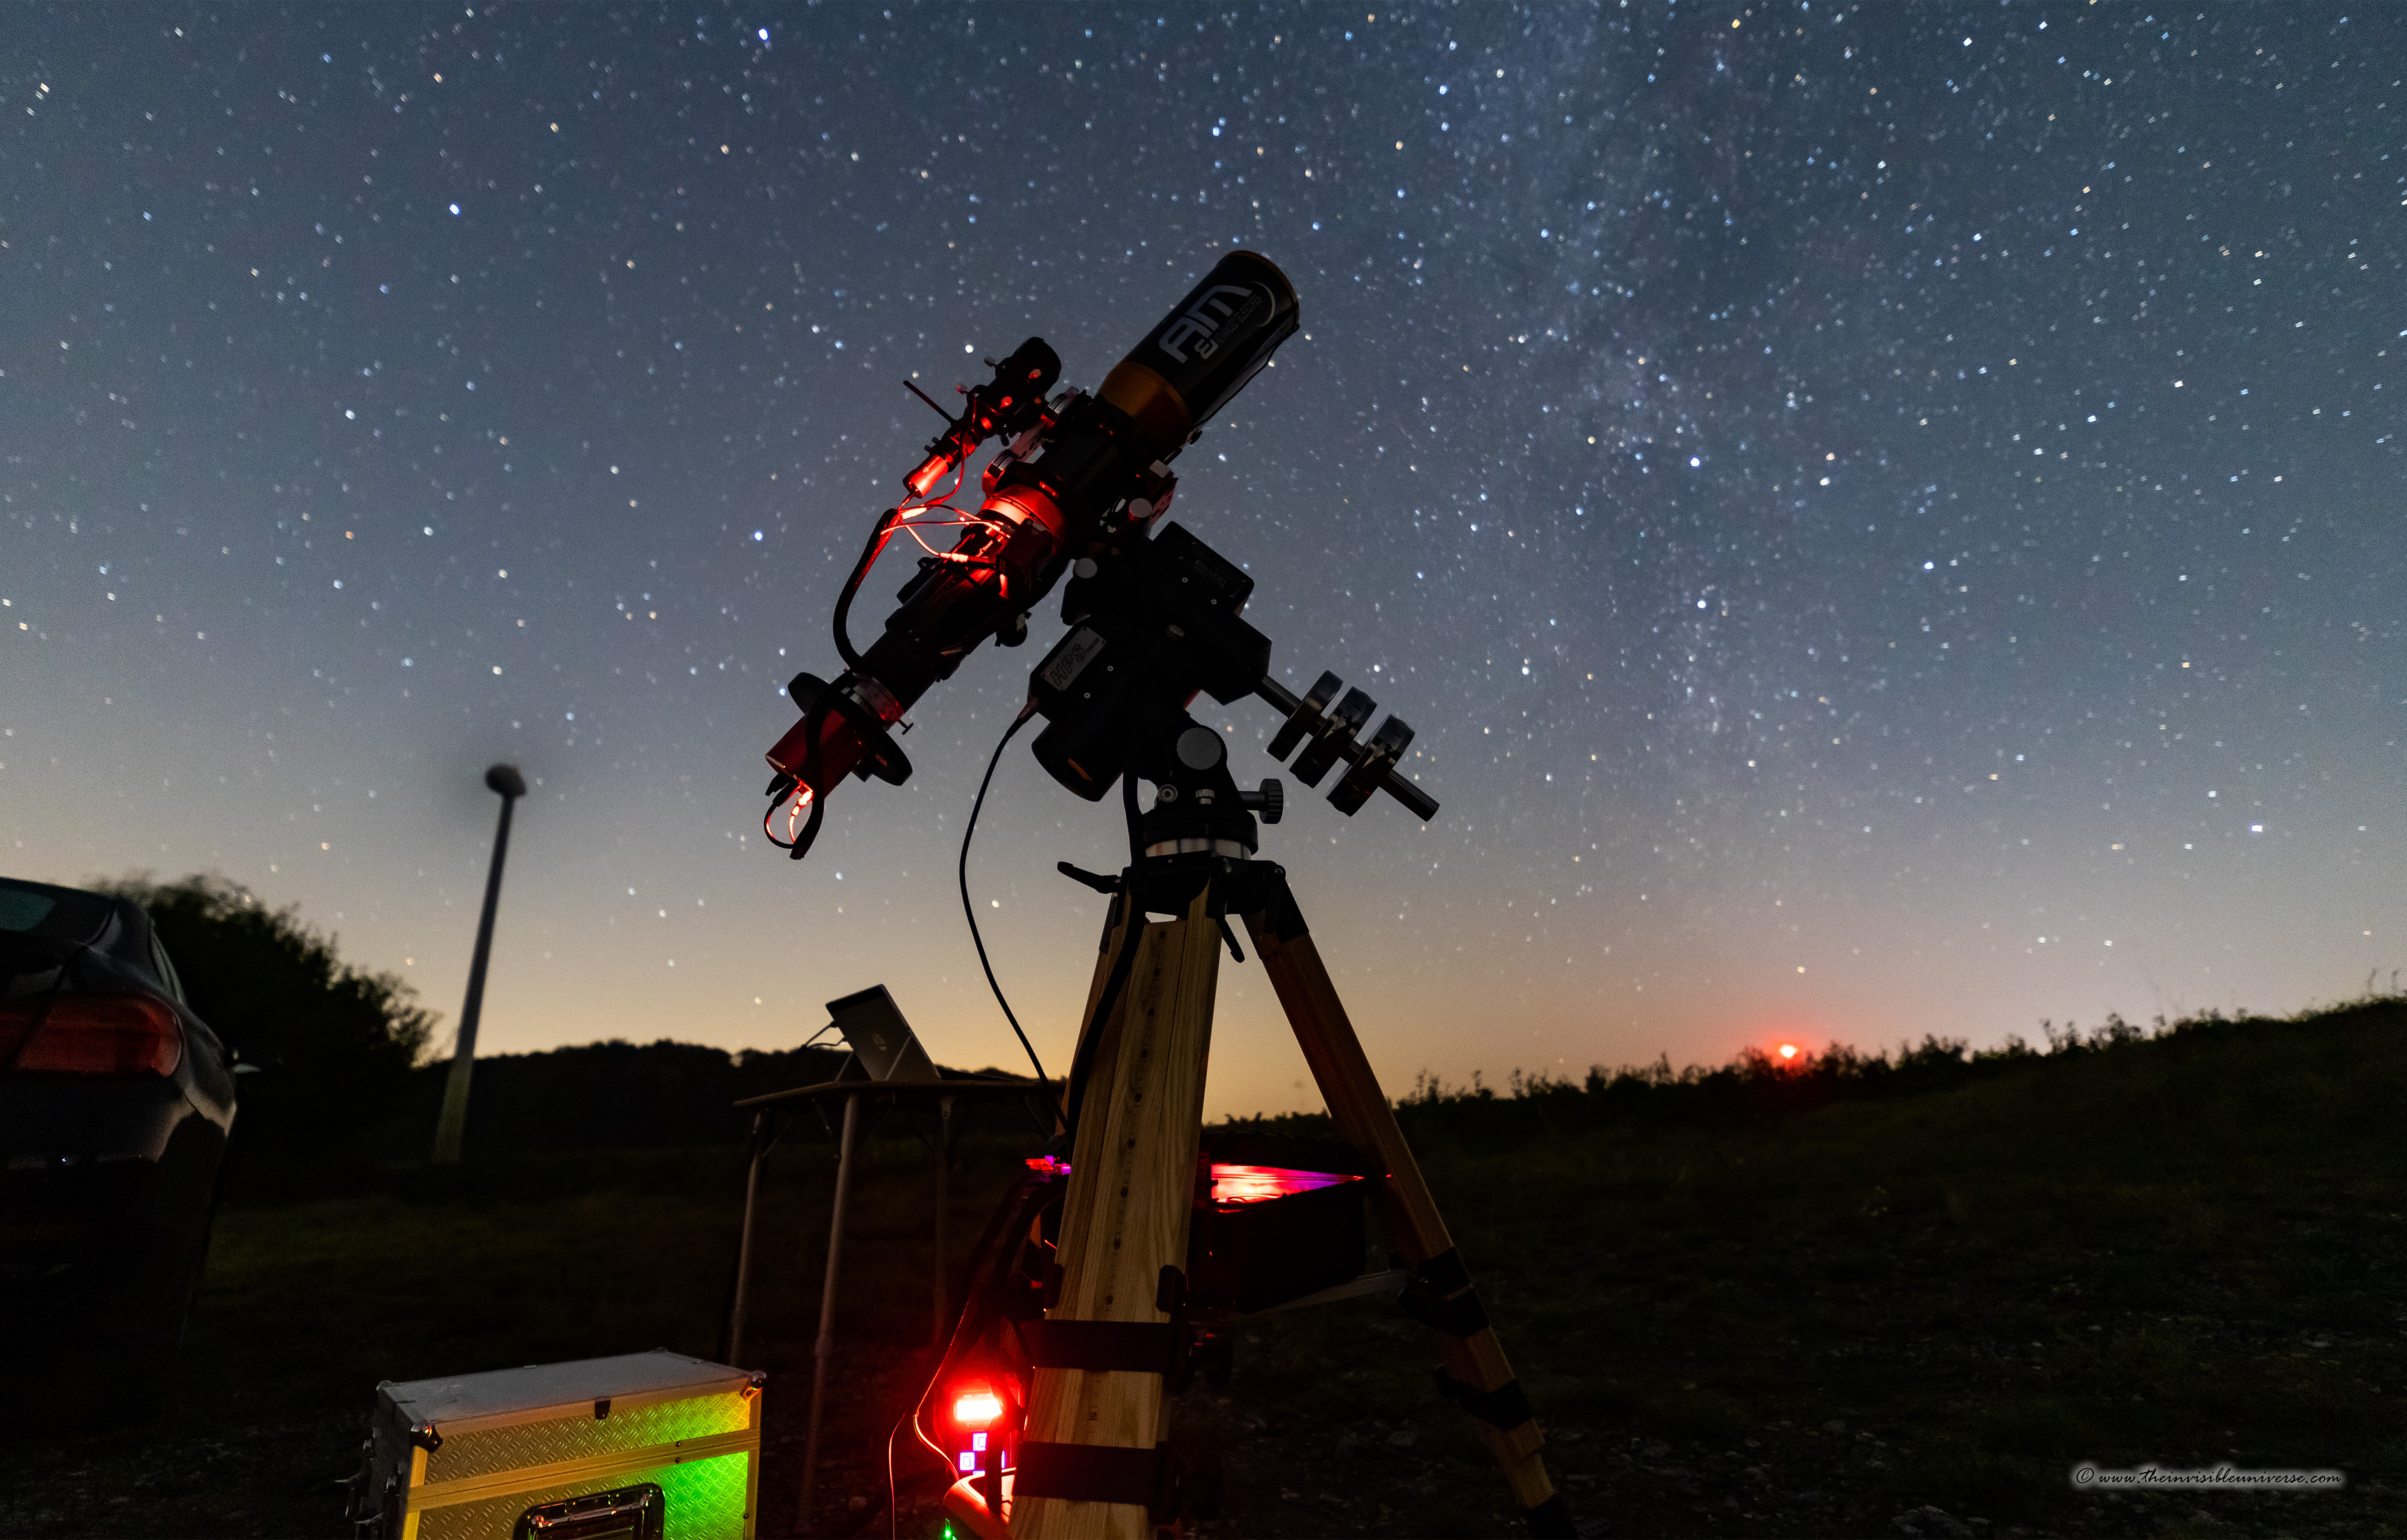
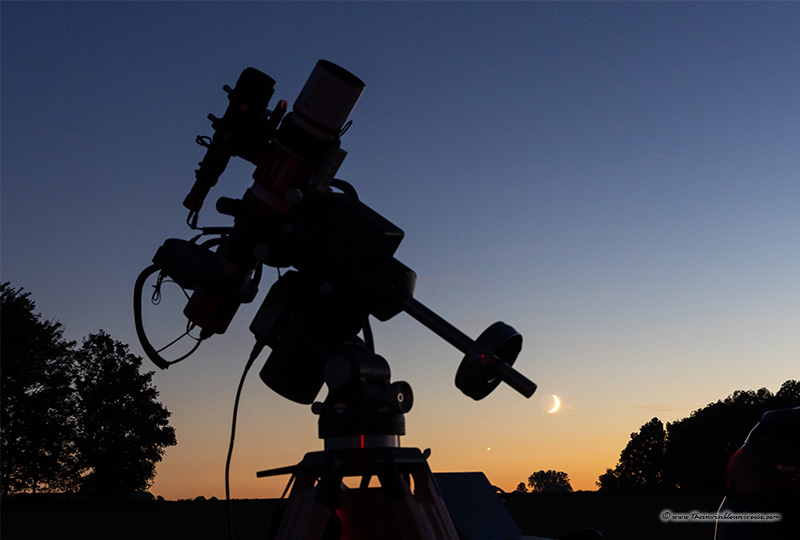
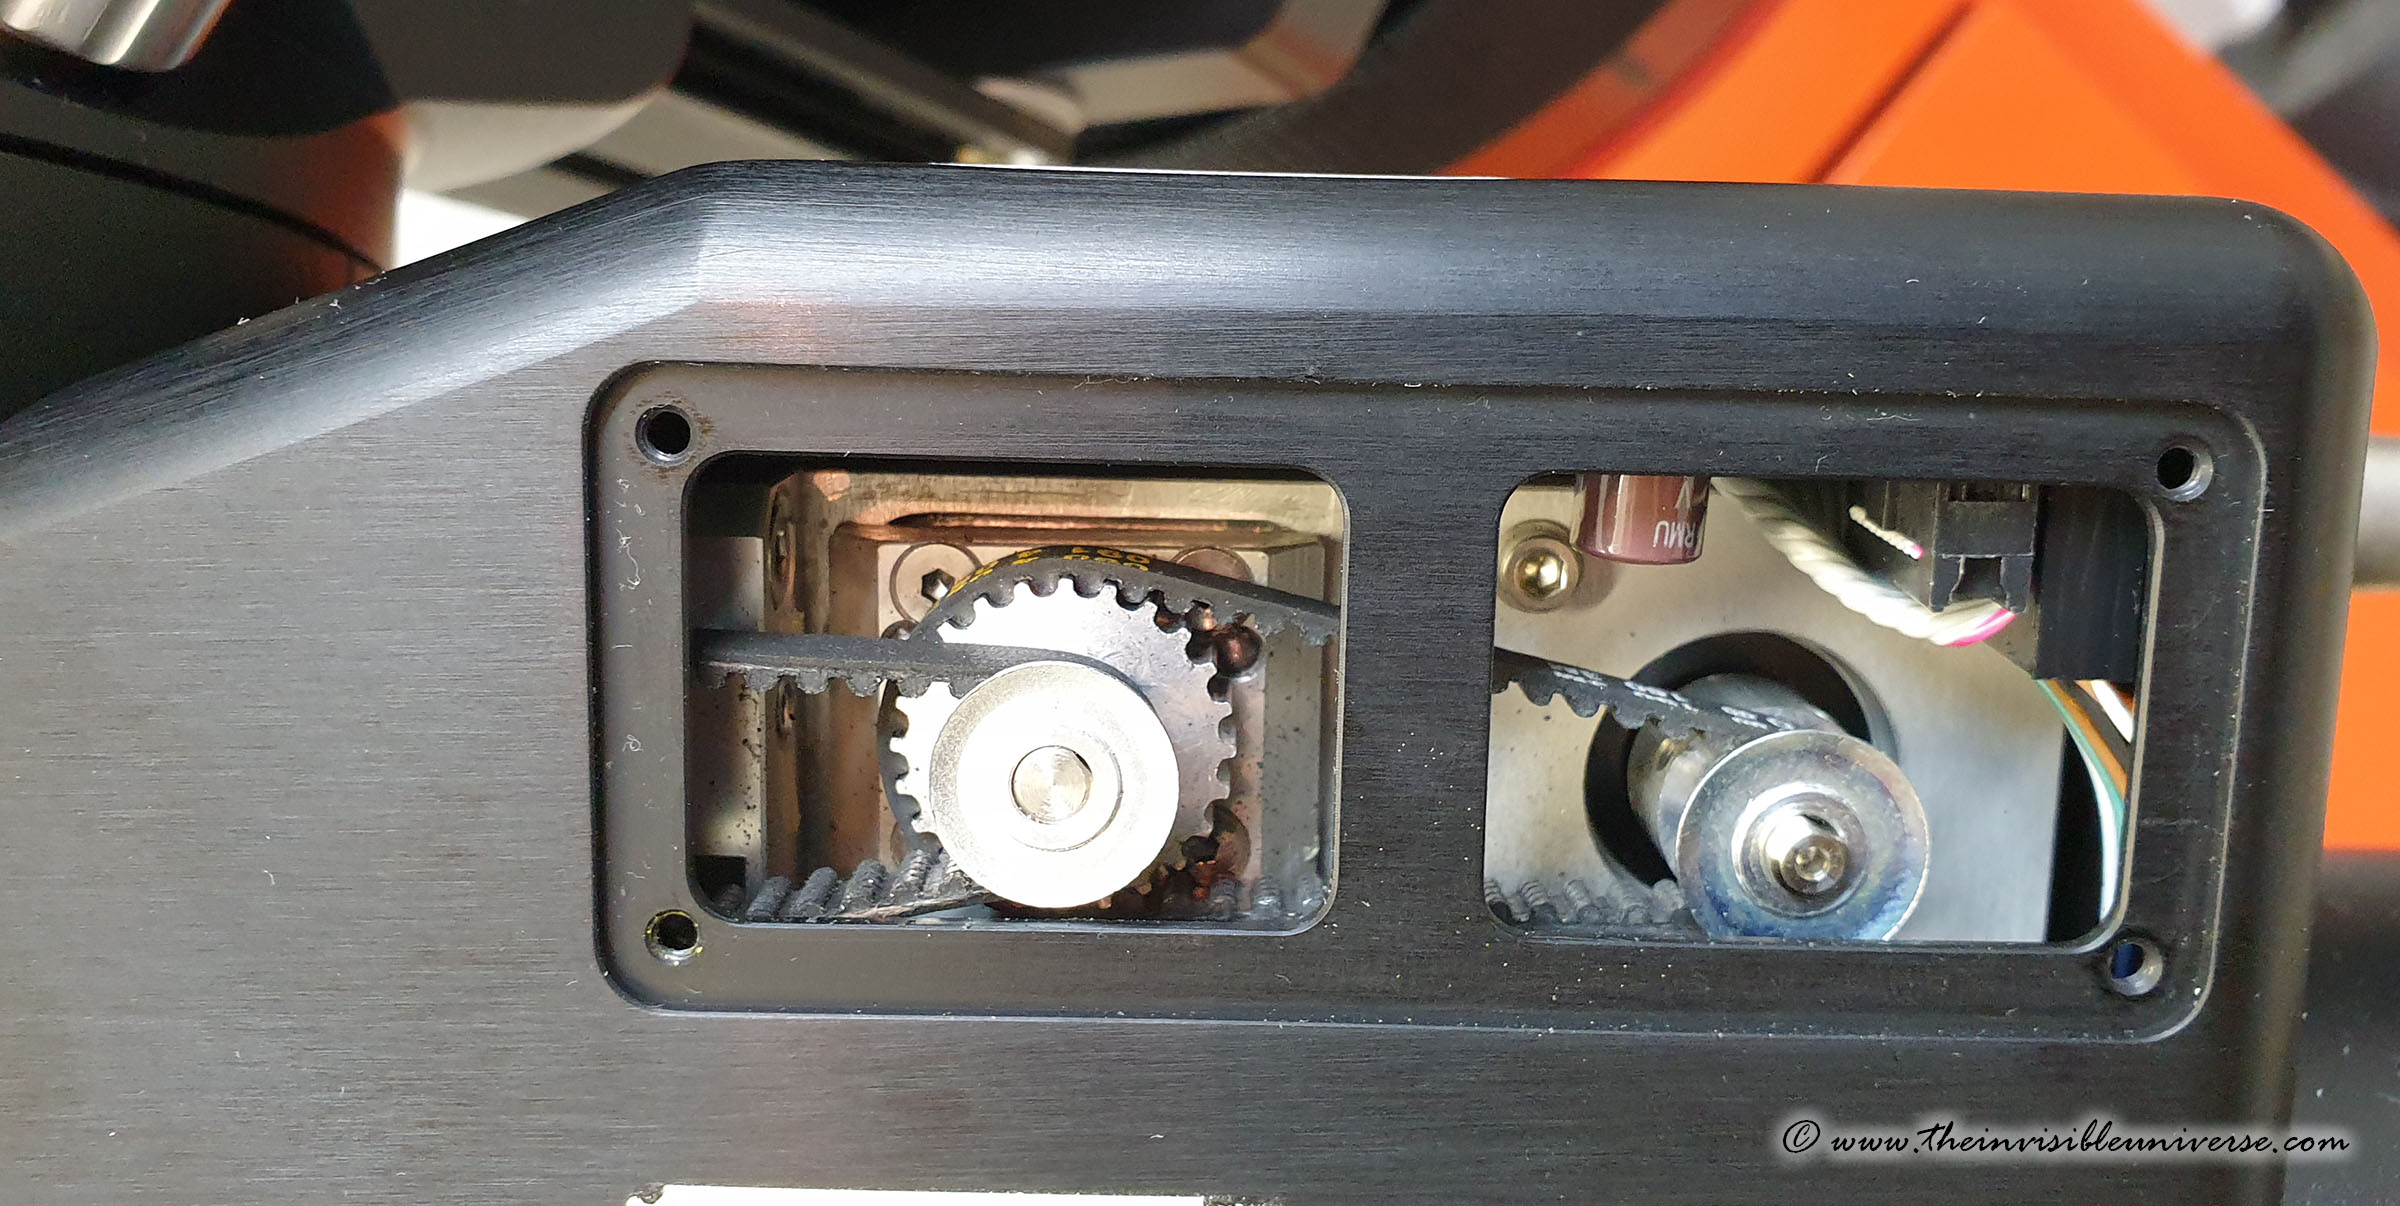
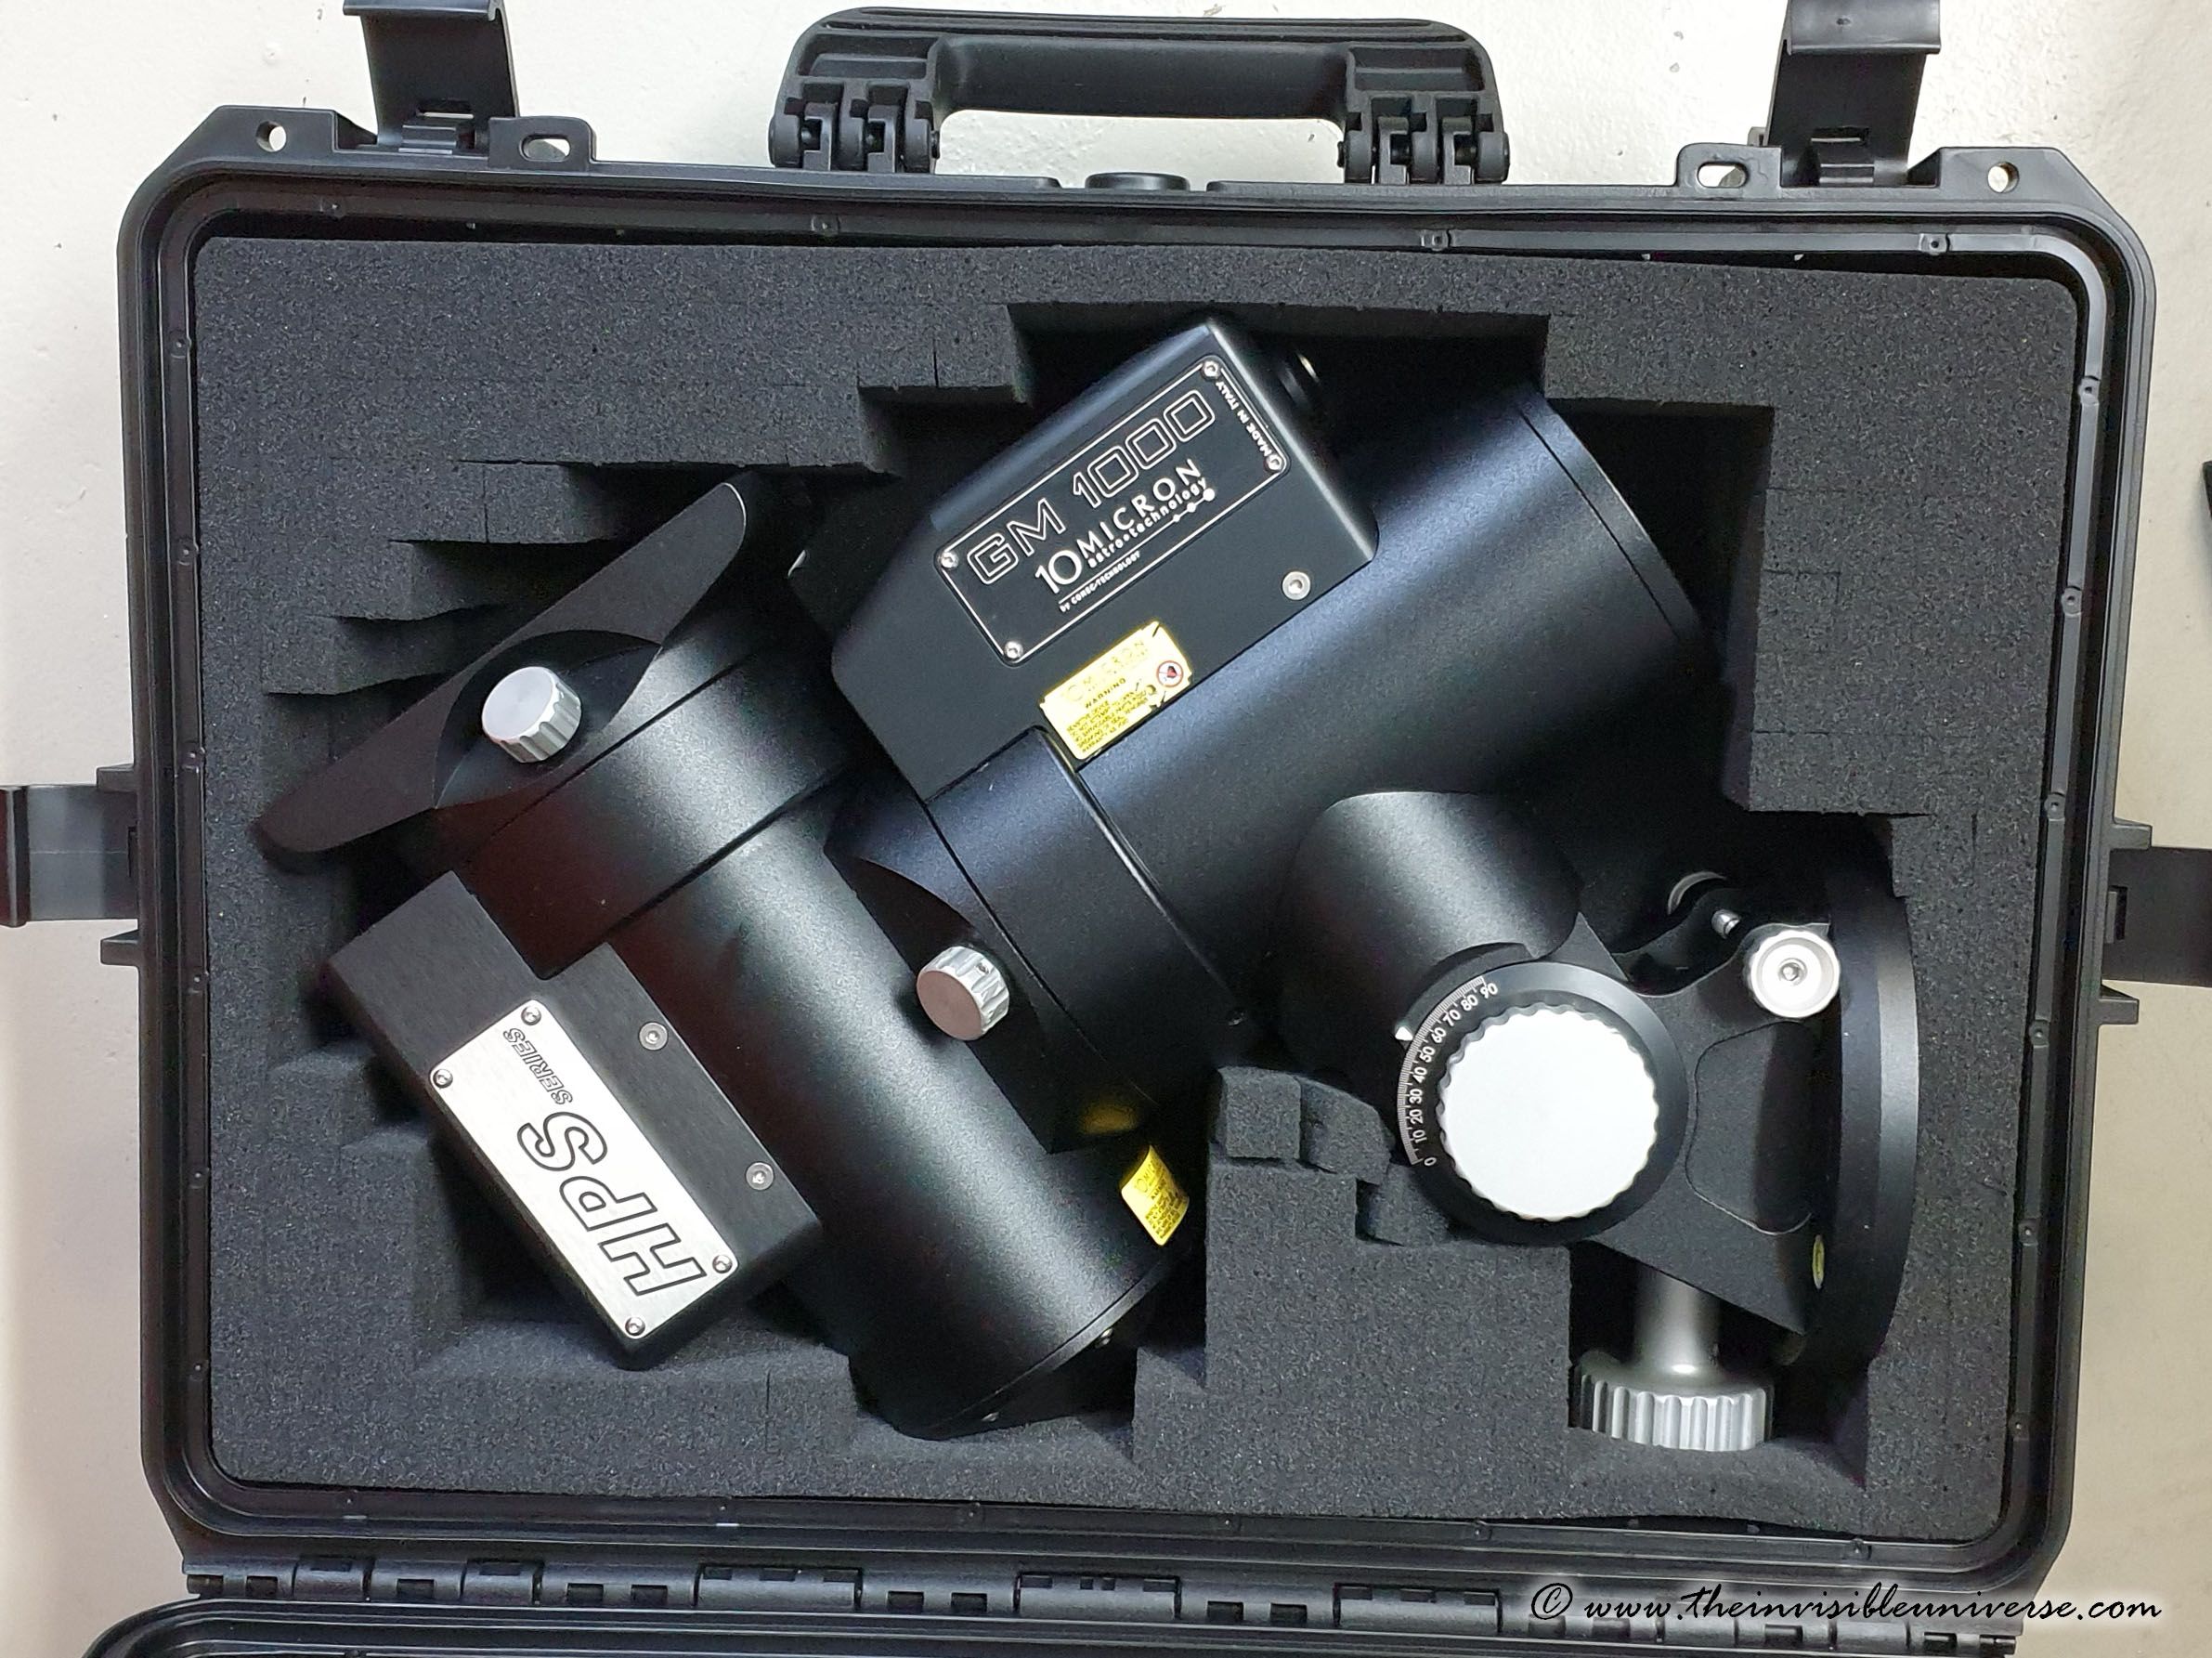
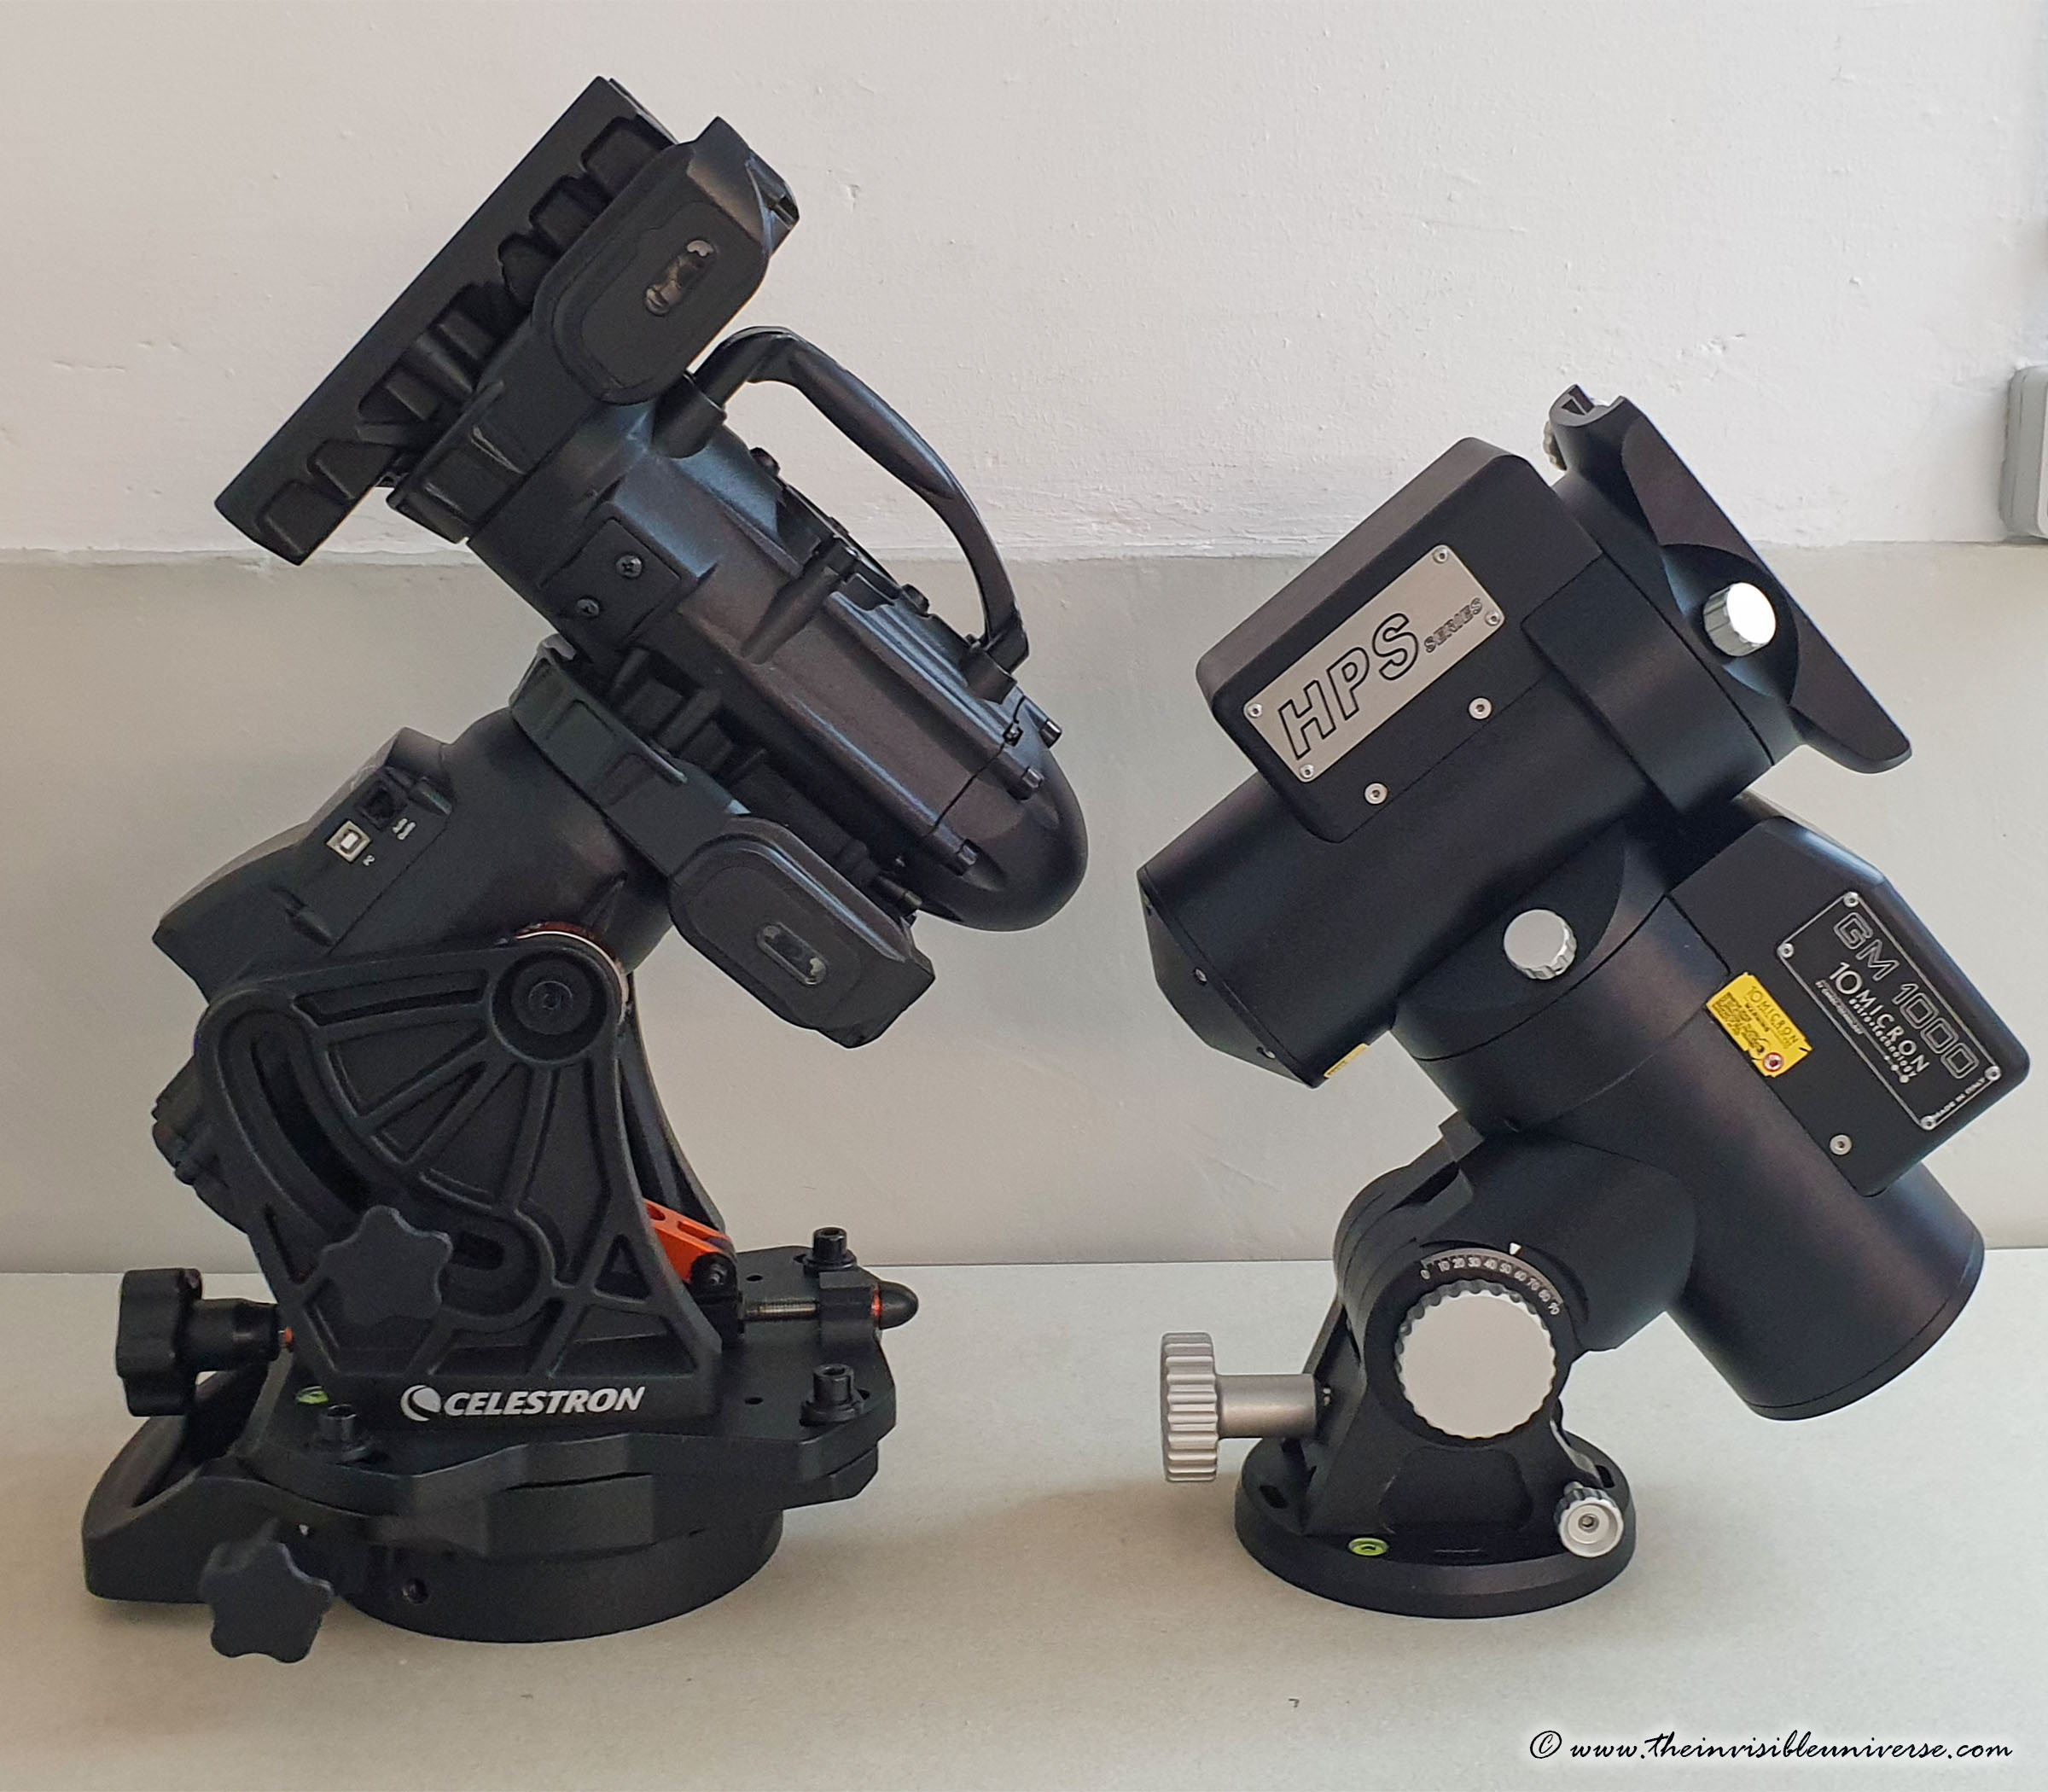
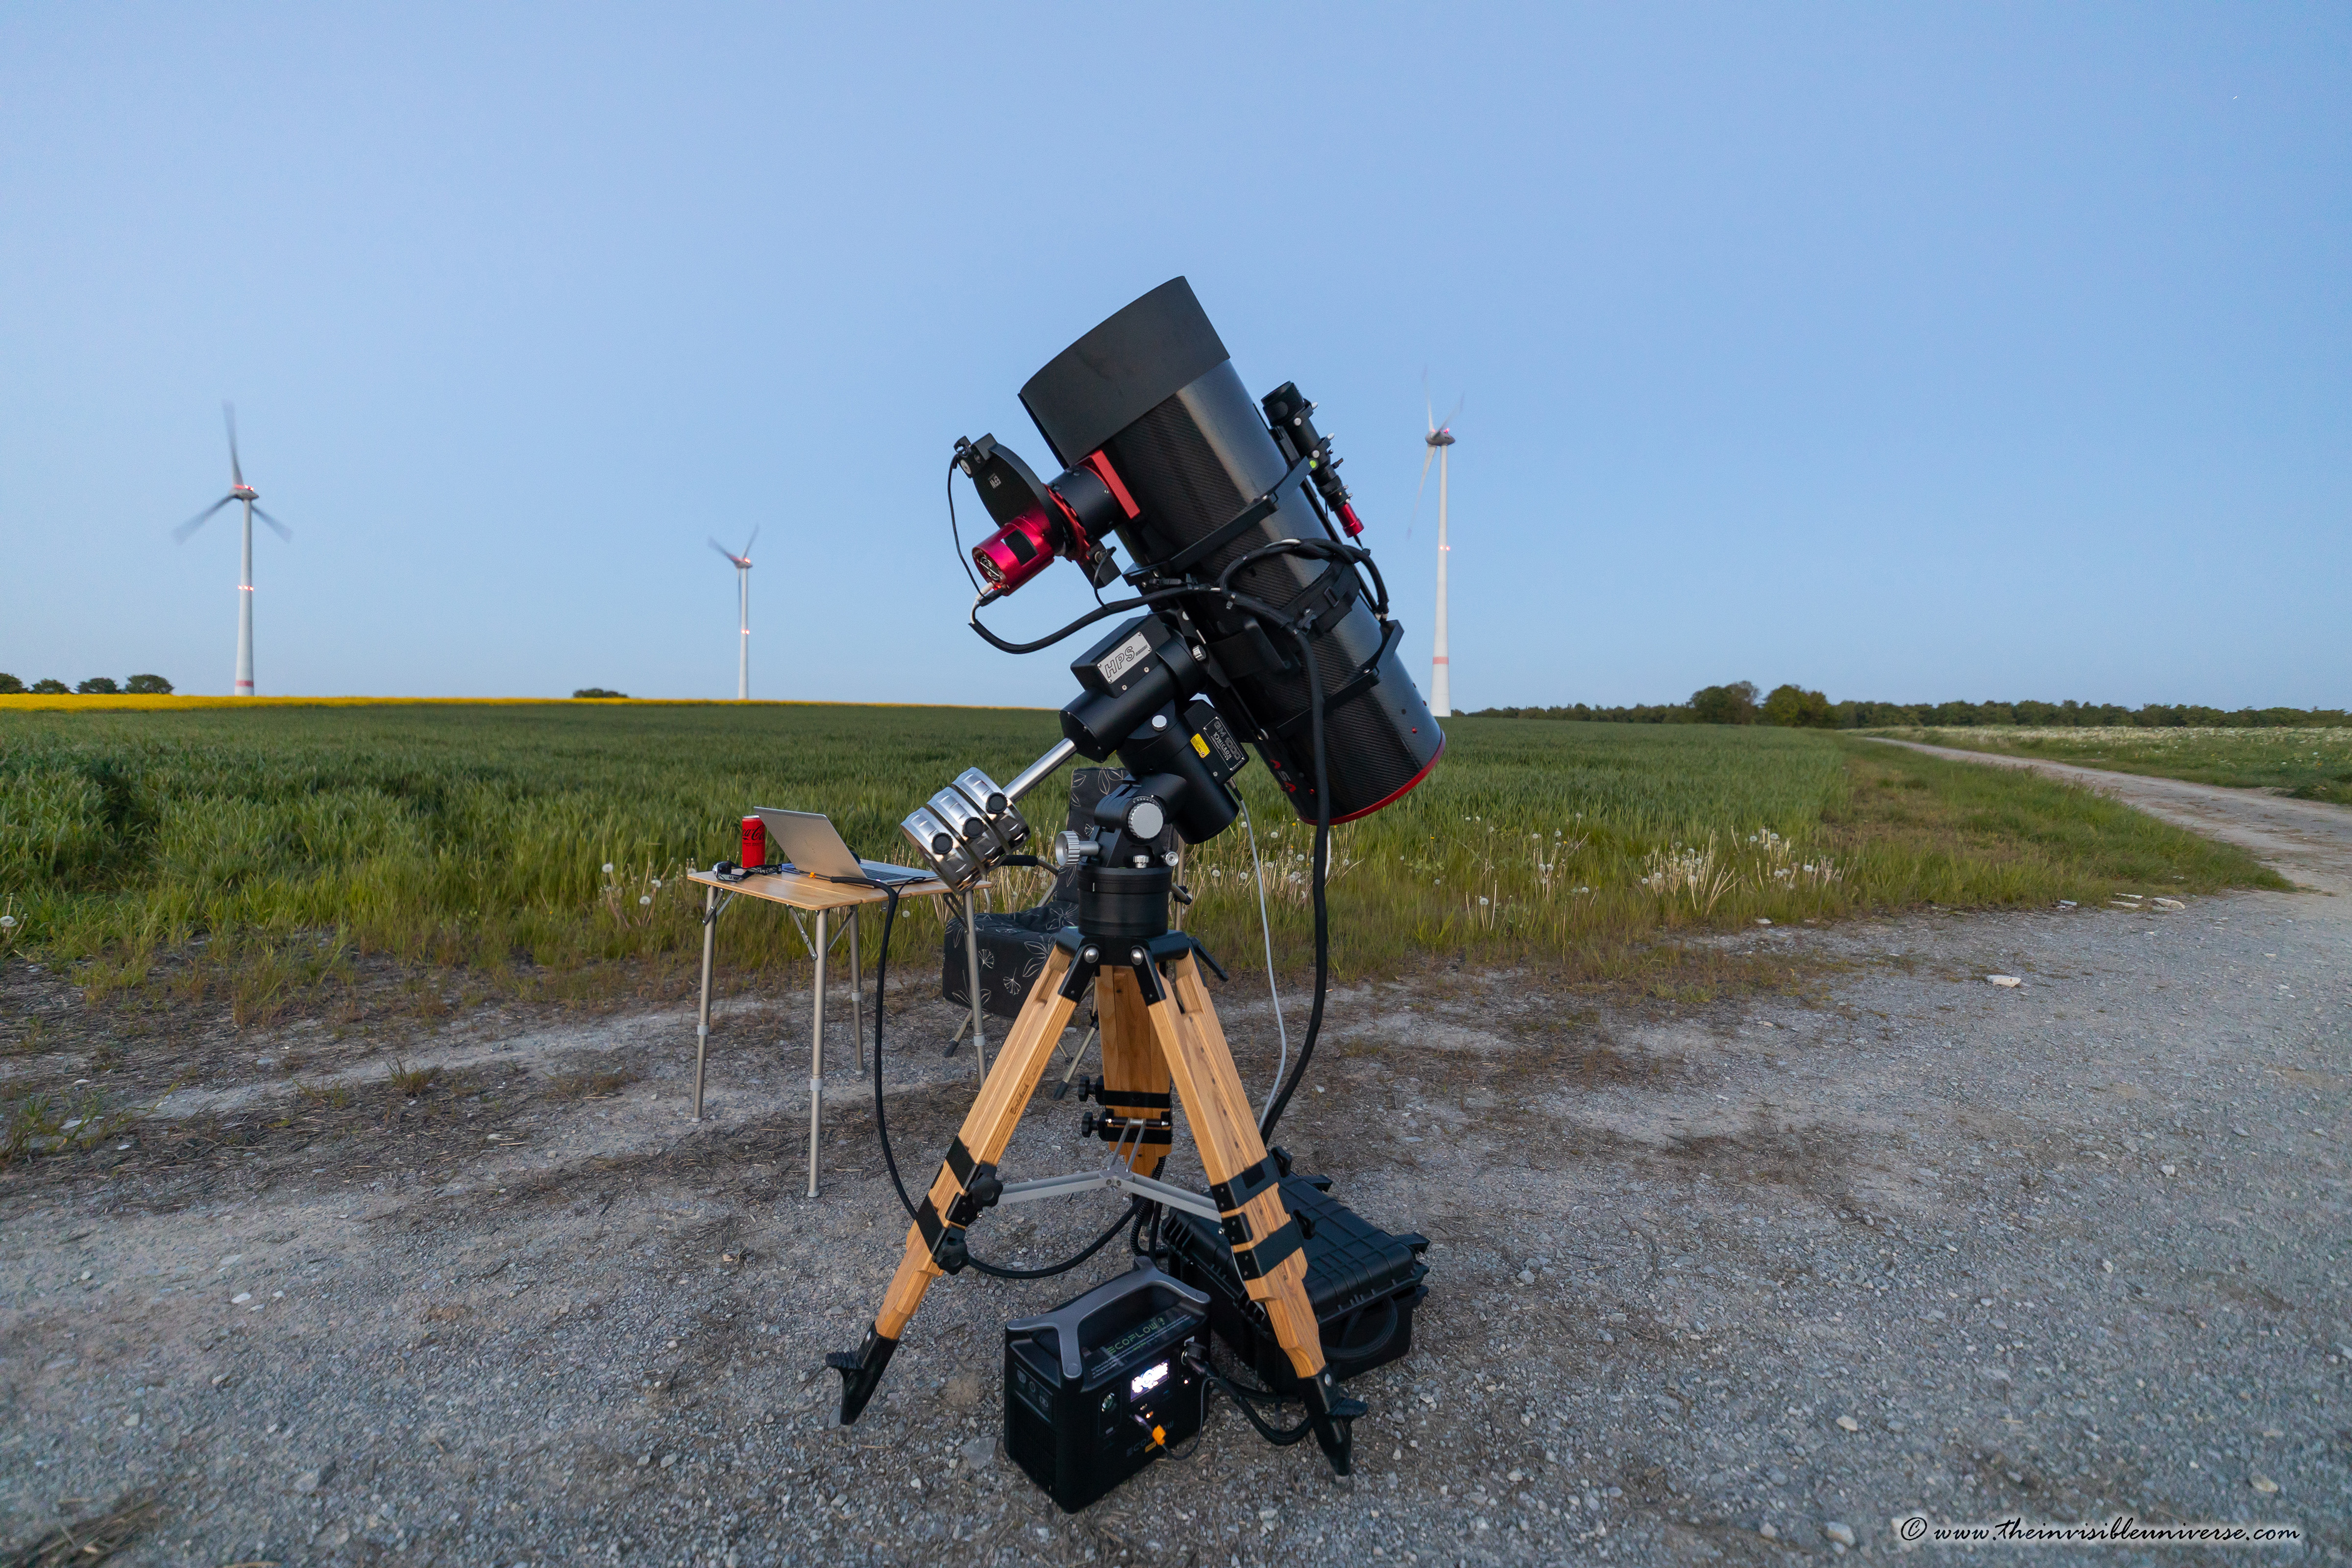
I bought the second mount for mobile use after I got into trouble with a Skywatcher EQ6 and a Celestron CGX. In the end, I ended up with a 10micron, a GM1000HPS, probably the best mobile astrophoto mount on the market. Thanks to the high precision encoders in both axes, as well as the powerful and fast motors, this mount is unbeatable when it comes to guiding and goto precision.
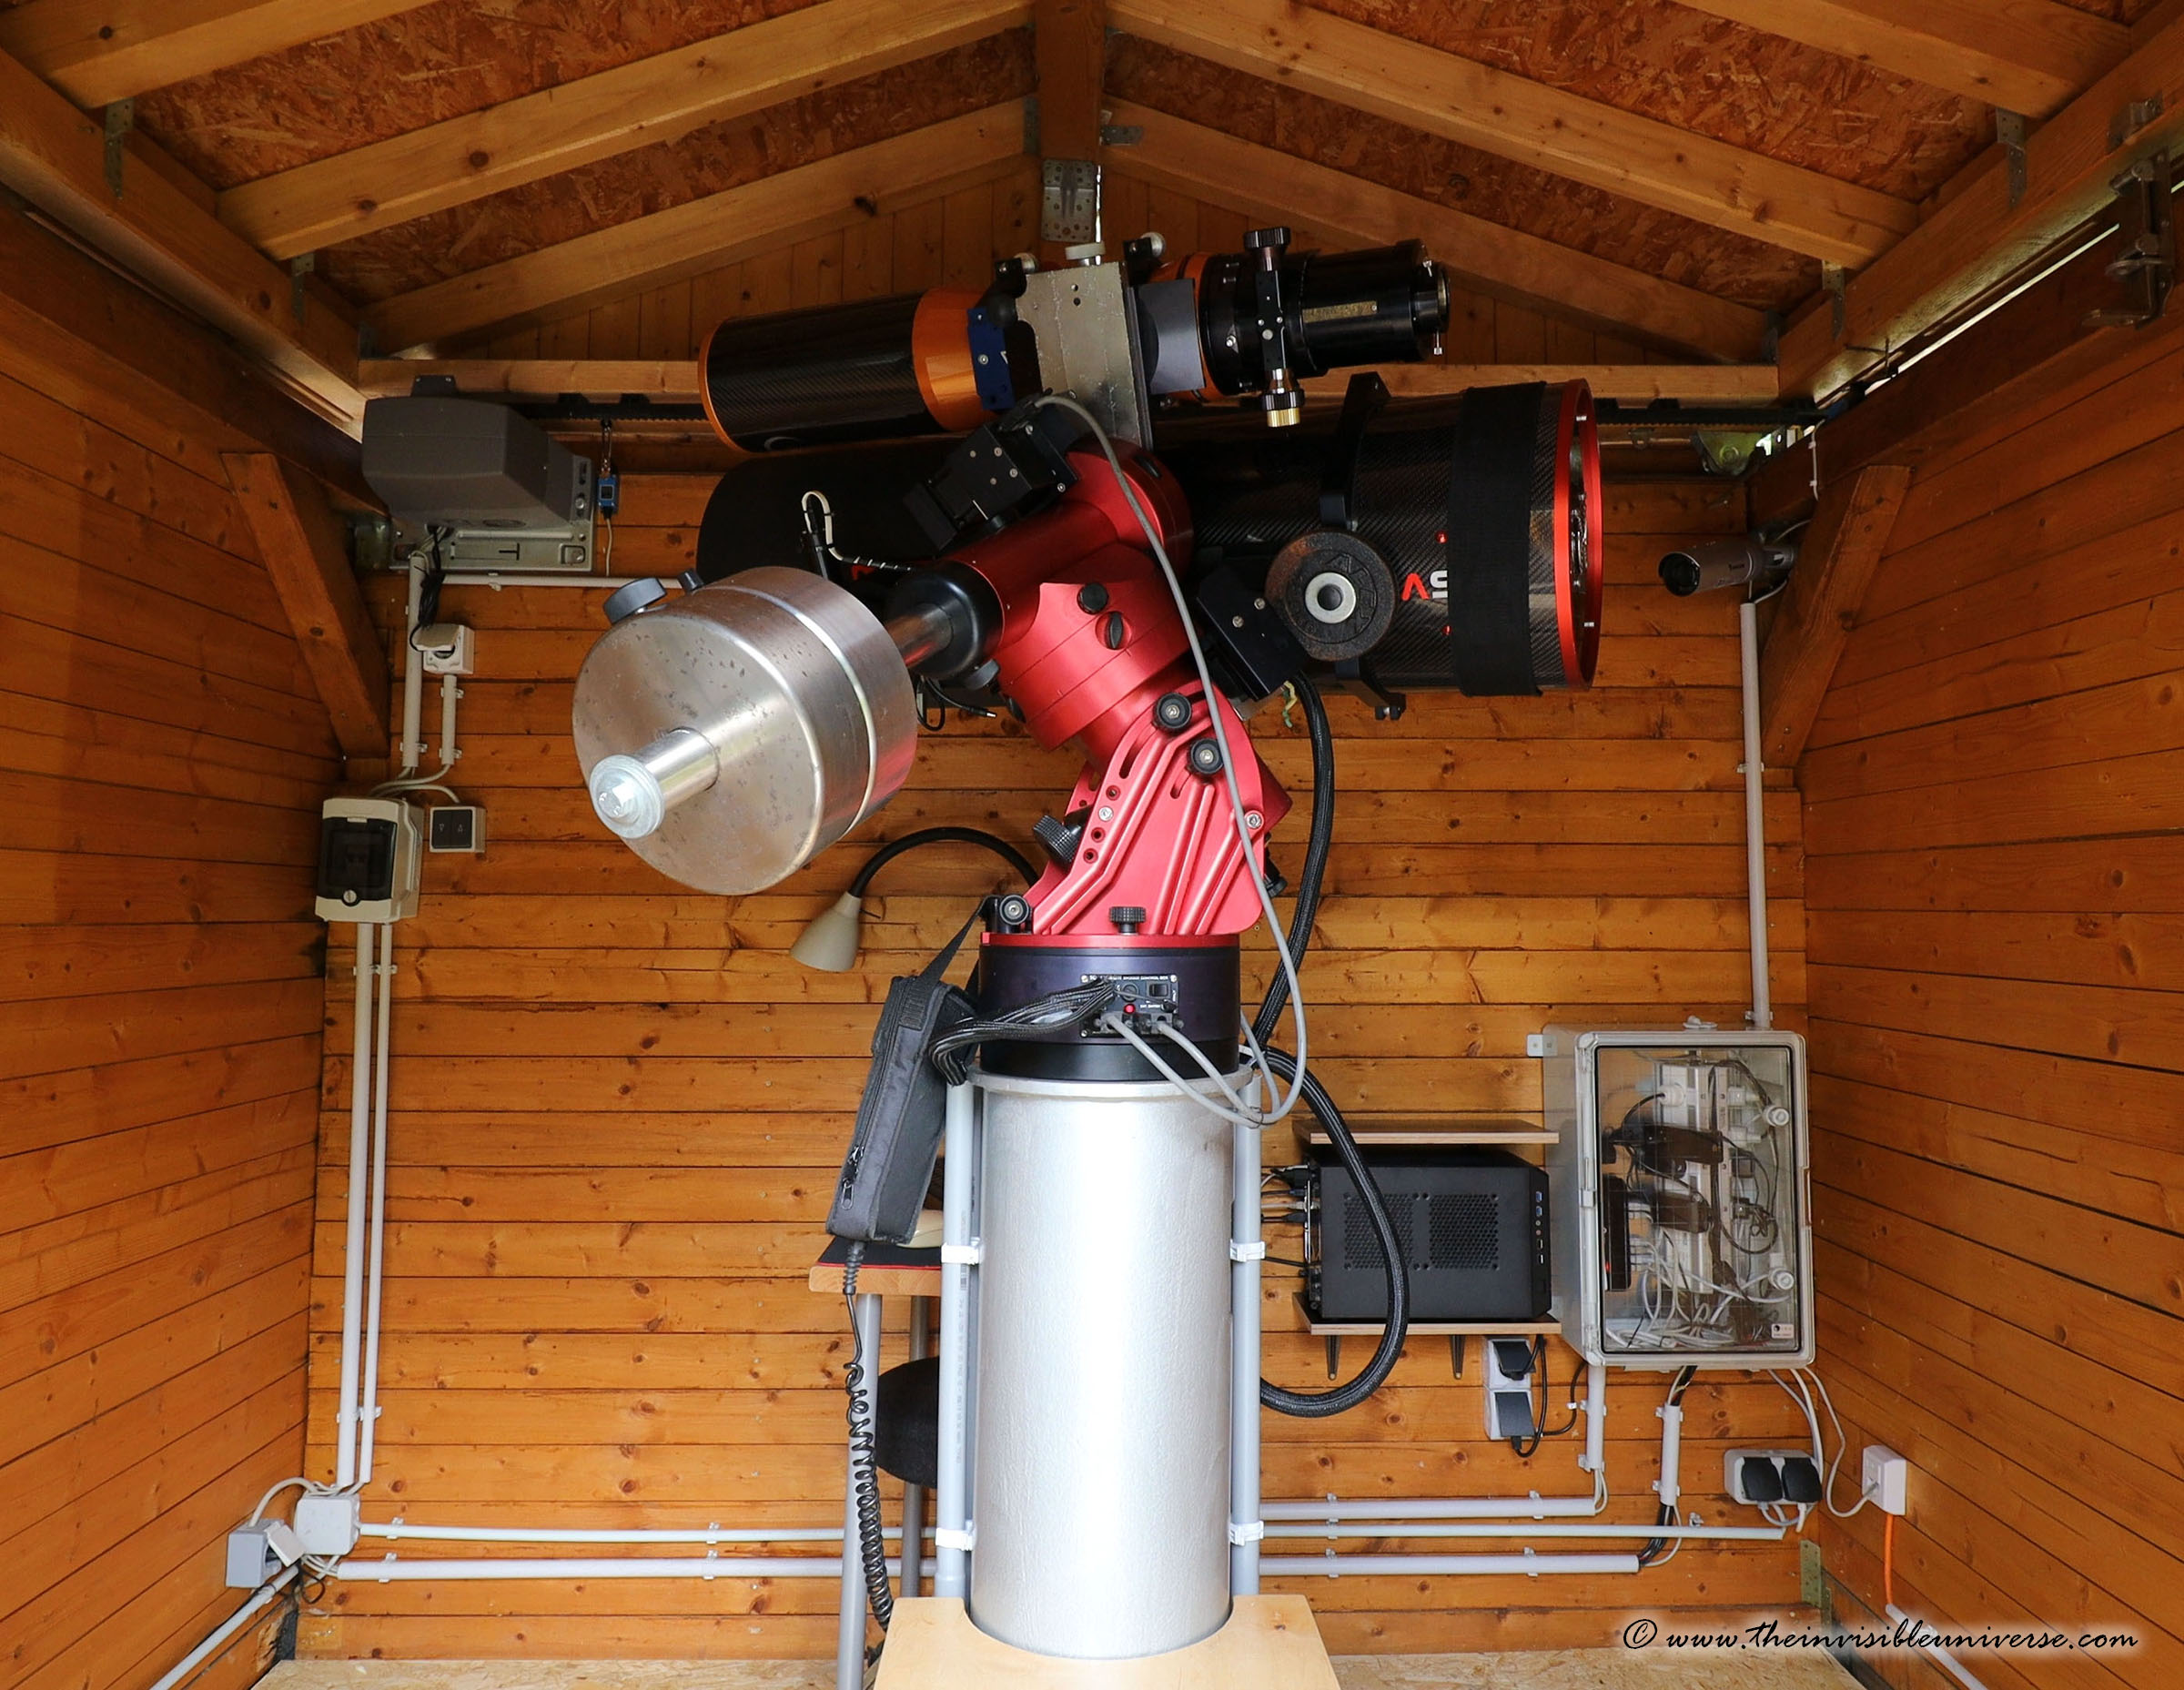
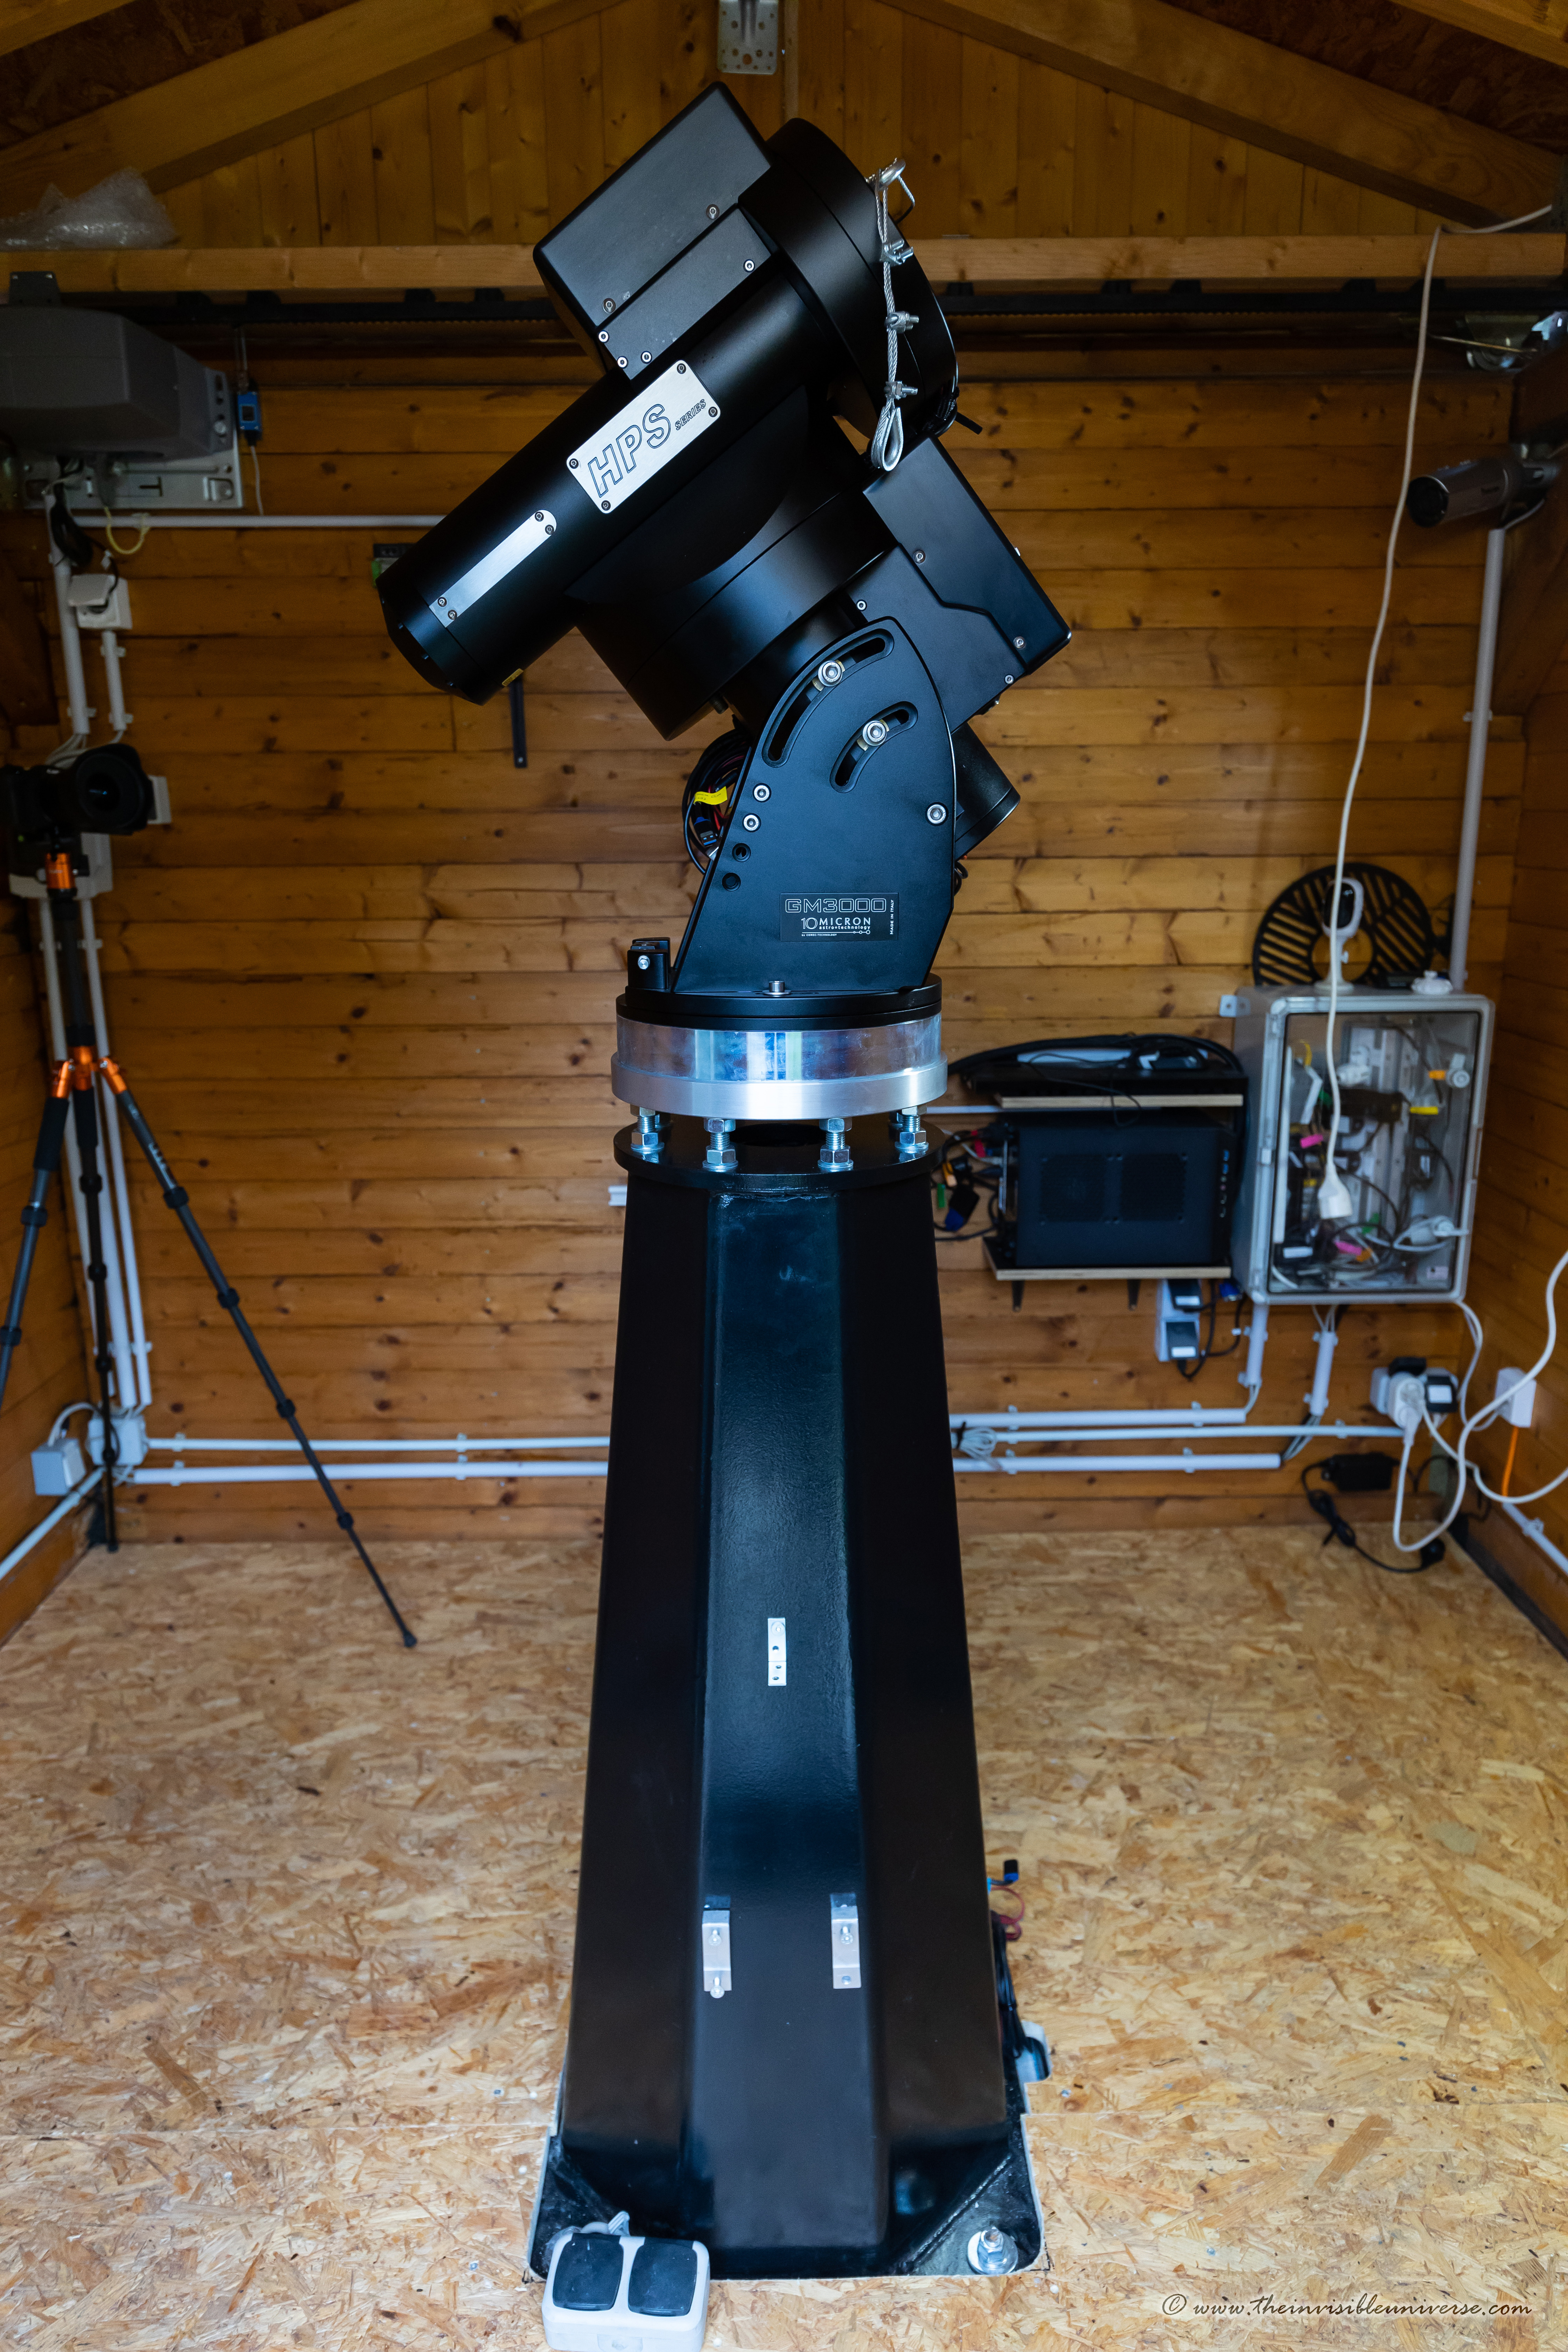
The new kid in town is the 10micron GM3000 HPS for my backyard observatory, which replaced the GM2000QCI. Please visit my dedicated website for this monster black mount: GM3000 HPS Mount page
As far as optics are concerned, I started out in digital astrophotography with Schmidt-Cassegrains. That was a mistake, because the long focal length, the mirror flop and other shortcomings of these devices make astrophotography a real feat.
However, for many years now I have owned a TMB Super Triplet APO 115/805 in a tube from A&M (now Officiane Stellare) and a 3.5" Starlight Feathertouch focuser. For focal length reduction and field flattening I have the large M82 Riccardi Reducer 0.75x, as well as a Borg Super Reducer 0,65x.
For higher focal lengths, I own what is probably the best 10" astrograph, which unfortunately is no longer made: the Astrosysteme Austria ASA 10N f3.6 Newtonian Astrograph.
Additionally, I have a 3" ASA Wynne corrector or a 3" Riccardi 1.0x Newtonian corrector, which together with the instrument illuminates the entire full-frame field.
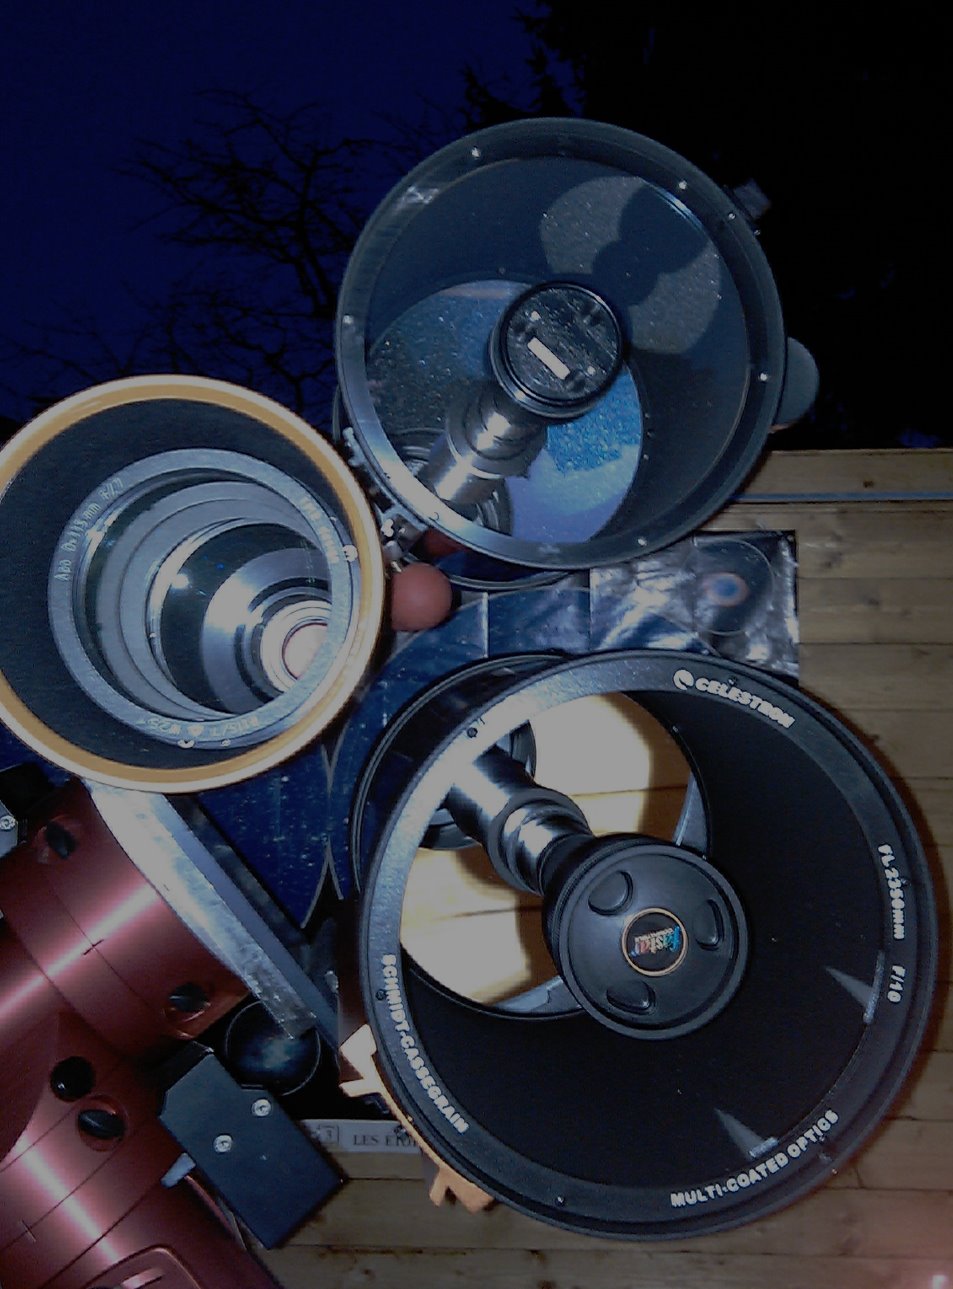
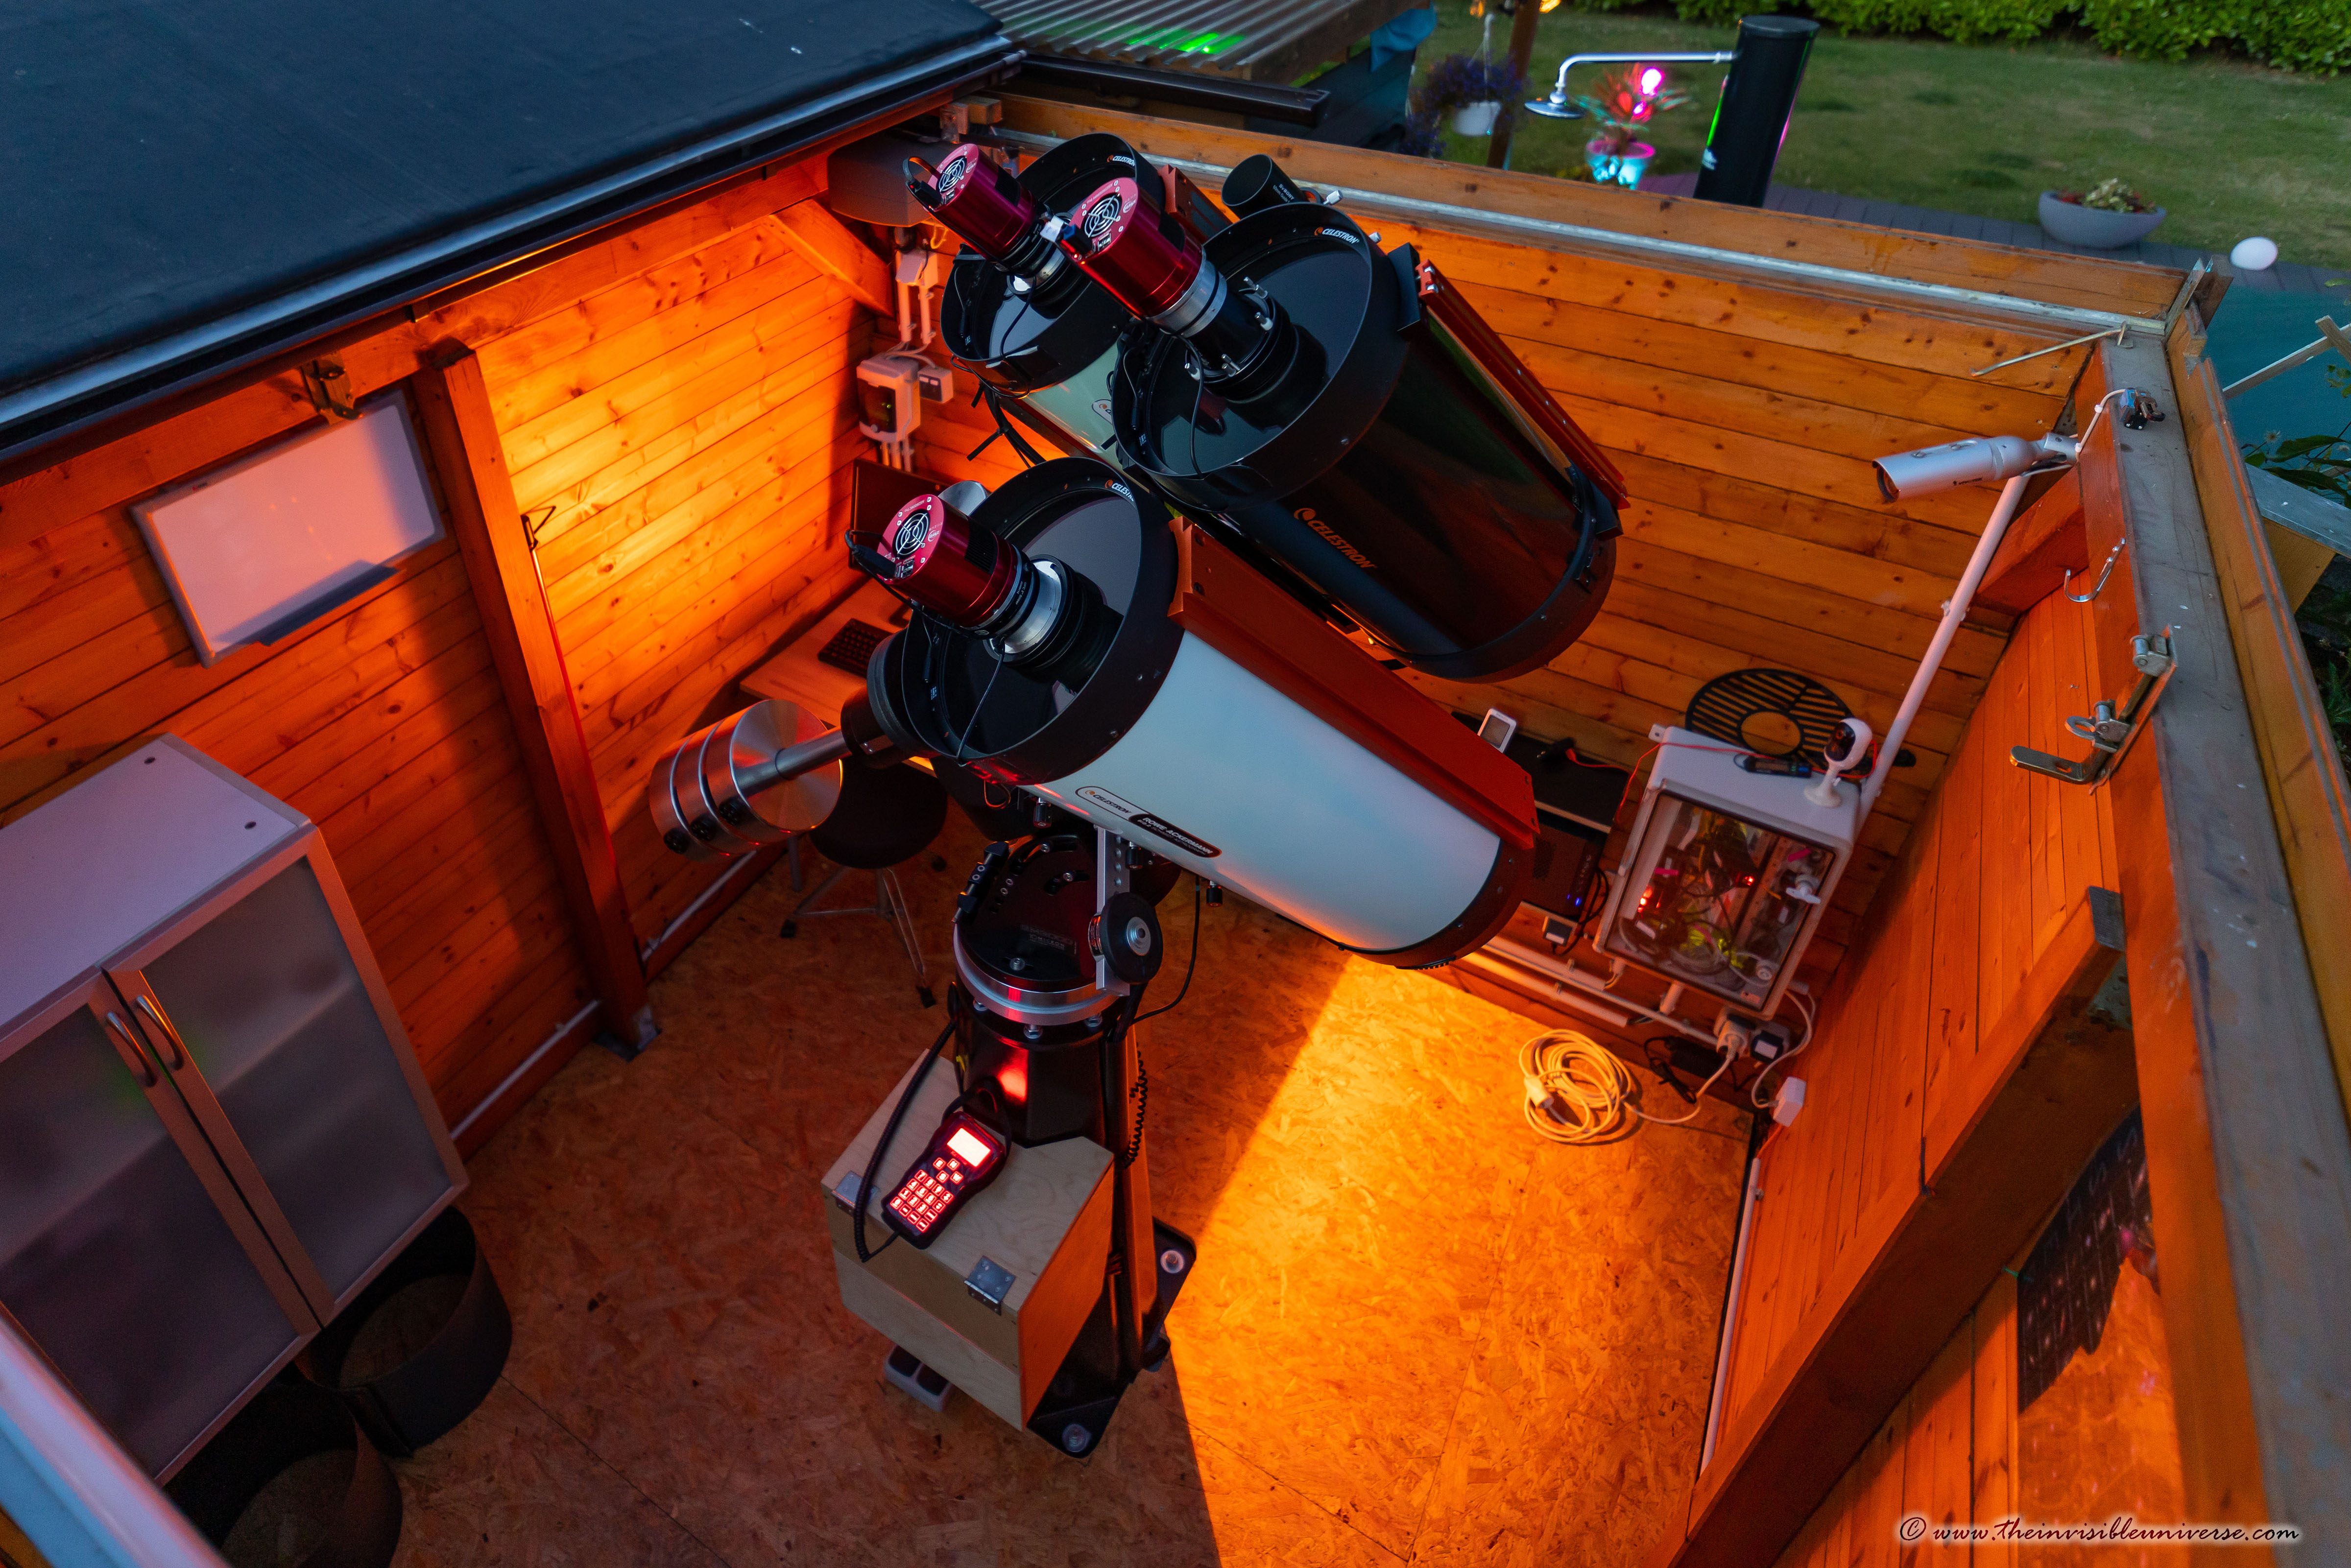
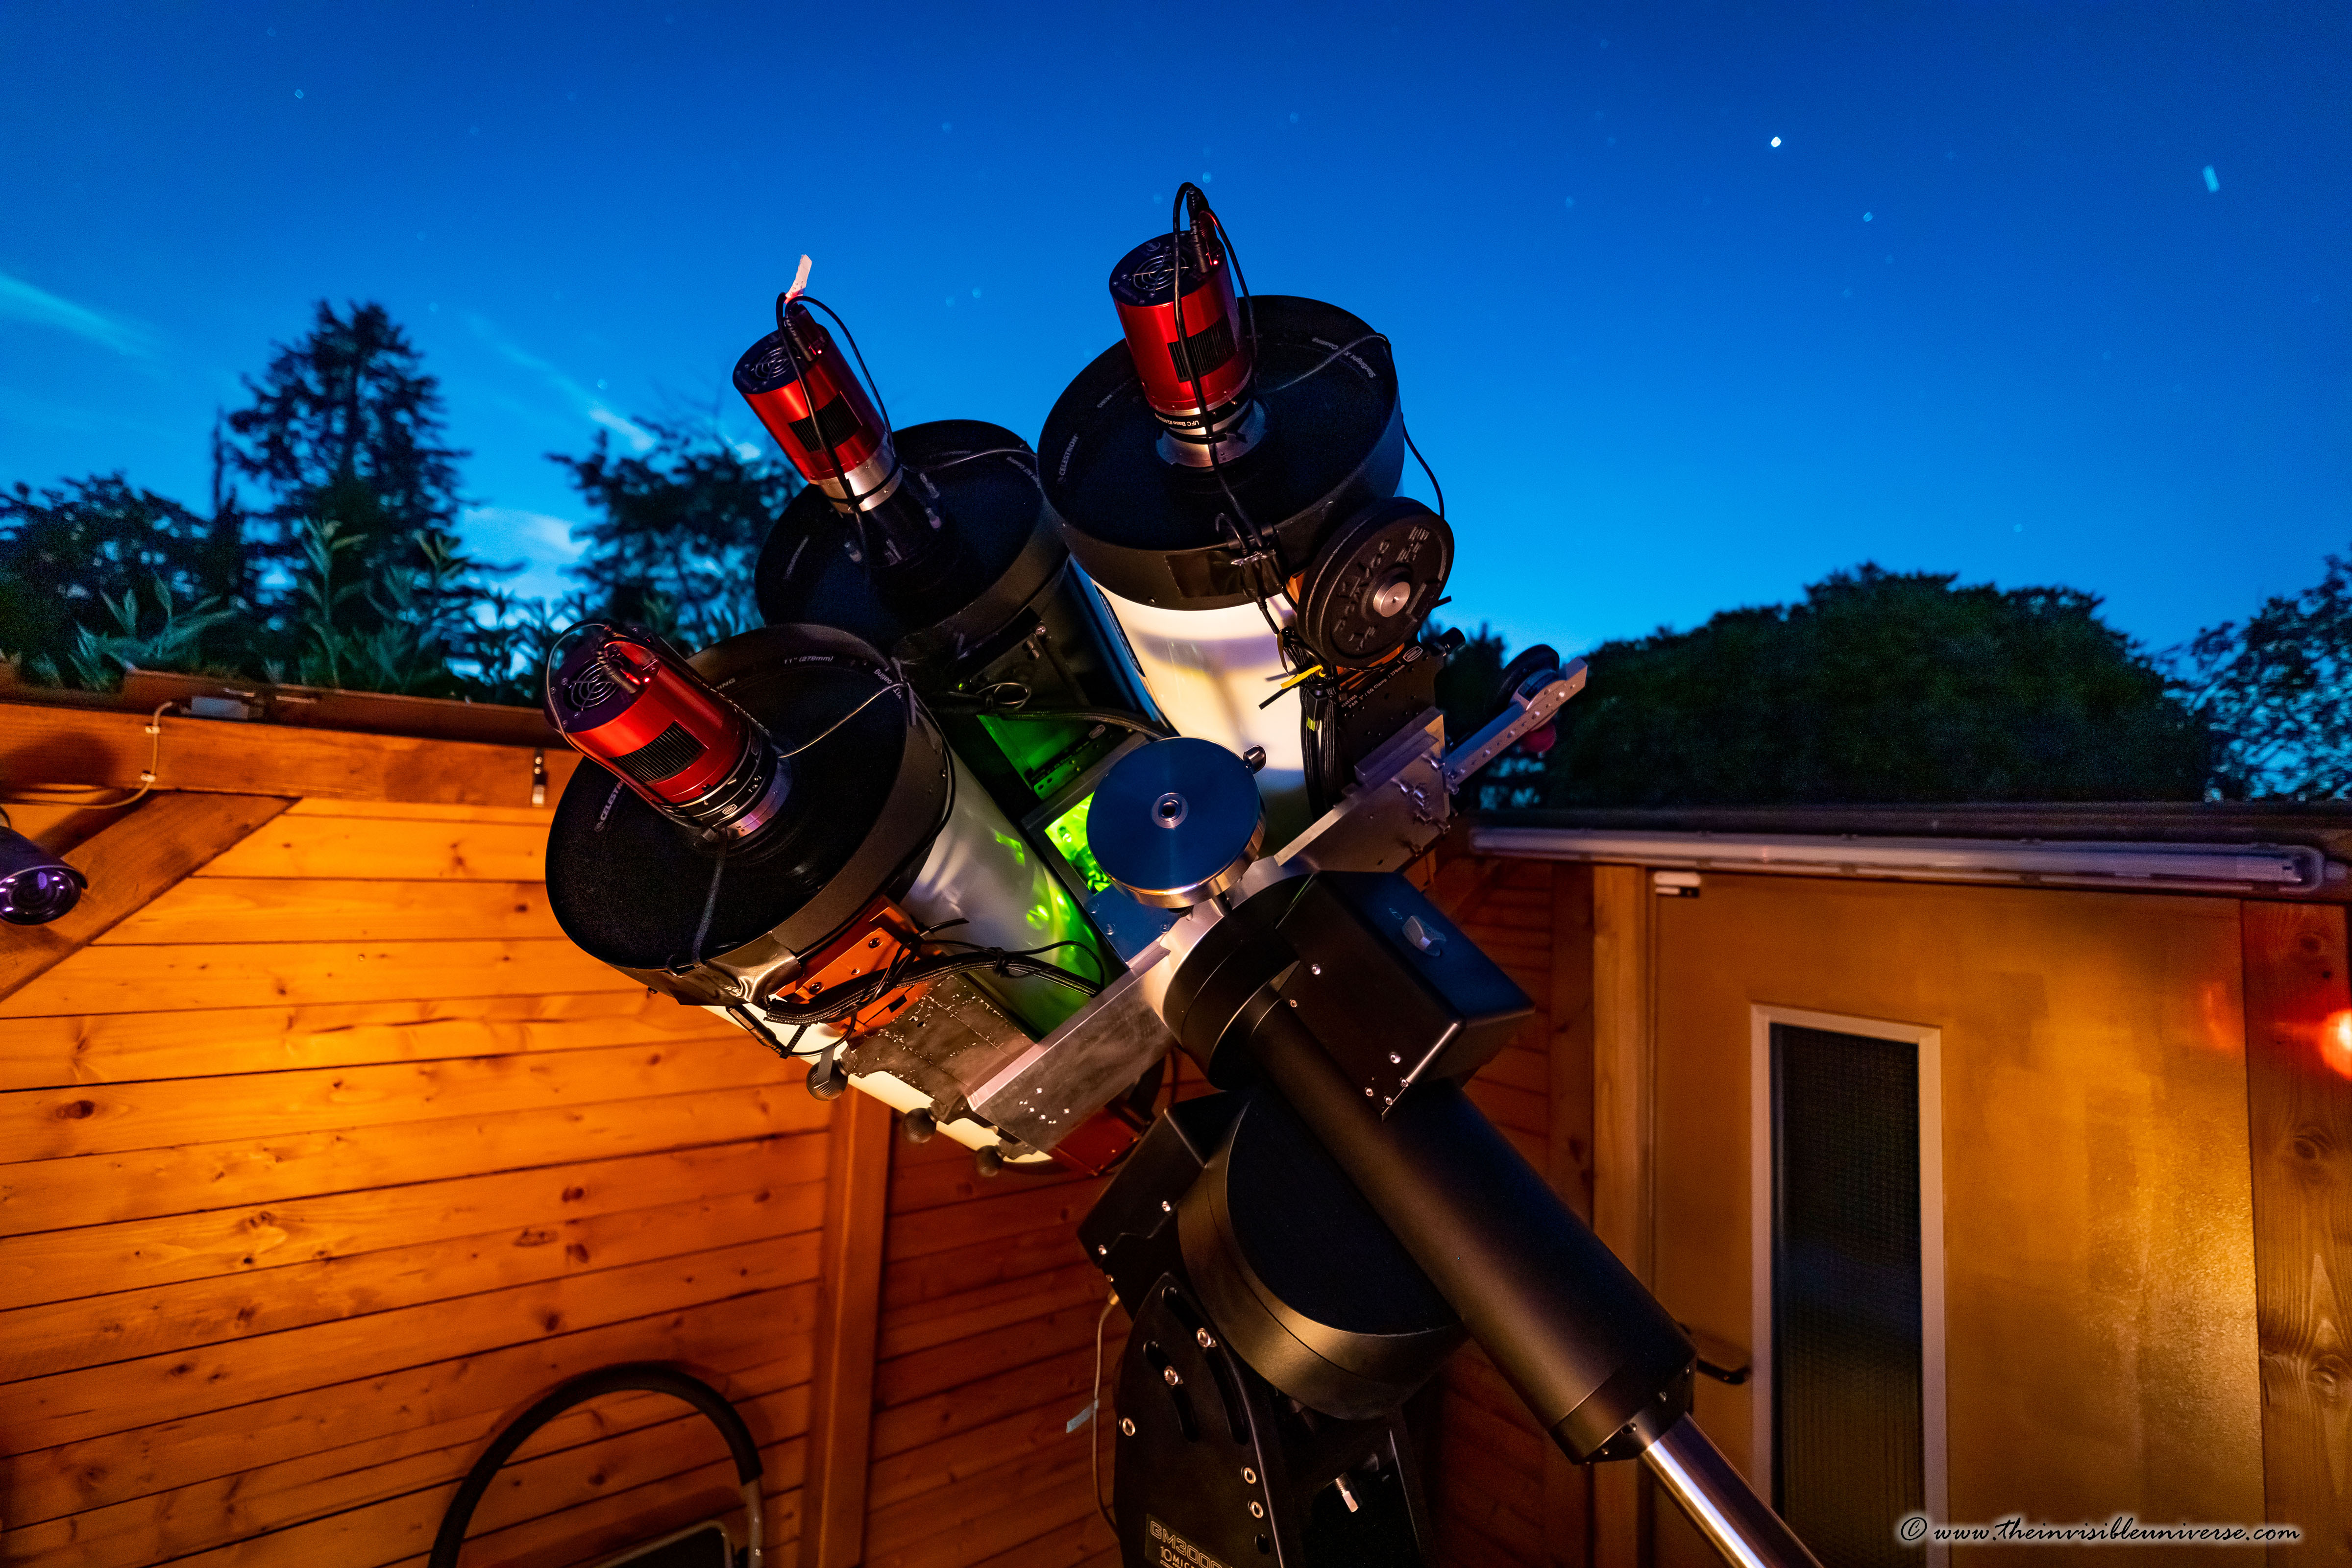
To fully leverage the 100kg load capacity of the GM3000 I decided to go big. I have purchased two Celestron RASA11 Version 1 Astrographs on the used market for a bargain, which are mounted side by side on the GM3000 on a self-made double mounting plate. Furthermore, I built a stand-off between the two RASAs to get a third big telescope mounted. Currently this is my Celestron C11 with the Starizona Hyperstar v4. So I do have three fast f2 astrographs with two monochrome and one color camera, that are pointed to the same spot in the sky.
For a sky with heavy light pollution the results with a cooled CCD- or CMOS- monochrome camera are better than with a DSLR as the L-RGB and narrowband image processing can eliminate the light pollution better and the cooling eliminates the thermal noise floor. For light polluted skies very long exposure times with a good S/N are essential to work out dim details of nebula and galaxies. Although I often use the Hubble Narrowband palette with Ha, OIII and SII, from my experience SII pictures are mostly very noisy and therefore I use quite often a bicolor technique to create a RGB image in Photoshop with a synthetic green channel from Ha and OIII as described in some pages on the web.
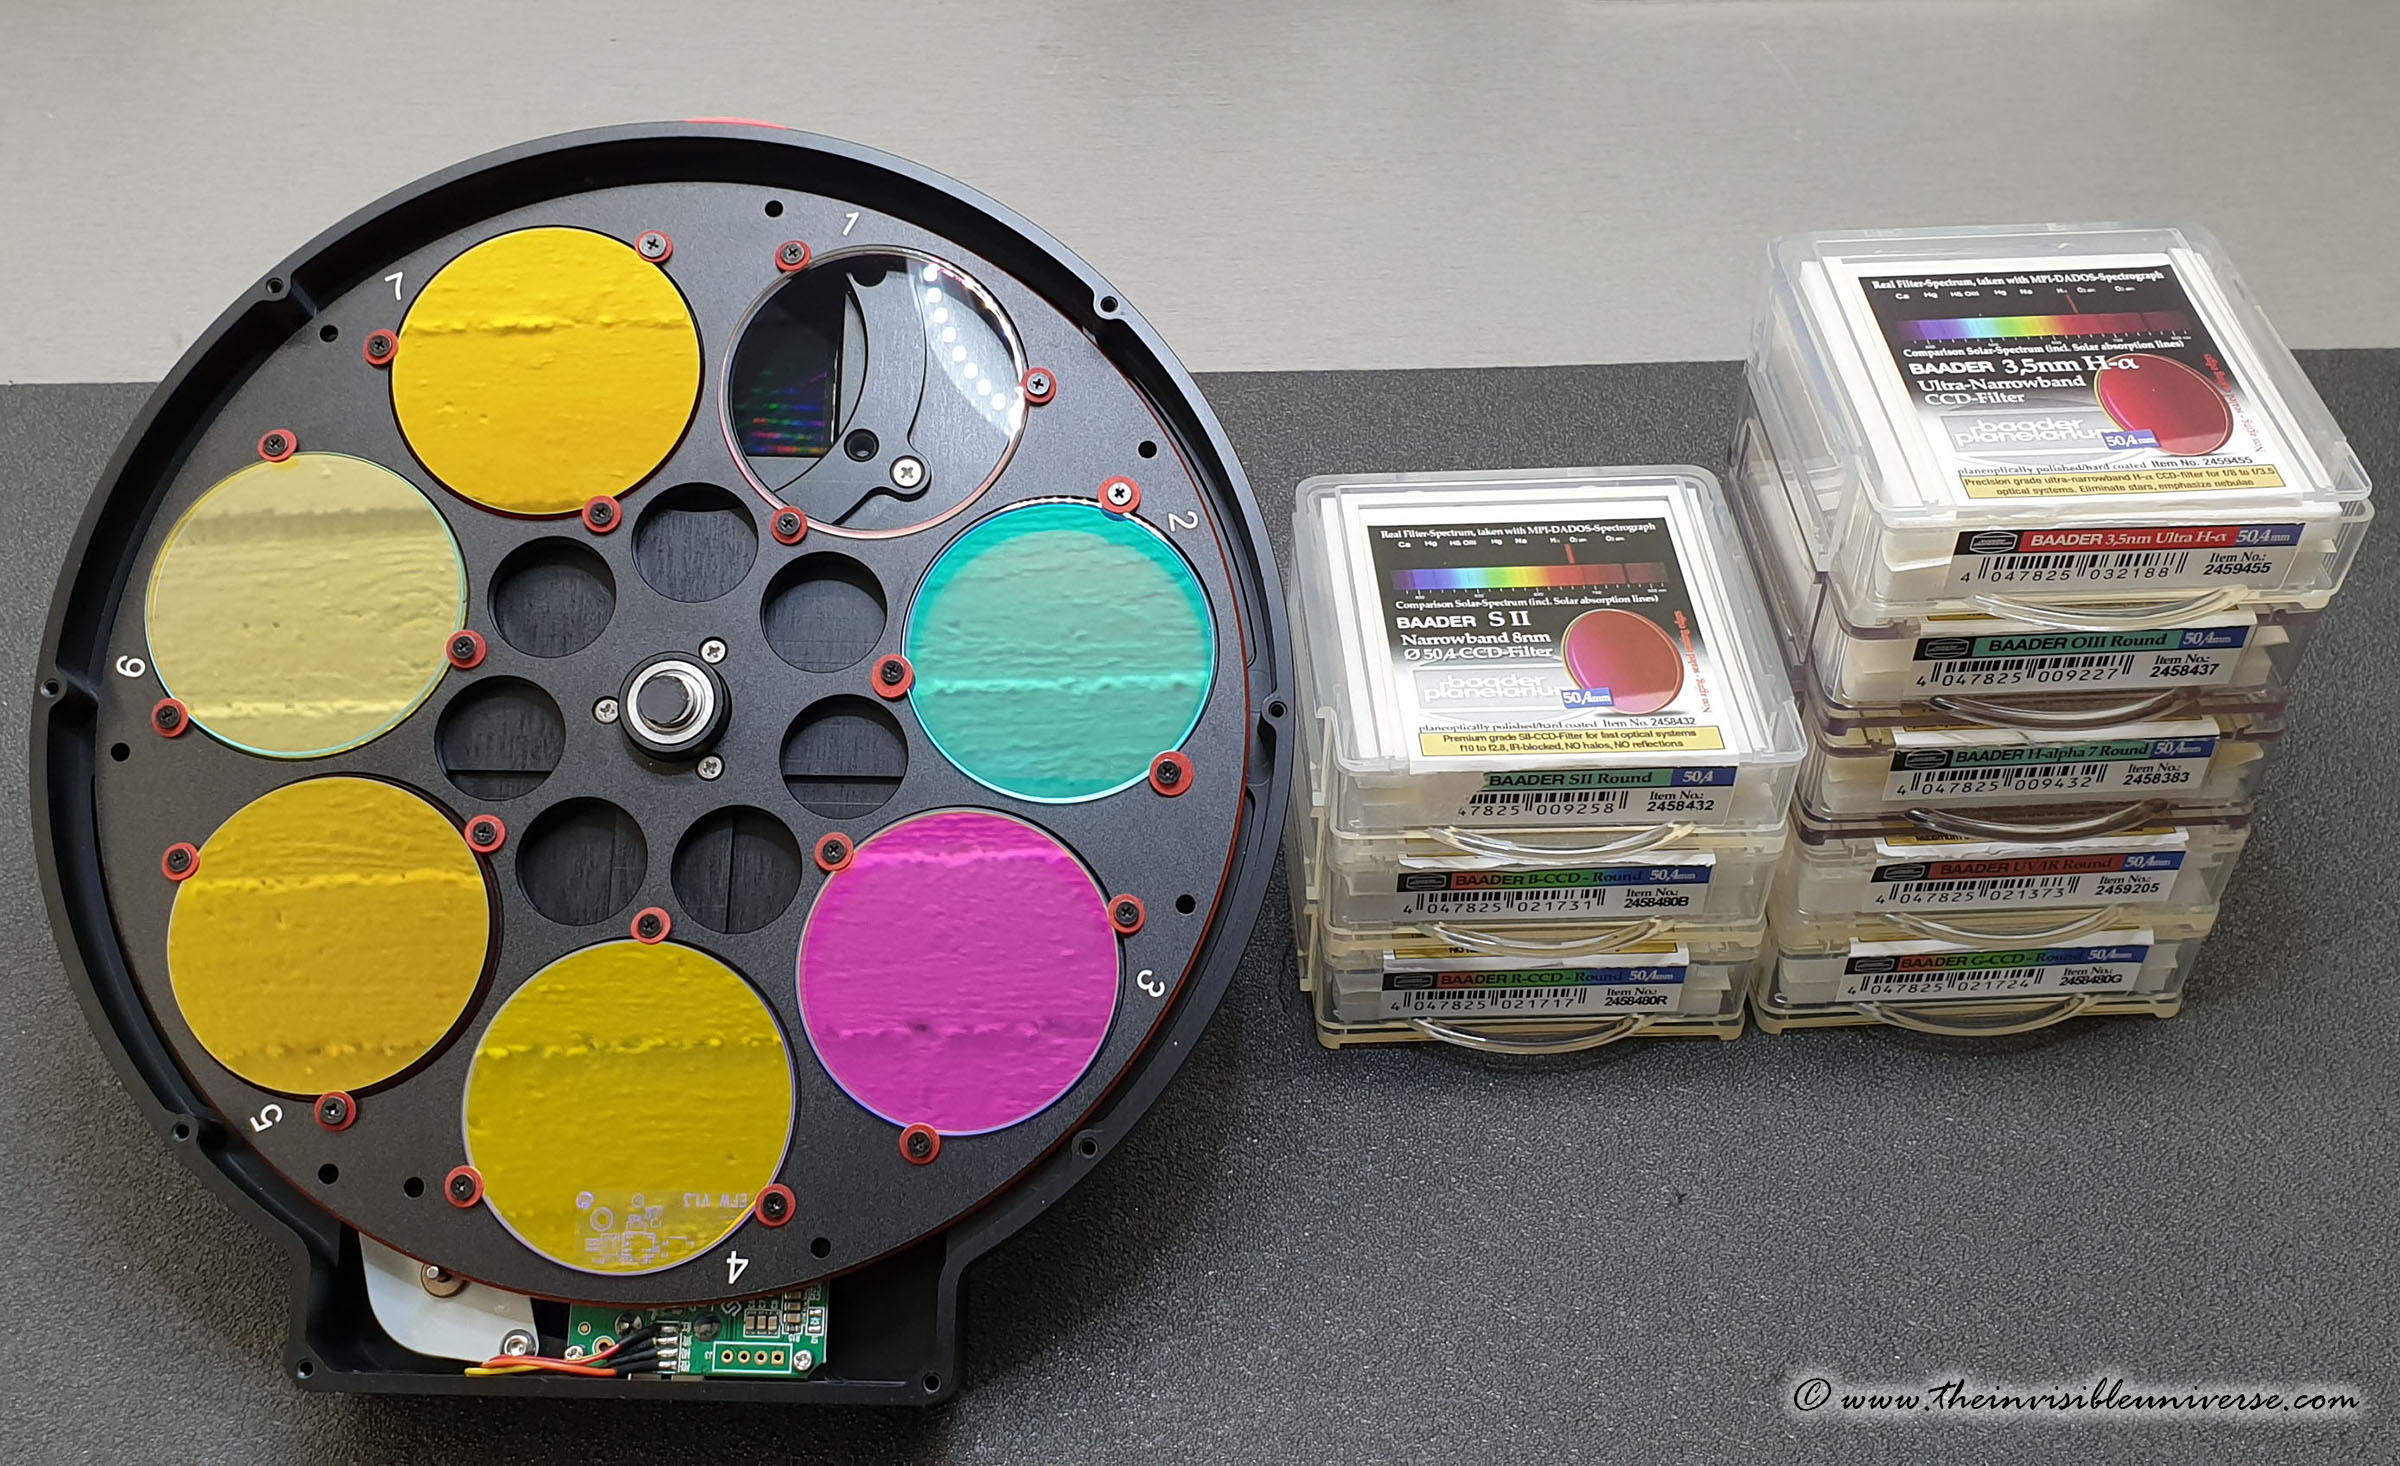
In terms of camera technology, I recently made the switch from CCD to CMOS. I own an ASI6200MM pro CMOS full-frame camera with a 7x2" filter wheel. At the moment, this is probably the best amateur astrophotography camera available. Furthermore, I own a ASI2600MM and a ASI2600MC camera for my two RASA11 Astrographs. That saves me from manual filter change in the middle of the night.
Link: Astrophotography Locations in the European Alps
Link: My Deep Sky Imaging Gallery
Link: Solar System Image Gallery
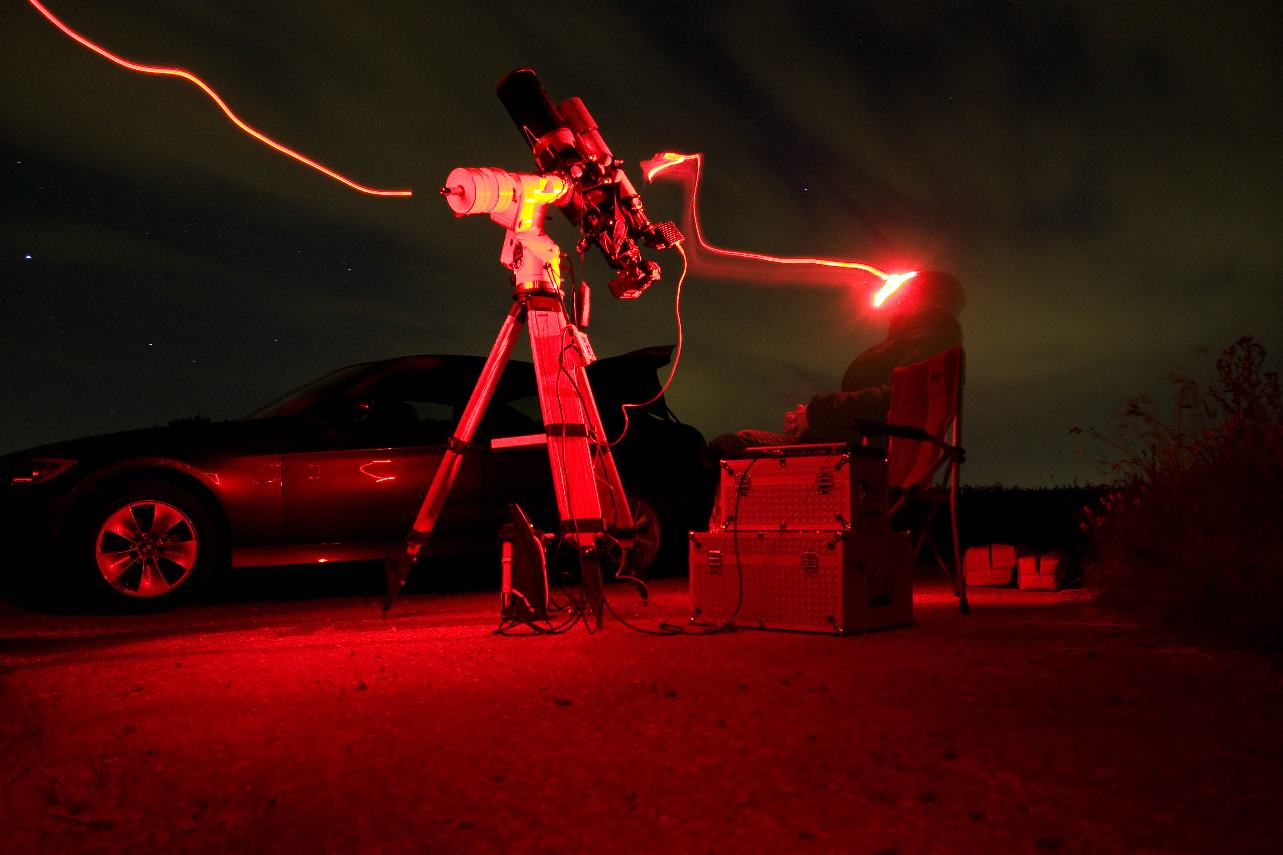
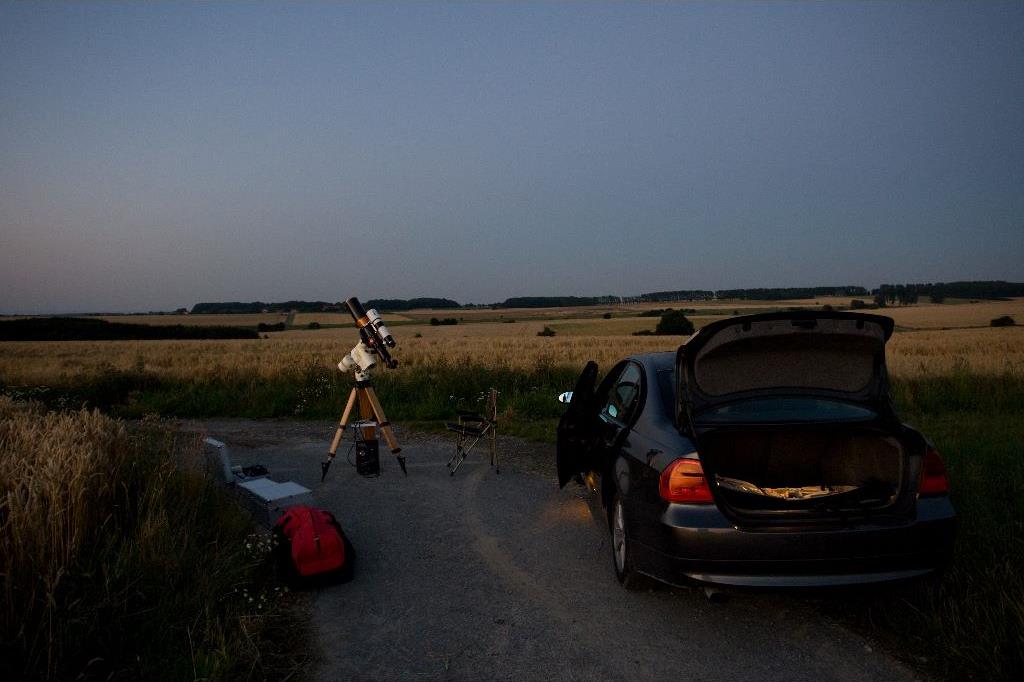
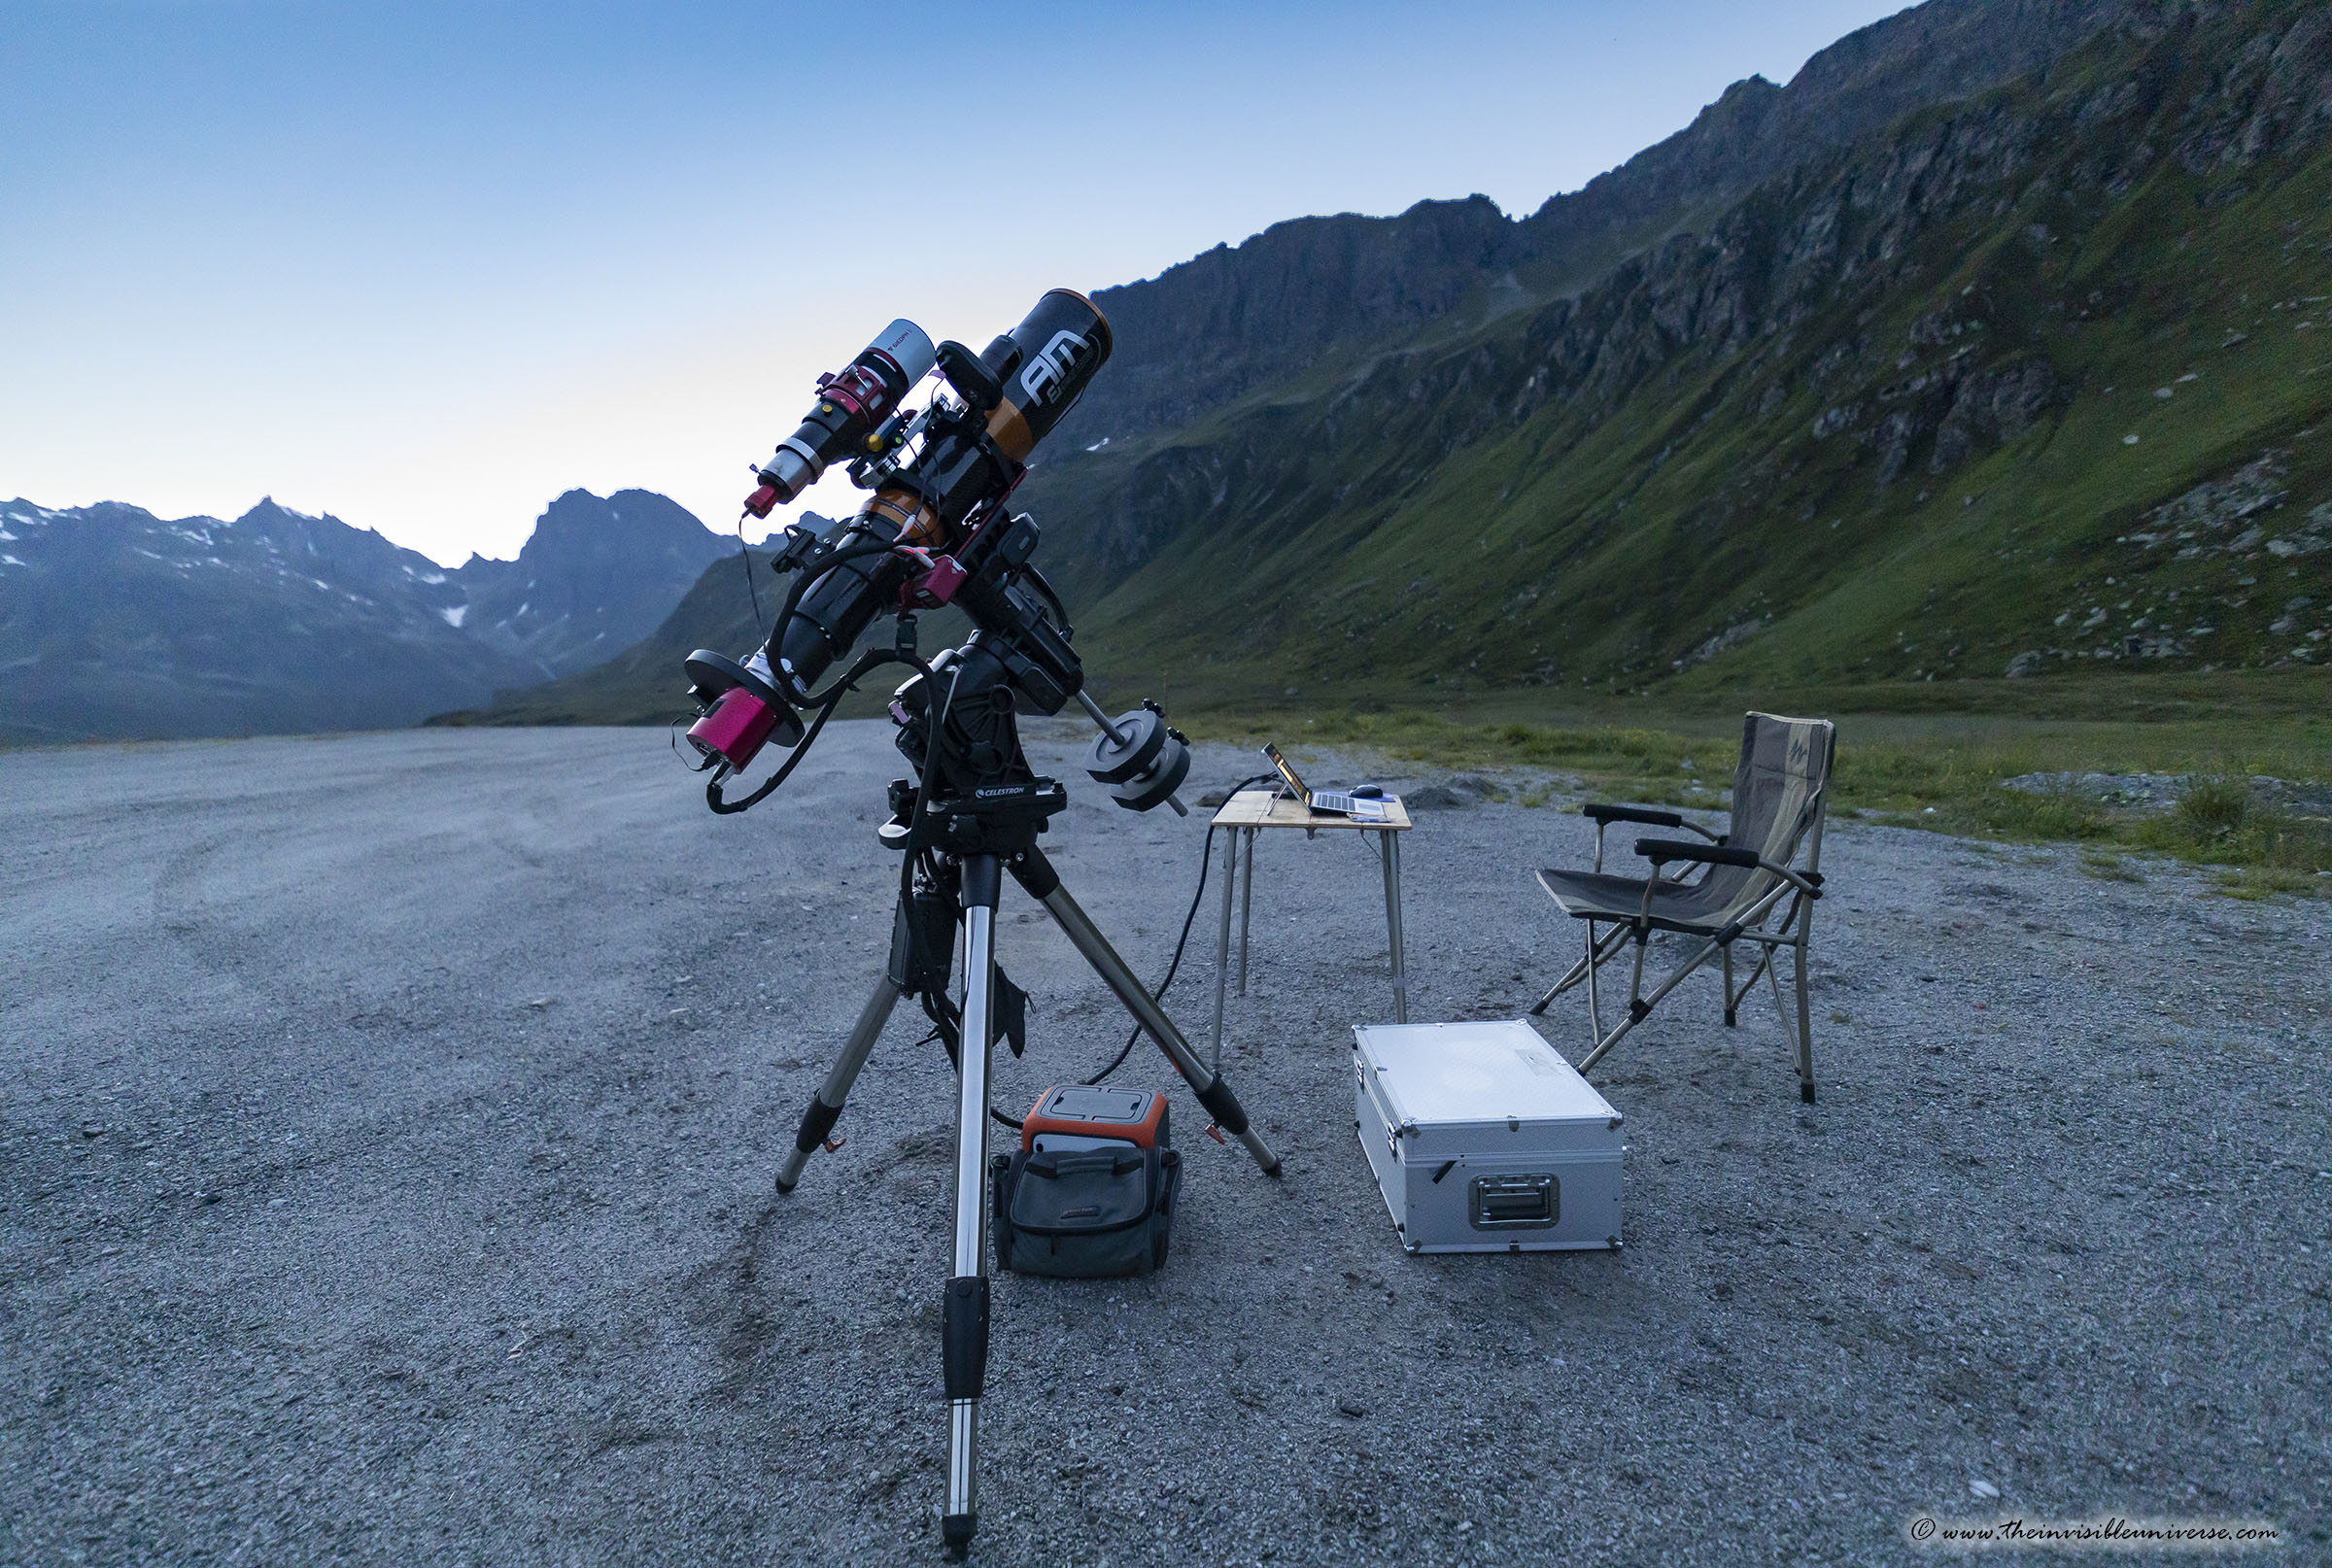
Here is one of my videos on youtube of my astrophoto excursion to the Col de Restefond in the French Alps with some information about my mobile astrophoto rig during that time, including the Celestron CGX mount and the TMB 115/805 APO:
In this video I show the installation of the 10micron GM3000HPS in my backyard observatory:
And here is a review of the 10micron GM1000HPS on the island of La Palma:
10micron GM3000 HPS Mount
My new observatory grade mount of the 100kg capacity class - high precision encoders included. Please visit my dedicated website for this monster black mount: GM3000 HPS Mount page
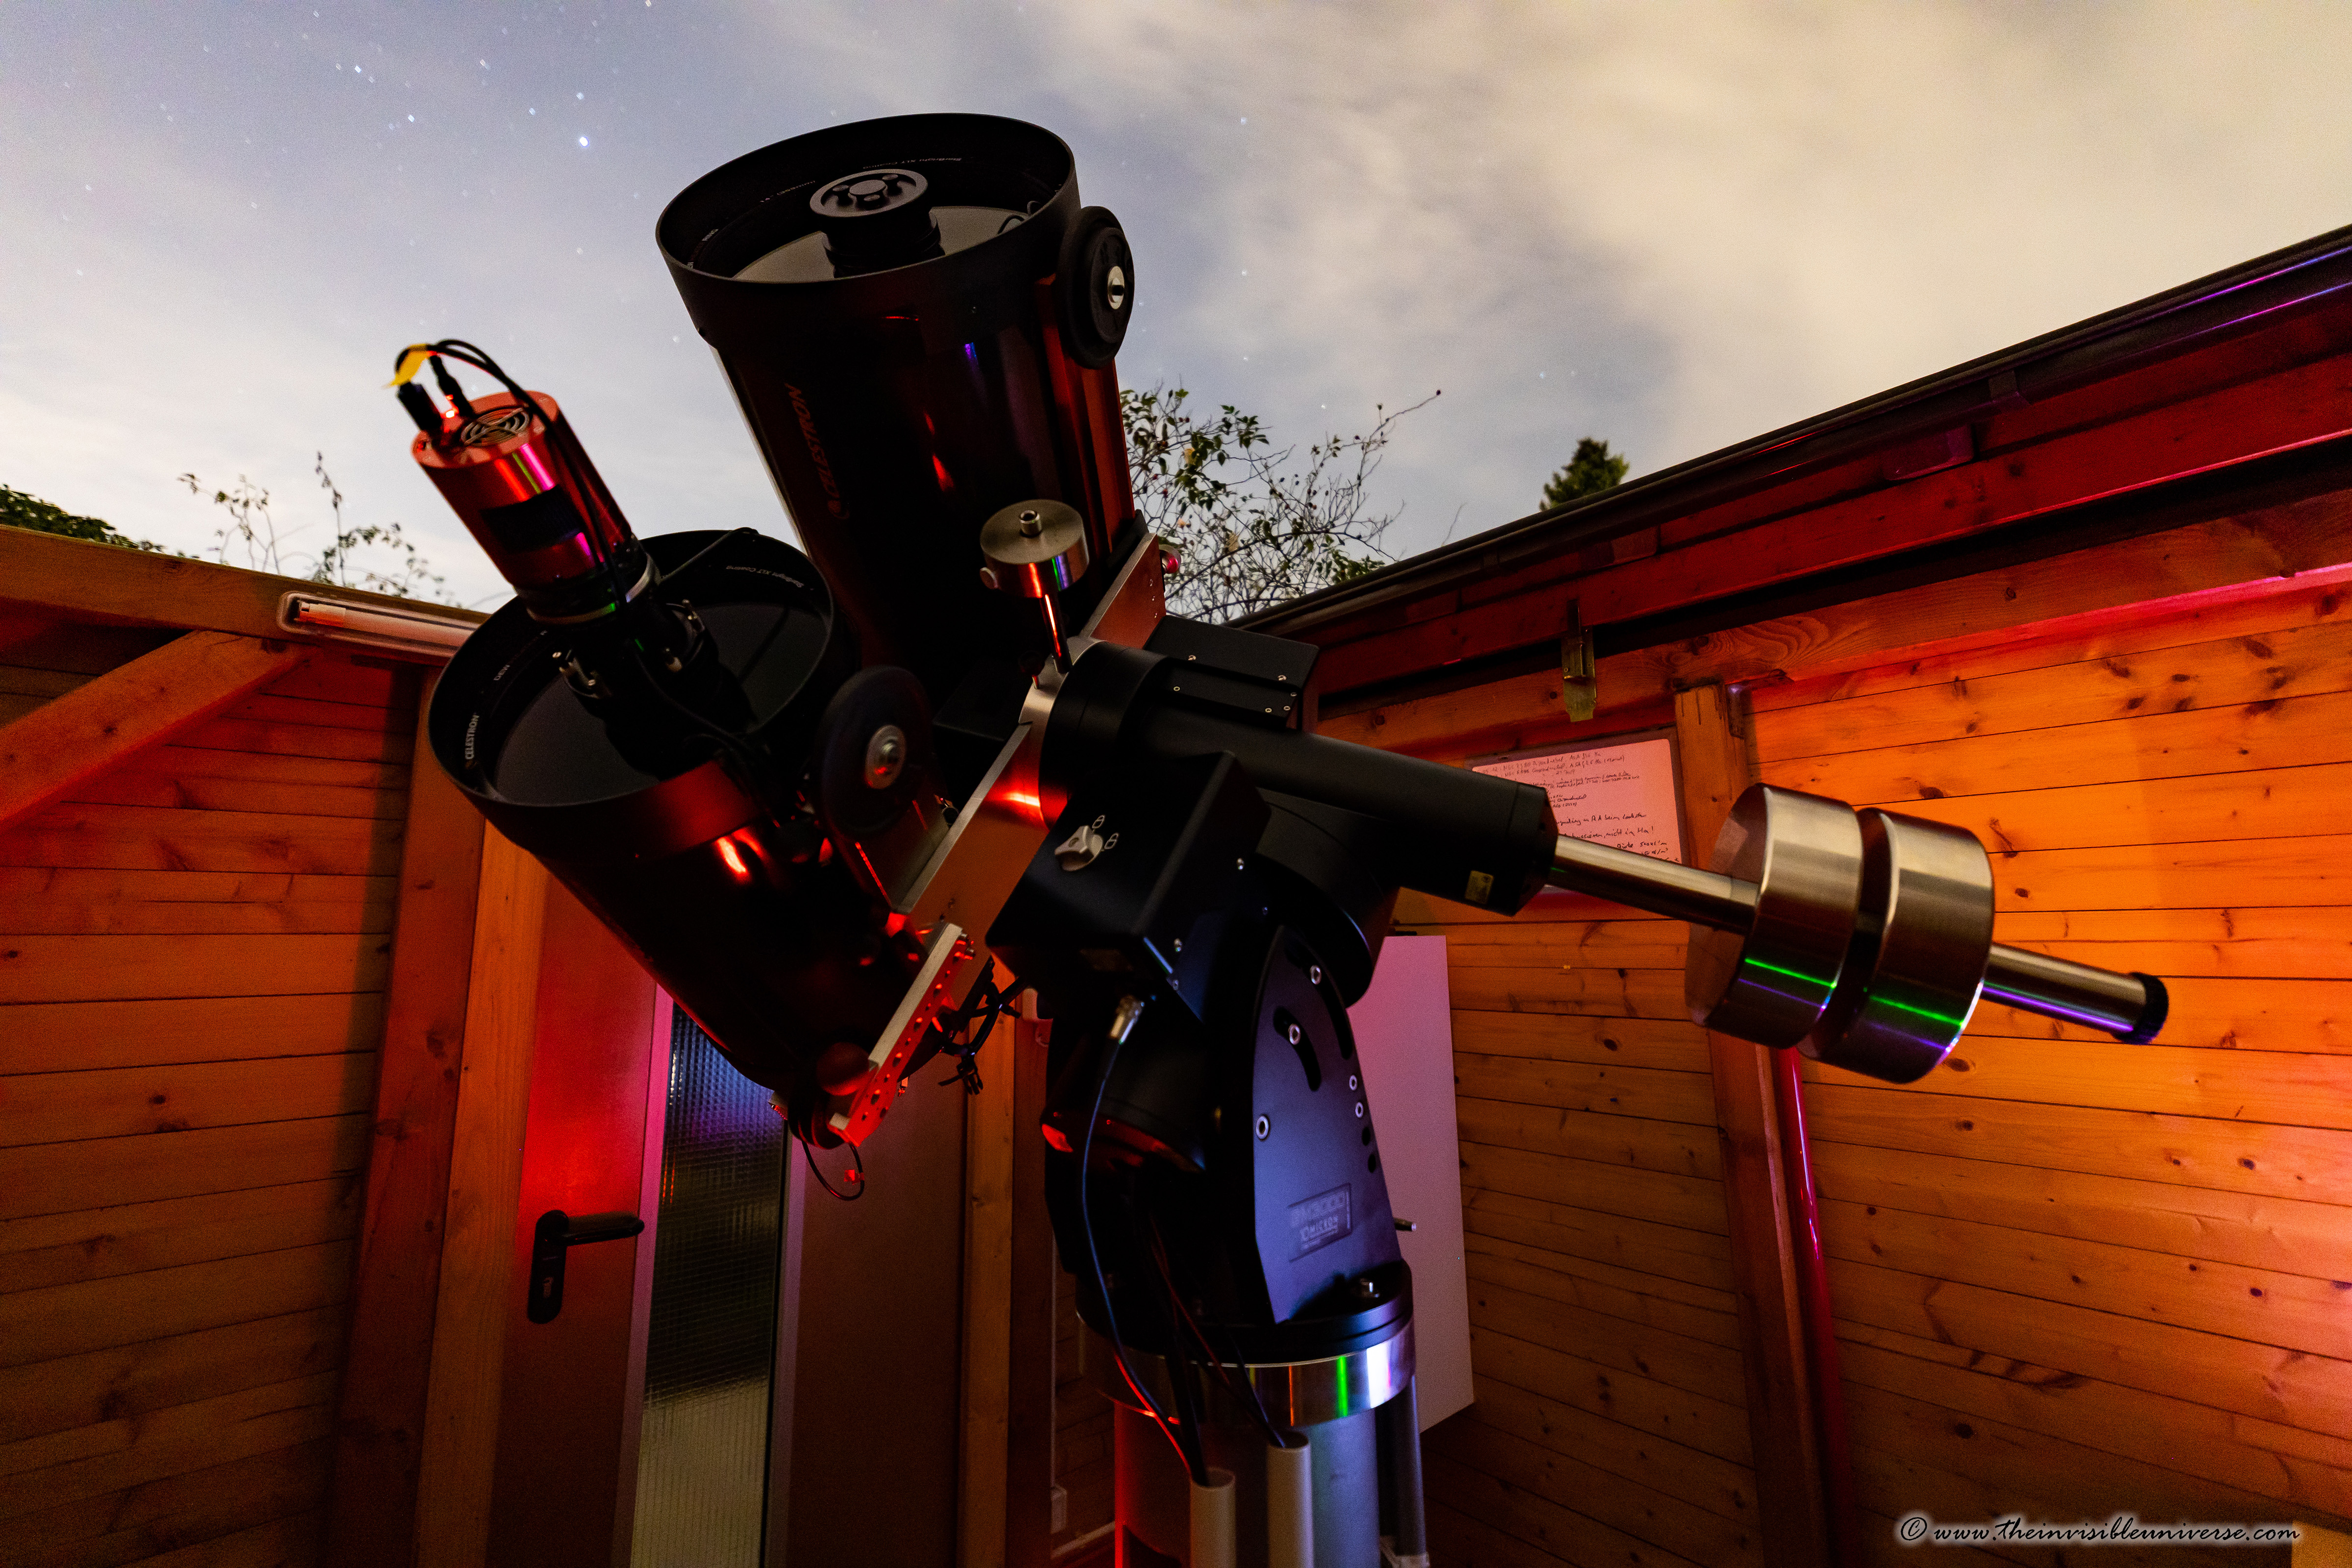

10micron GM2000QCI Mount
This mount is reliable, solid, precise and fast. You can set it up and let it do its job. It just works - period.
Unfortunately, I had to sell this beauty when I got my GM3000HPS.
Here is a review of this mount.
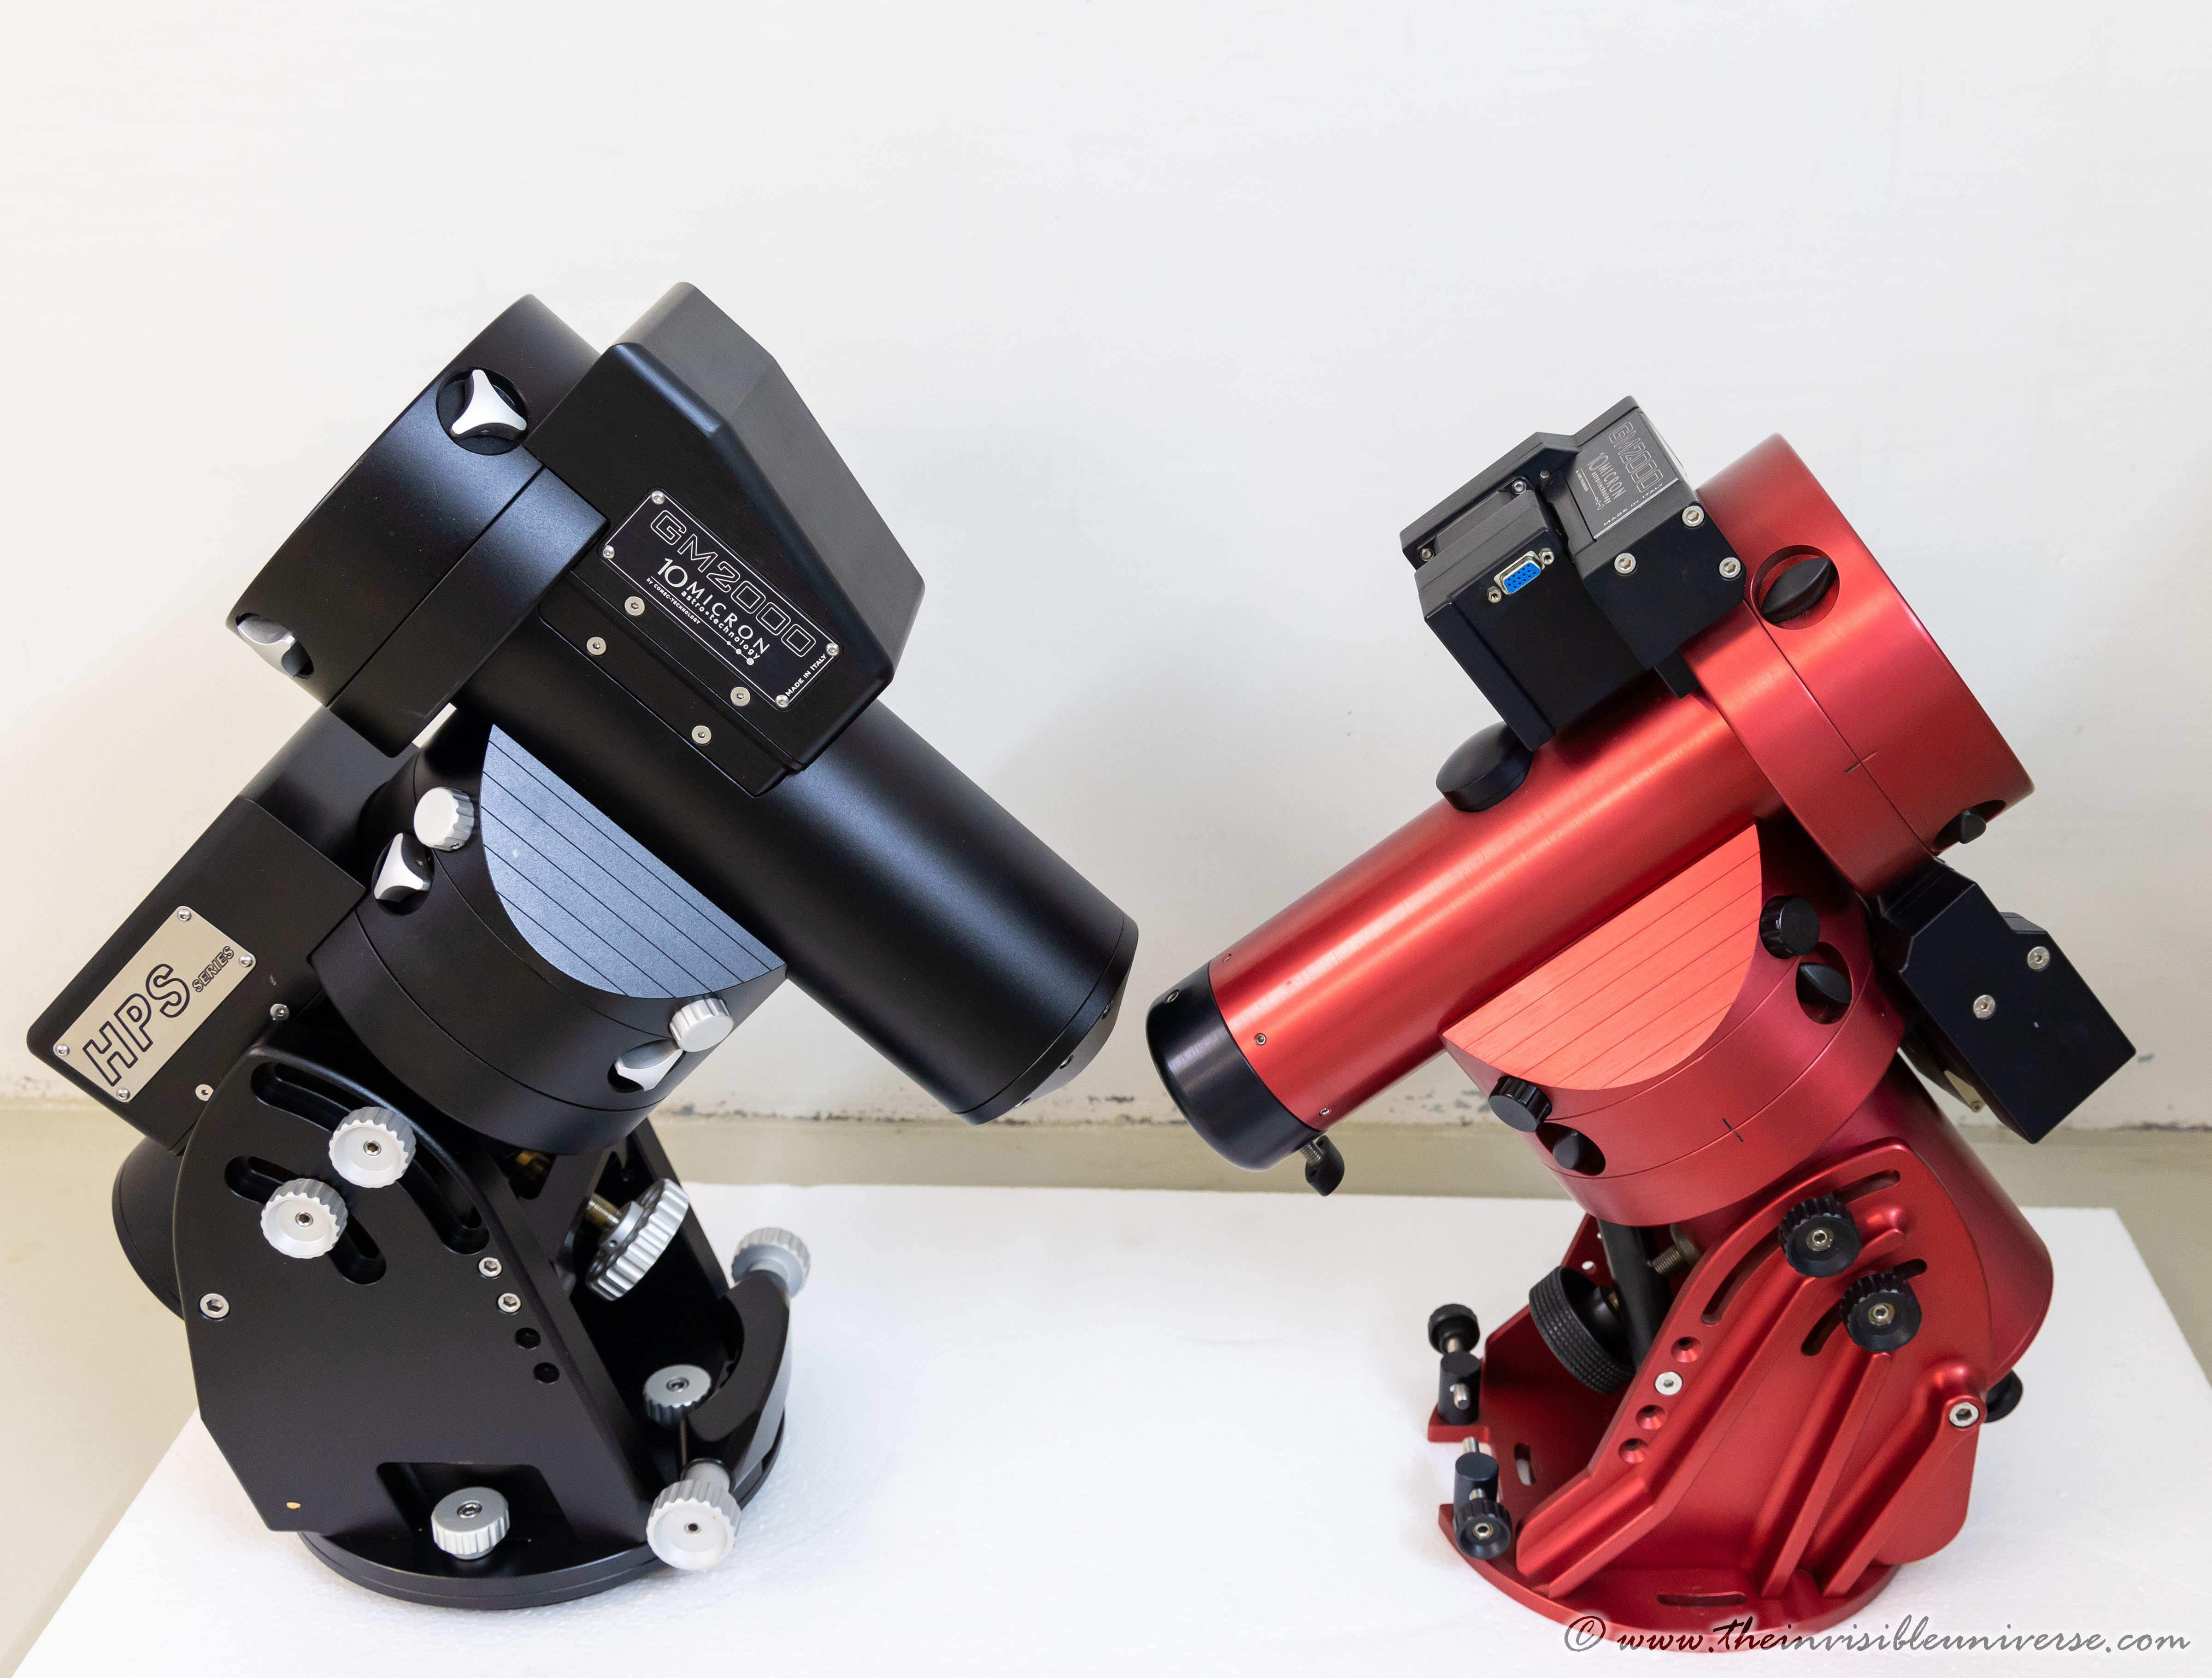
10micron GM1000HPS Mount
This is the ultimate portable astrophoto mount. I have owned many mounts, but this is the only one that is portable and precise enough. The high-precision encoders make the tracking very smooth and stable. No fiddling around with periodic errors or backlash. Although the mount is no heavier than a Celestron CGX at 19kG, or only slightly heavier than an EQ6, it is far more stable. You can even put a 10" Newtonian astrograph on it without losing control. Together with N.I.N.A for polar alignment and Mount Wizzard for creating a sky model, the mount is very quickly set up and ready to shoot. The system has almost zero backlash and zero periodic error. Due to its compact size in comparison to e.g. a Celestron CGX, it can be transported easily.

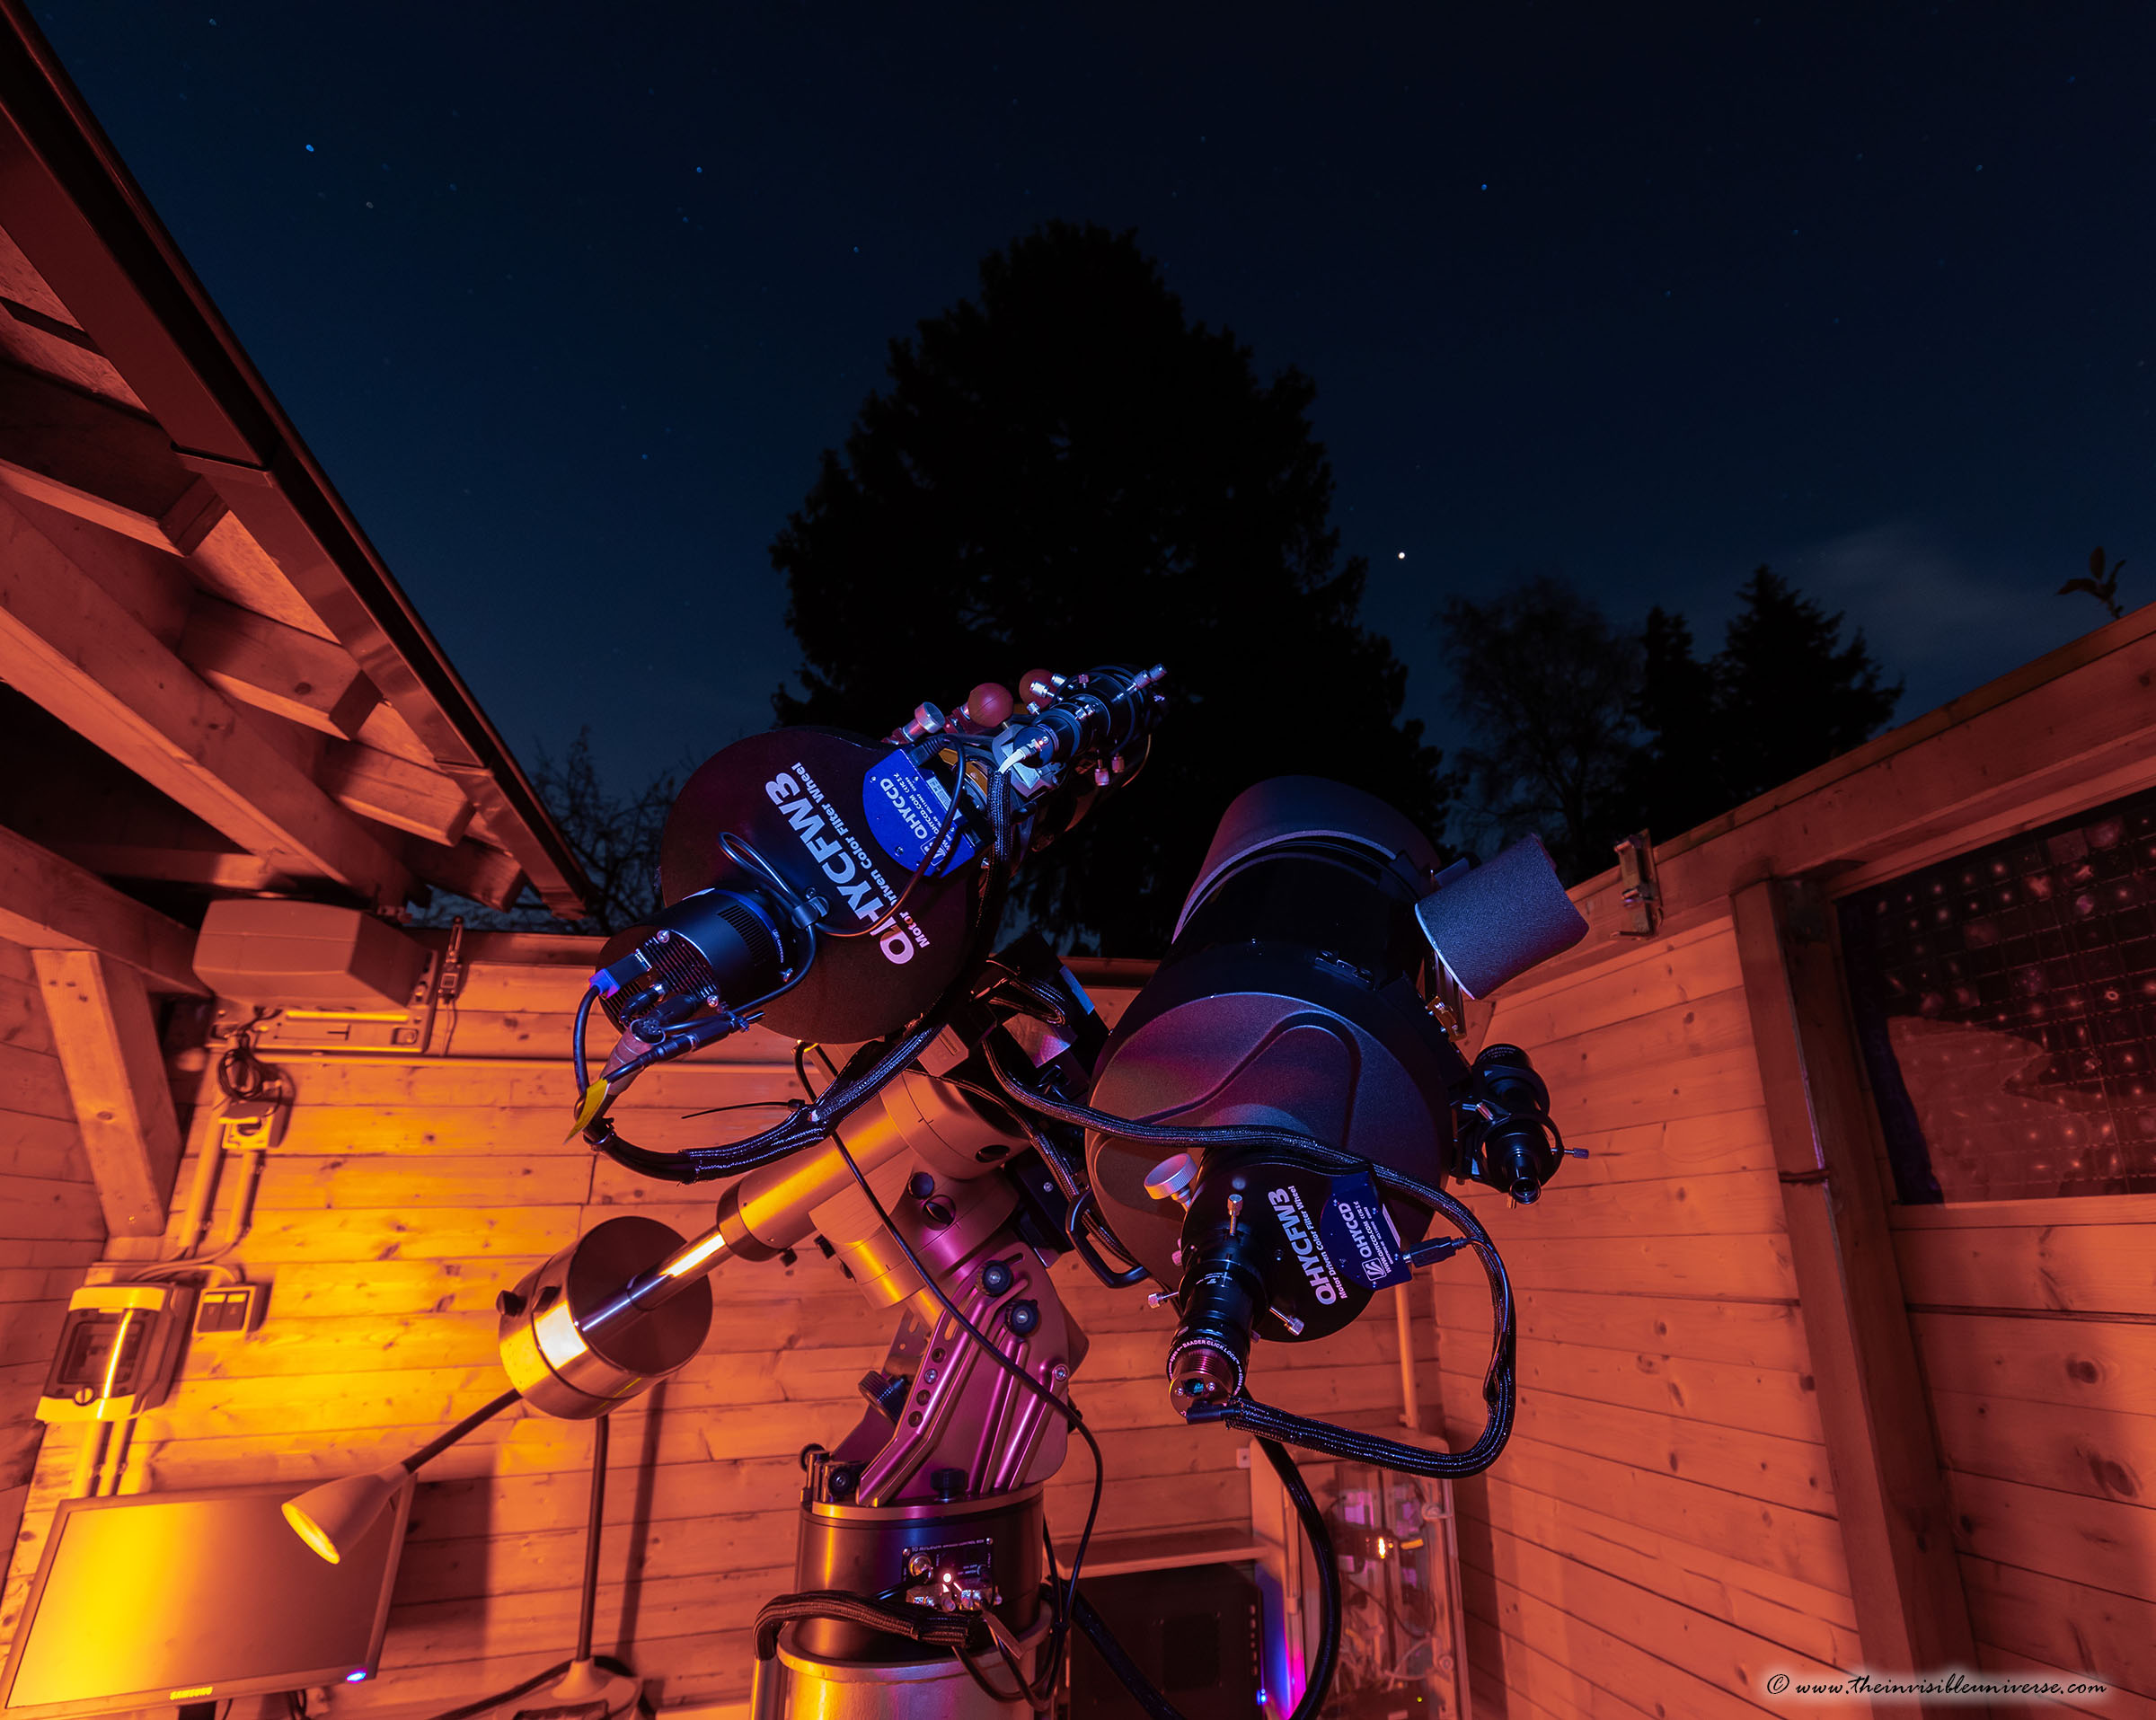
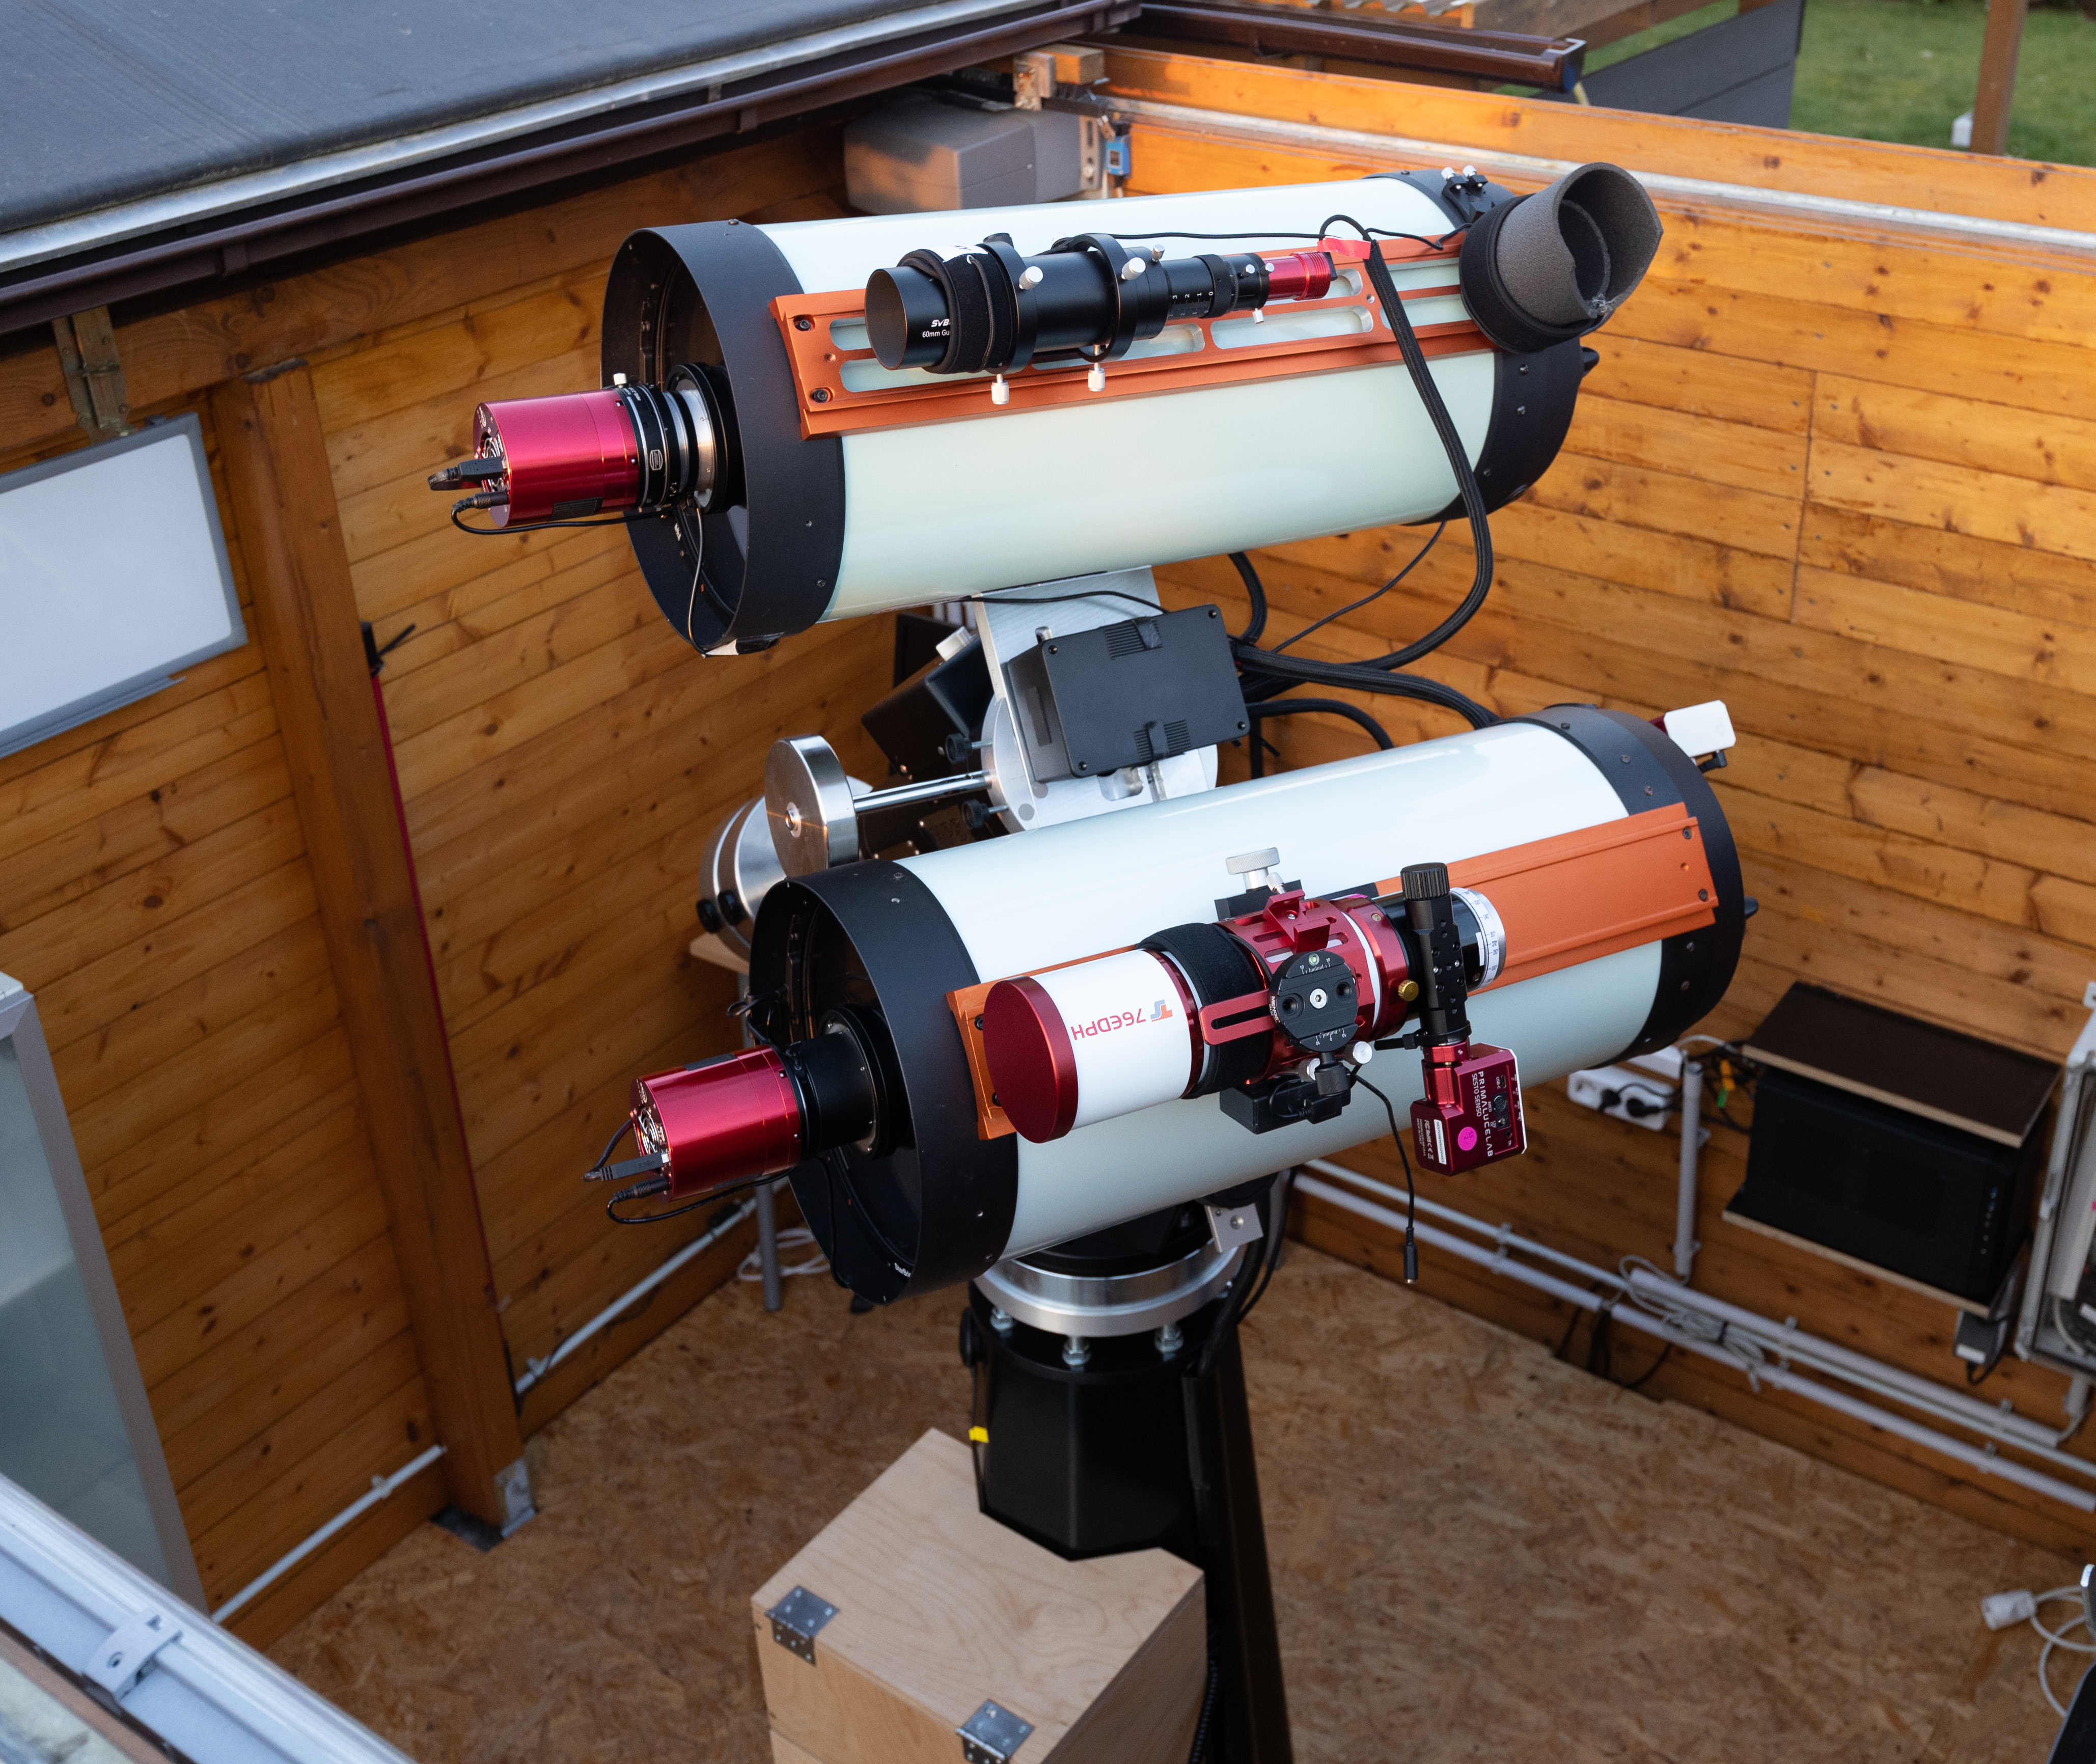
Dual Celestron RASA11 v1 Setup
The RASA11 is a very fast f2.22 astrograph with 620mm focal length, used exclusively for photographic purposes. Thanks to its fast optics, it can collect a large amount of light in a short time - perfect for light-polluted skies where you need to overcome the noise of the bright sky background.
But what's better than one RASA - that's right, two RASAs! One is equipped with an ASI2600MC APS-C sized color camera, so I don't have to change RGB filters in the middle of the night. The other is strictly for monochrome imaging with an ASI2600MM and a baader filter changer, with either a clear filter or Baader Highspeed Narrowband Filters.
I installed the Celestron Dew Heater Ring on the Schmidt plate, as this is probably the best solution for avoiding dew. With the Dew Heater Ring, the RASA11 can be used on normal nights even without a dew shield.
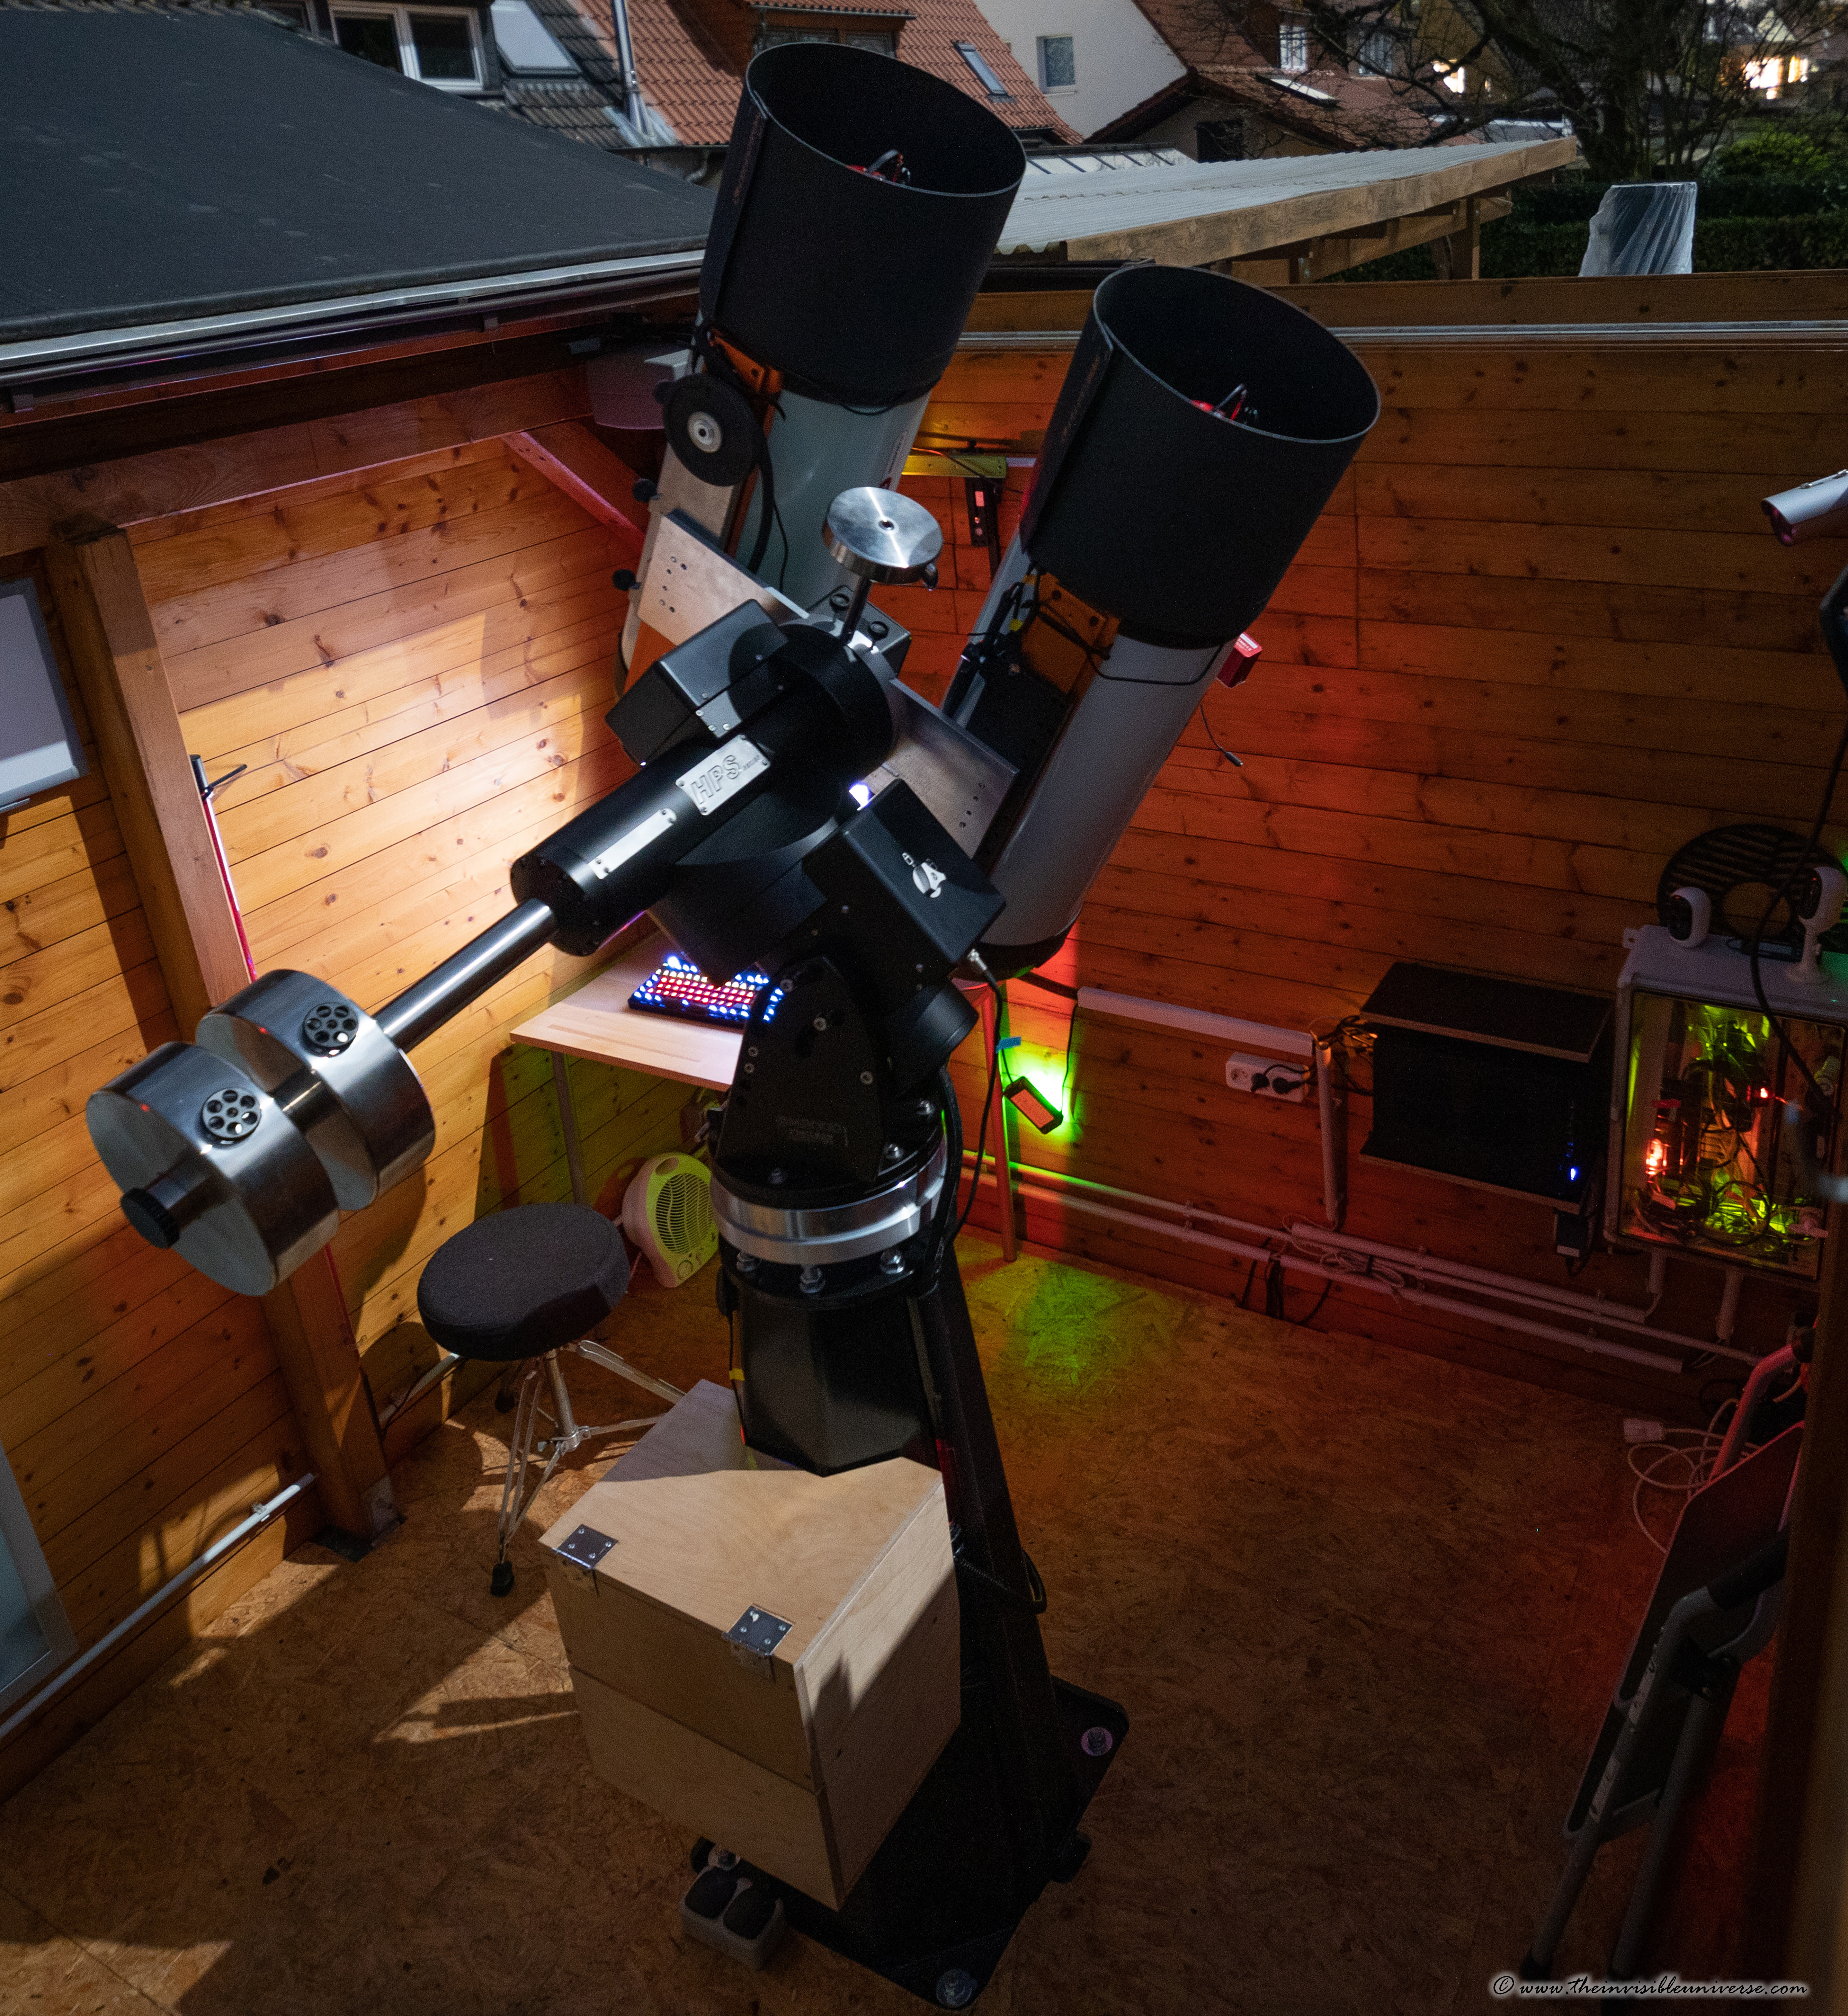
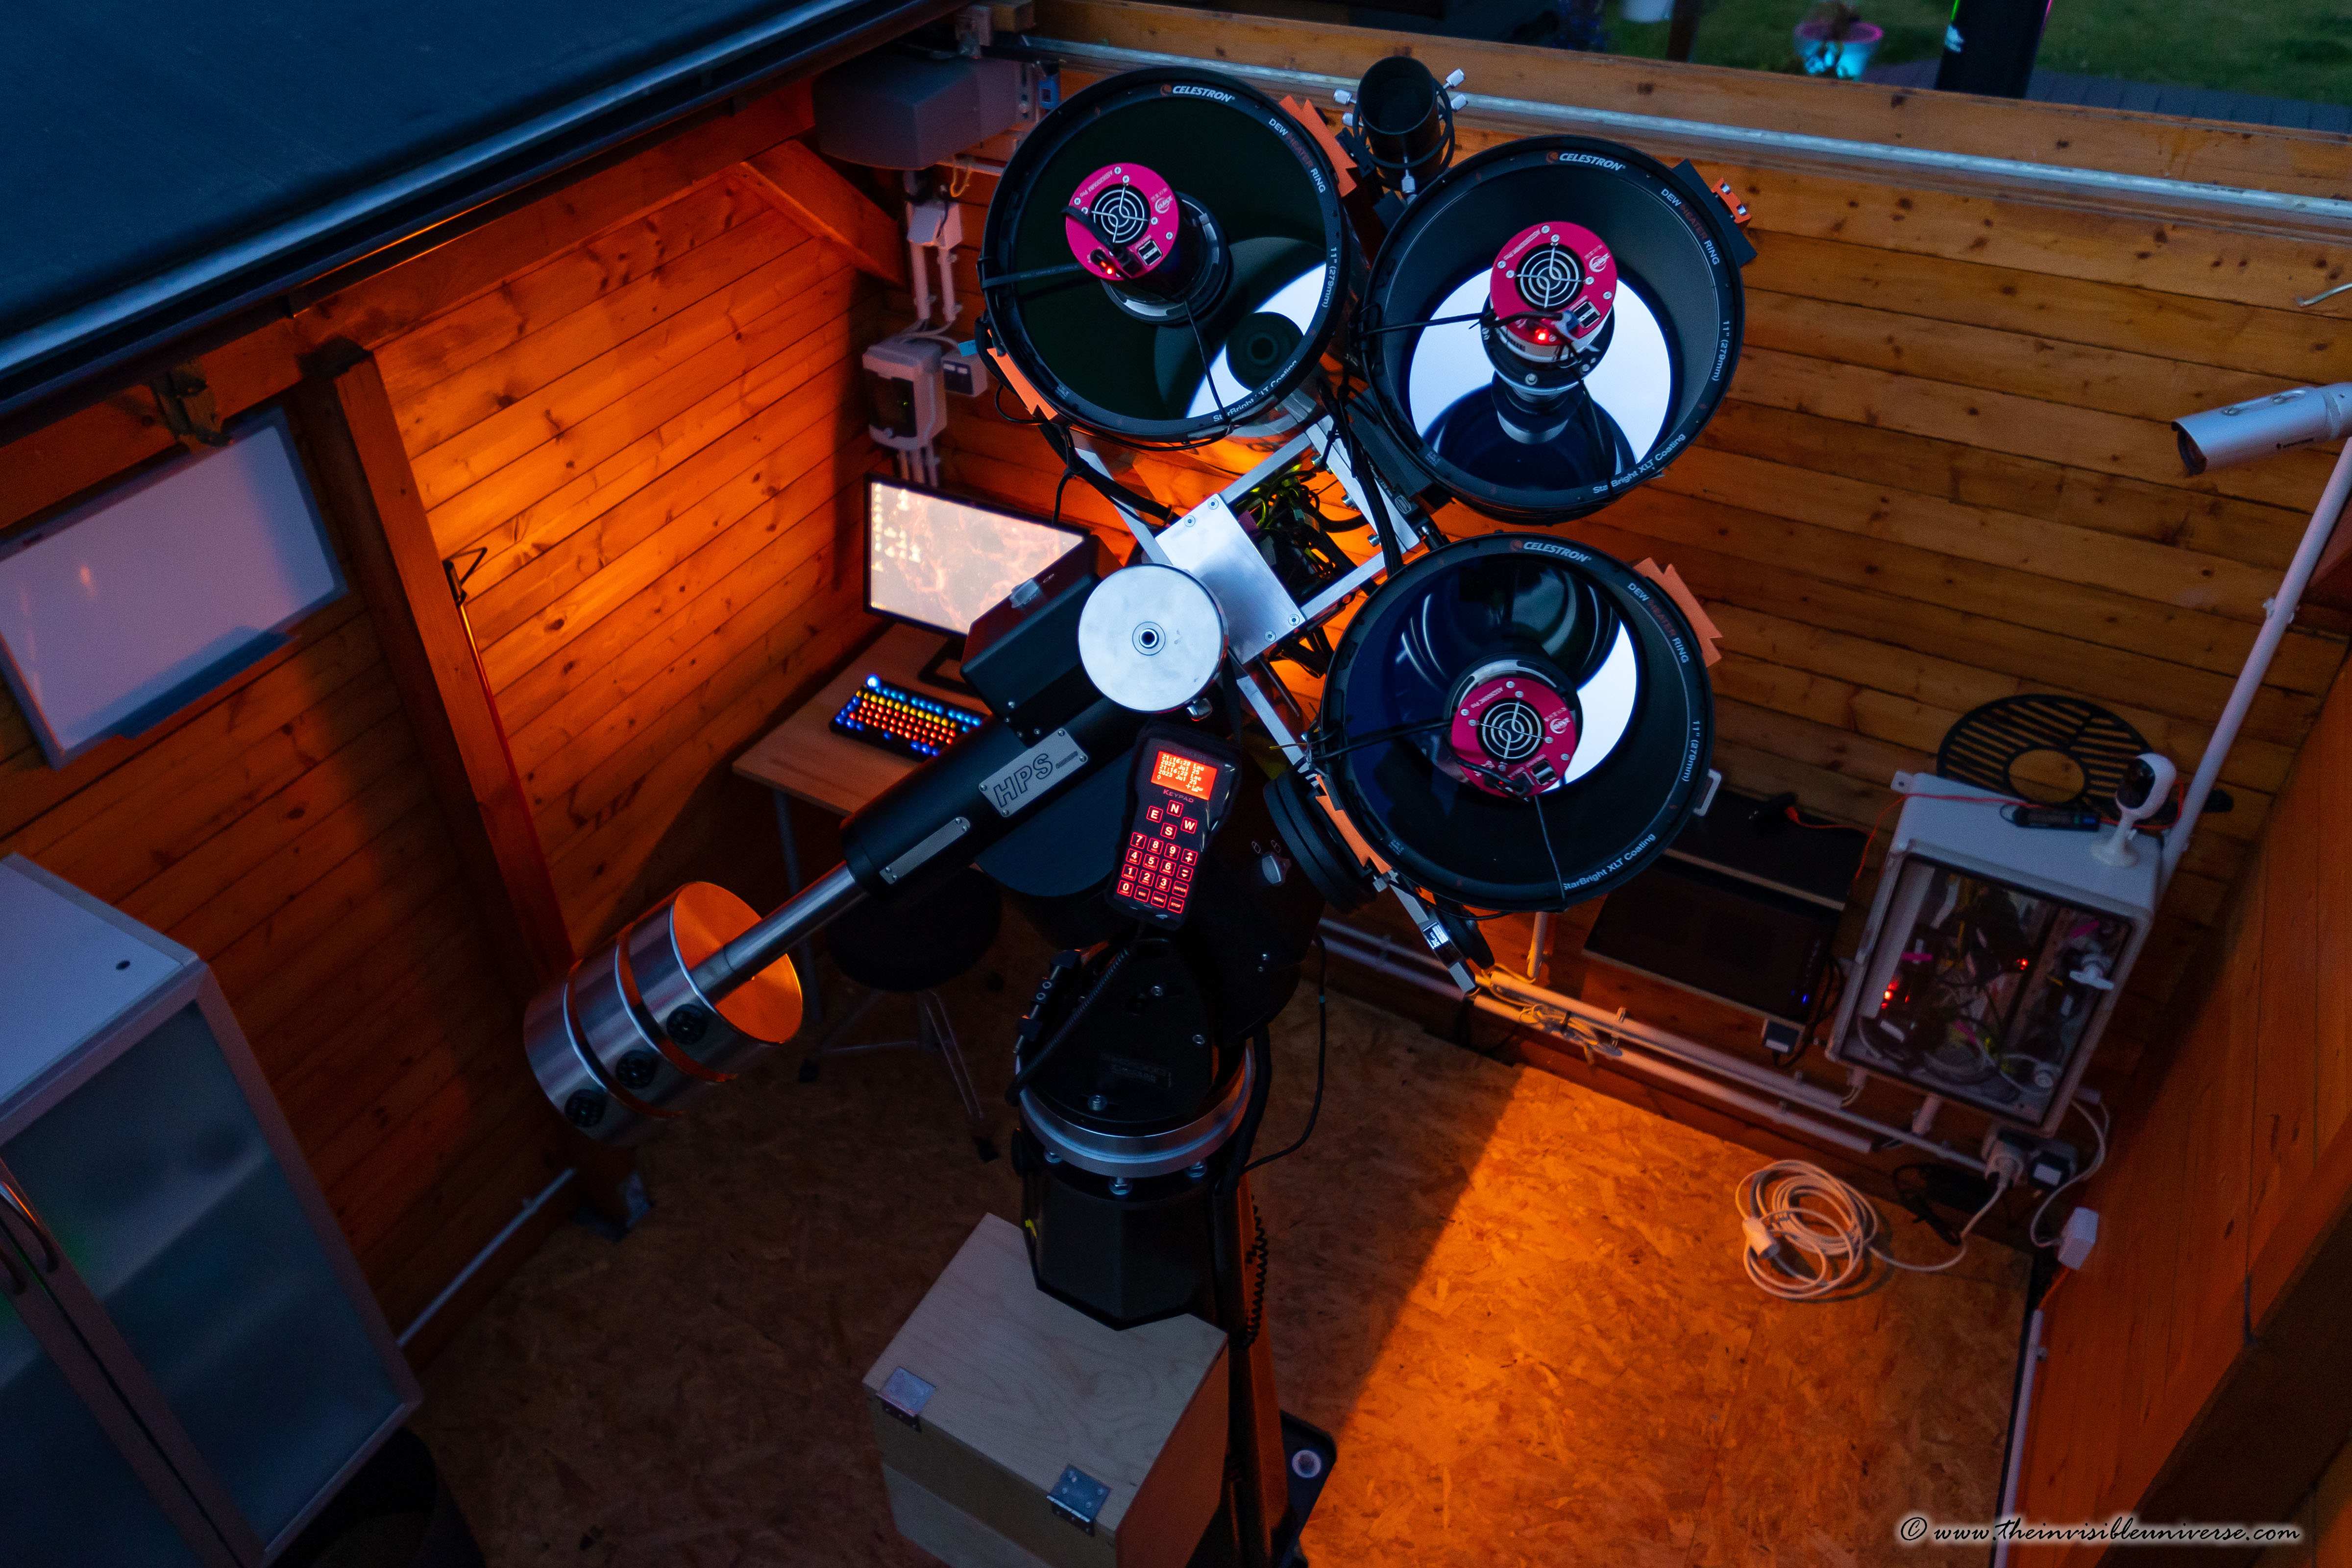
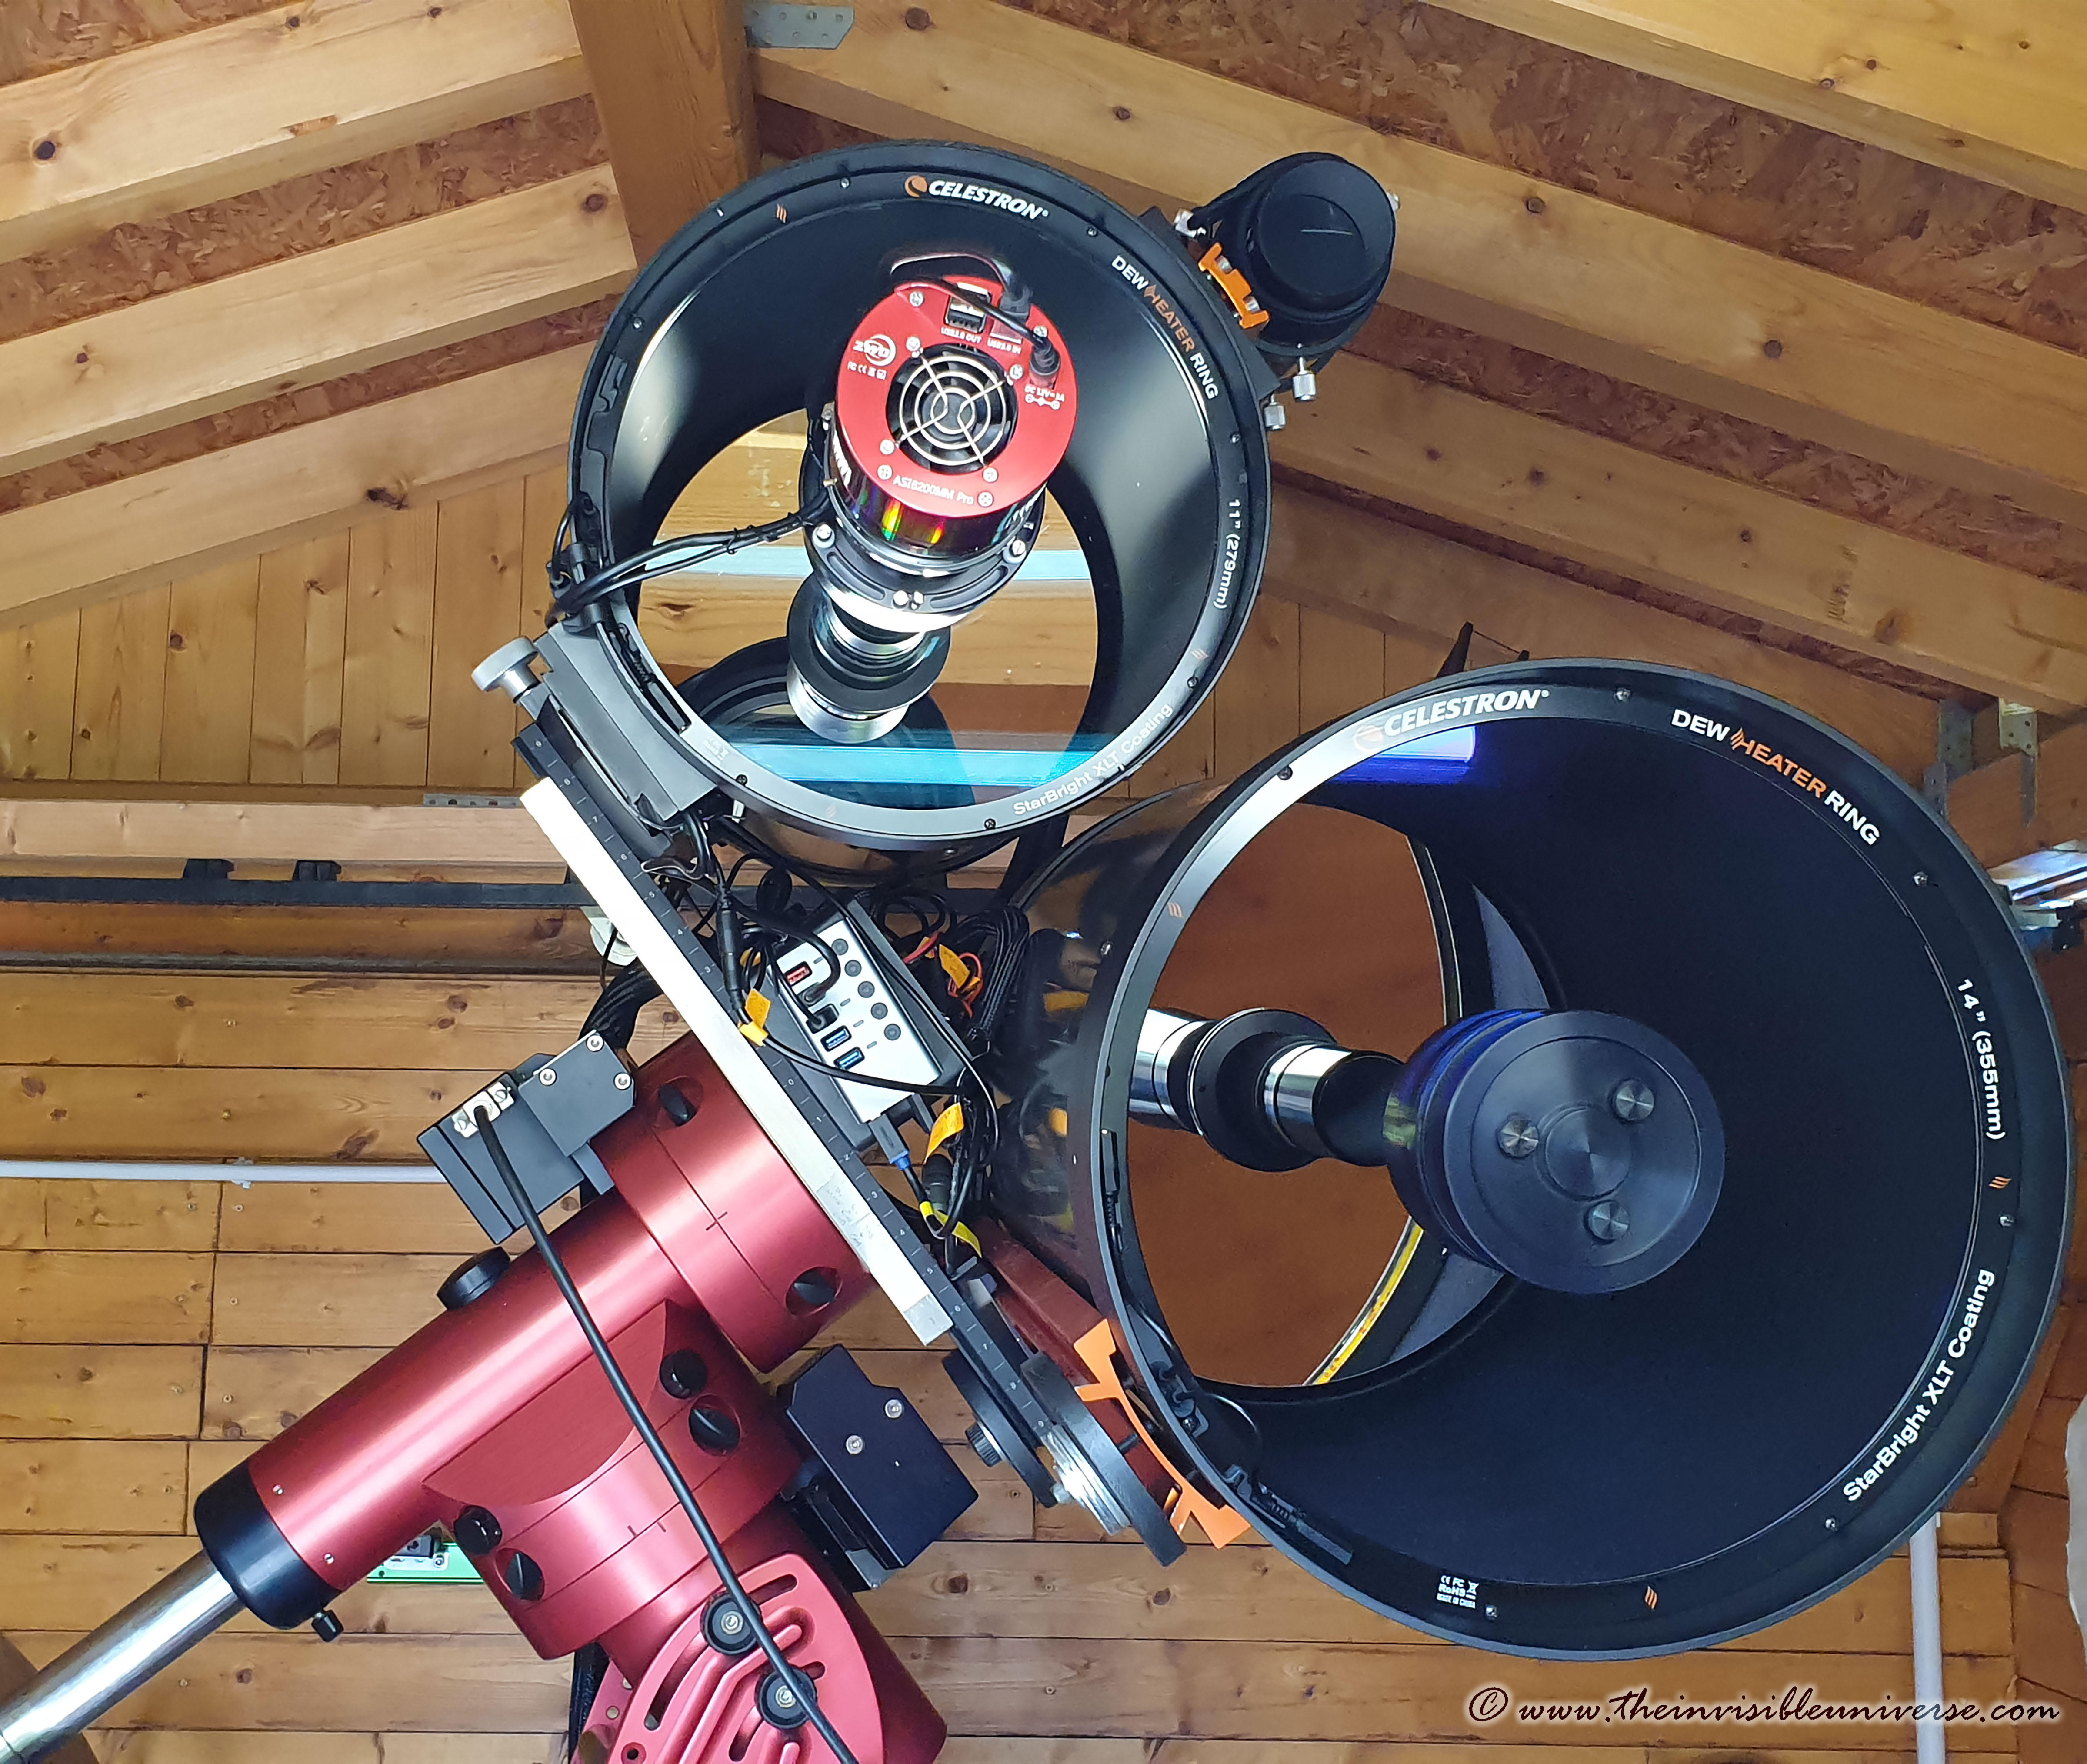
T-1100 Astrograph: Triple 11" Celestron Astrograph on the 10micron GM3000HPS mount
To fully leverage the 100kg load capacity of the GM3000 I built a stand-off between the two RASAs to get a third big telescope mounted. Currently this is my Celestron C11 with the Starizona Hyperstar v4. So I do have three fast f2 astrographs with two monochrome and one color camera, that are pointed to the same spot in the sky. The construction is rock-solid and the unguided performace of the GM3000 mount is not hampered.
Thus I can collect three times the data per night compared to only one telescope. And I do not to have to change the filters on the RASAs in the middle of the night. I can image in parallel with my ASI6200MM and the ASI2600MM, both equipped with 2" Baader Highspeed monochrome filters in the Baader Filter Changer. I can image with all three telescope in parallel unguided! I use three instances of the astro software N.I.N.A. to collect data with three CMOS cameras.
In parallel to this, the ASI2600MC color camera is mounted on the Celestron C11 Hyperstar to collect color data in parallel.I will exchange the C11 against a third RASA11 as soon as I get my hands on a reasonably priced used RASA11.
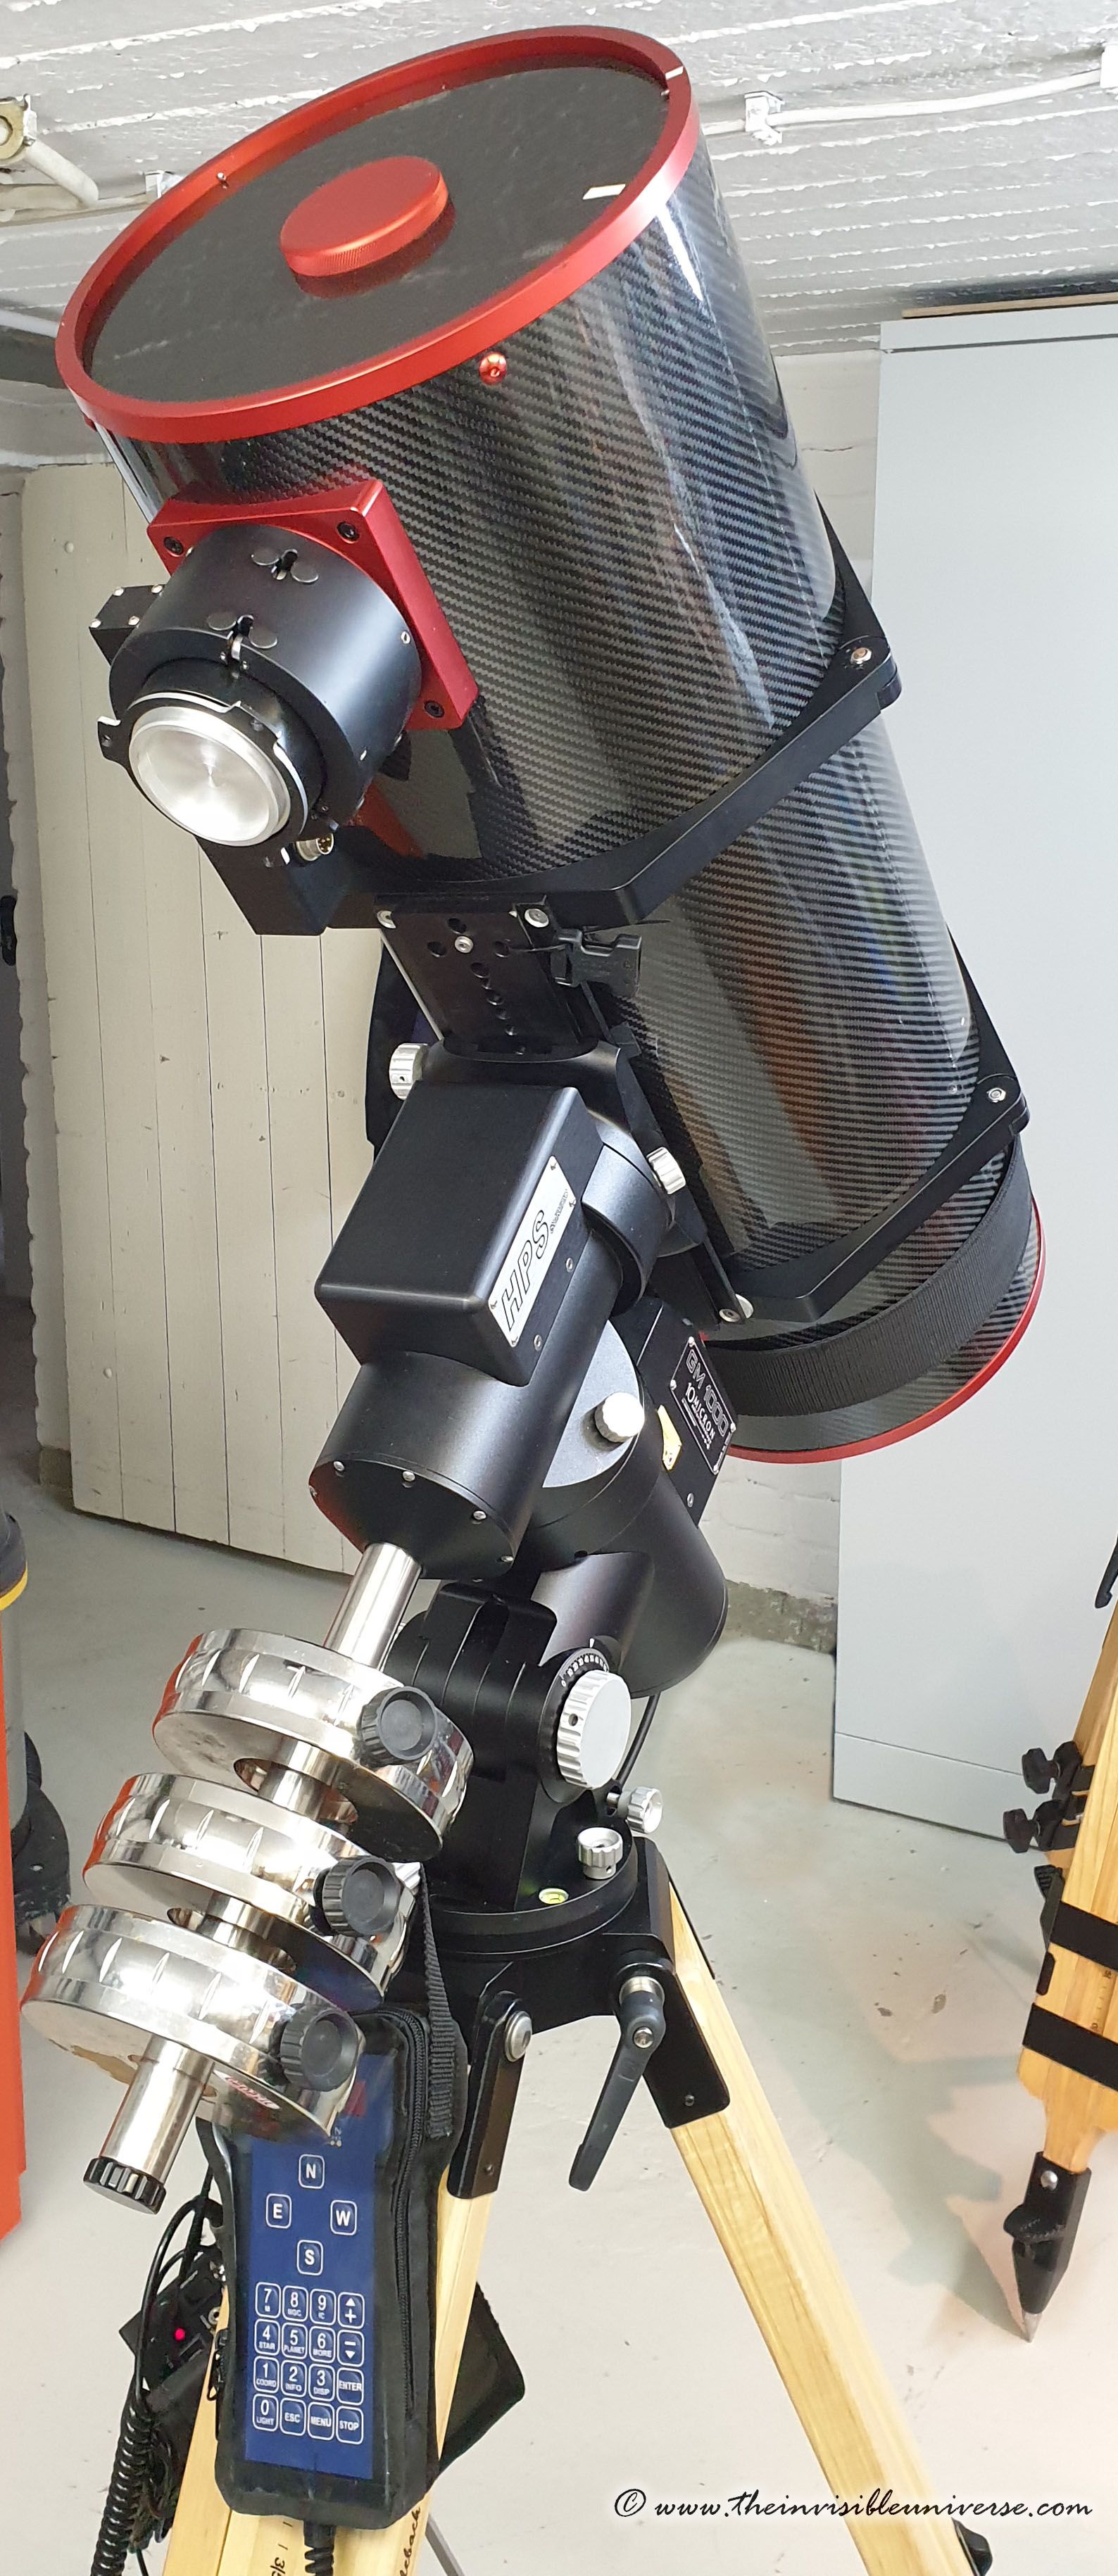
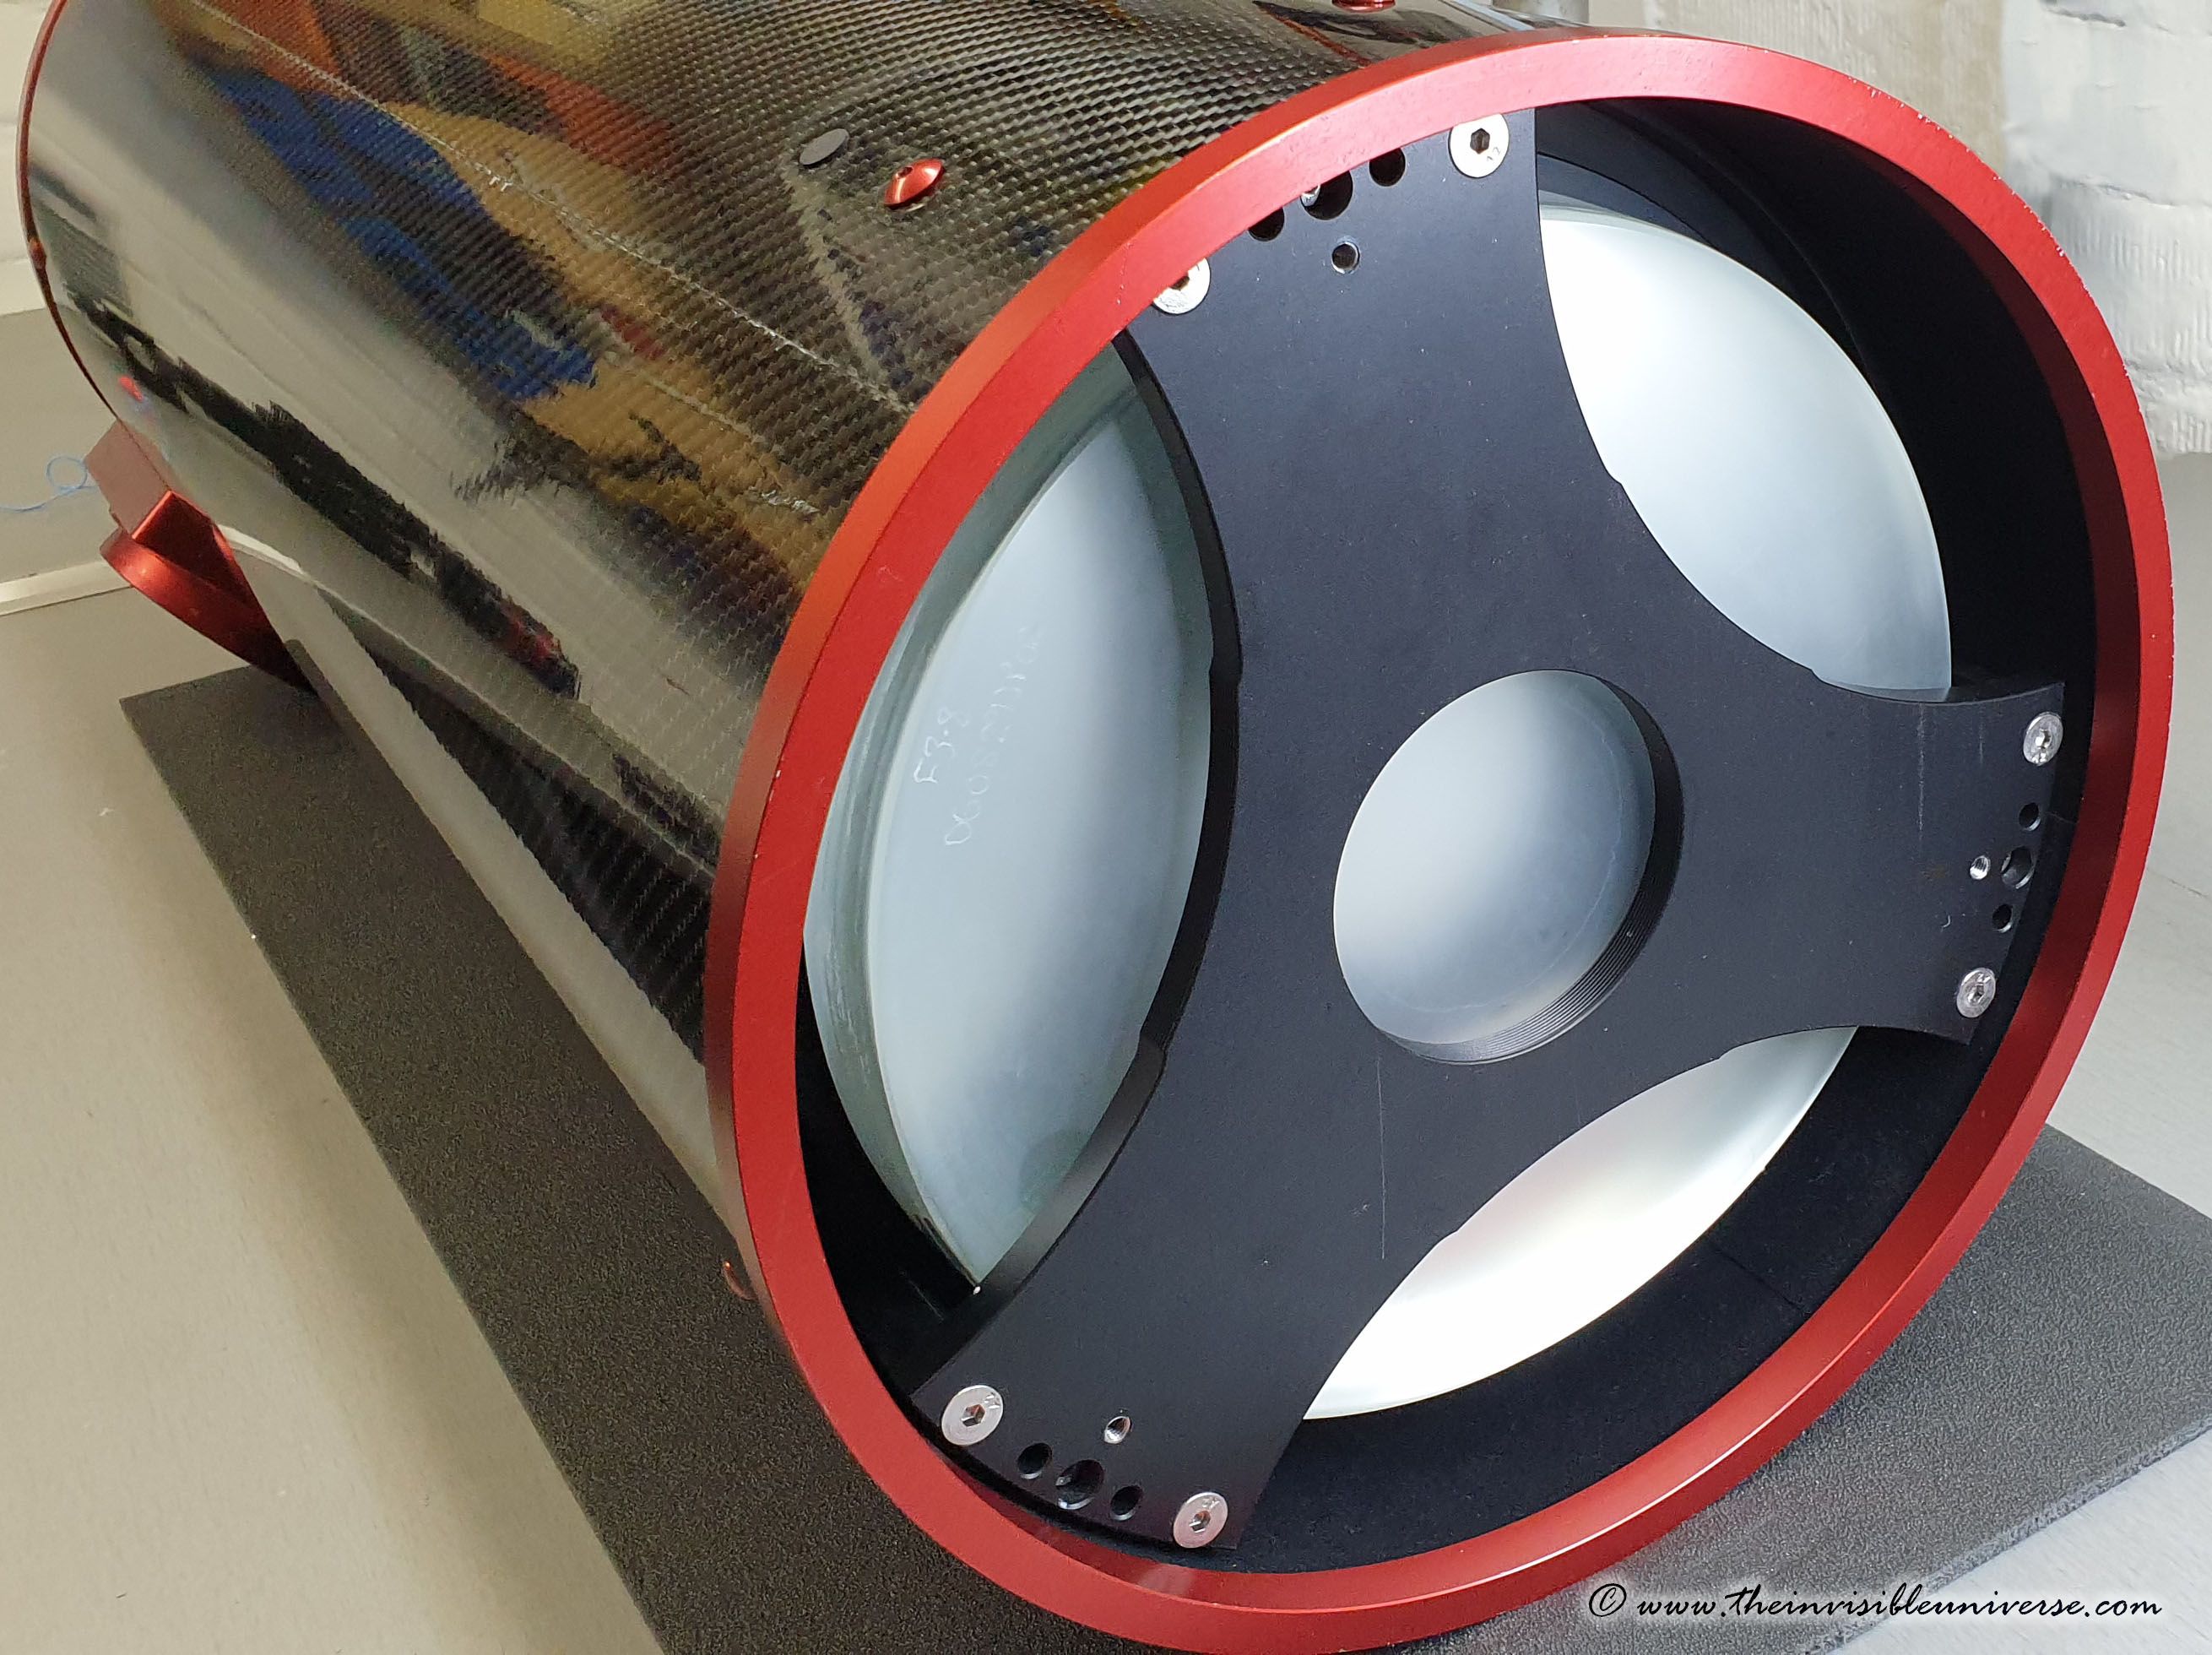
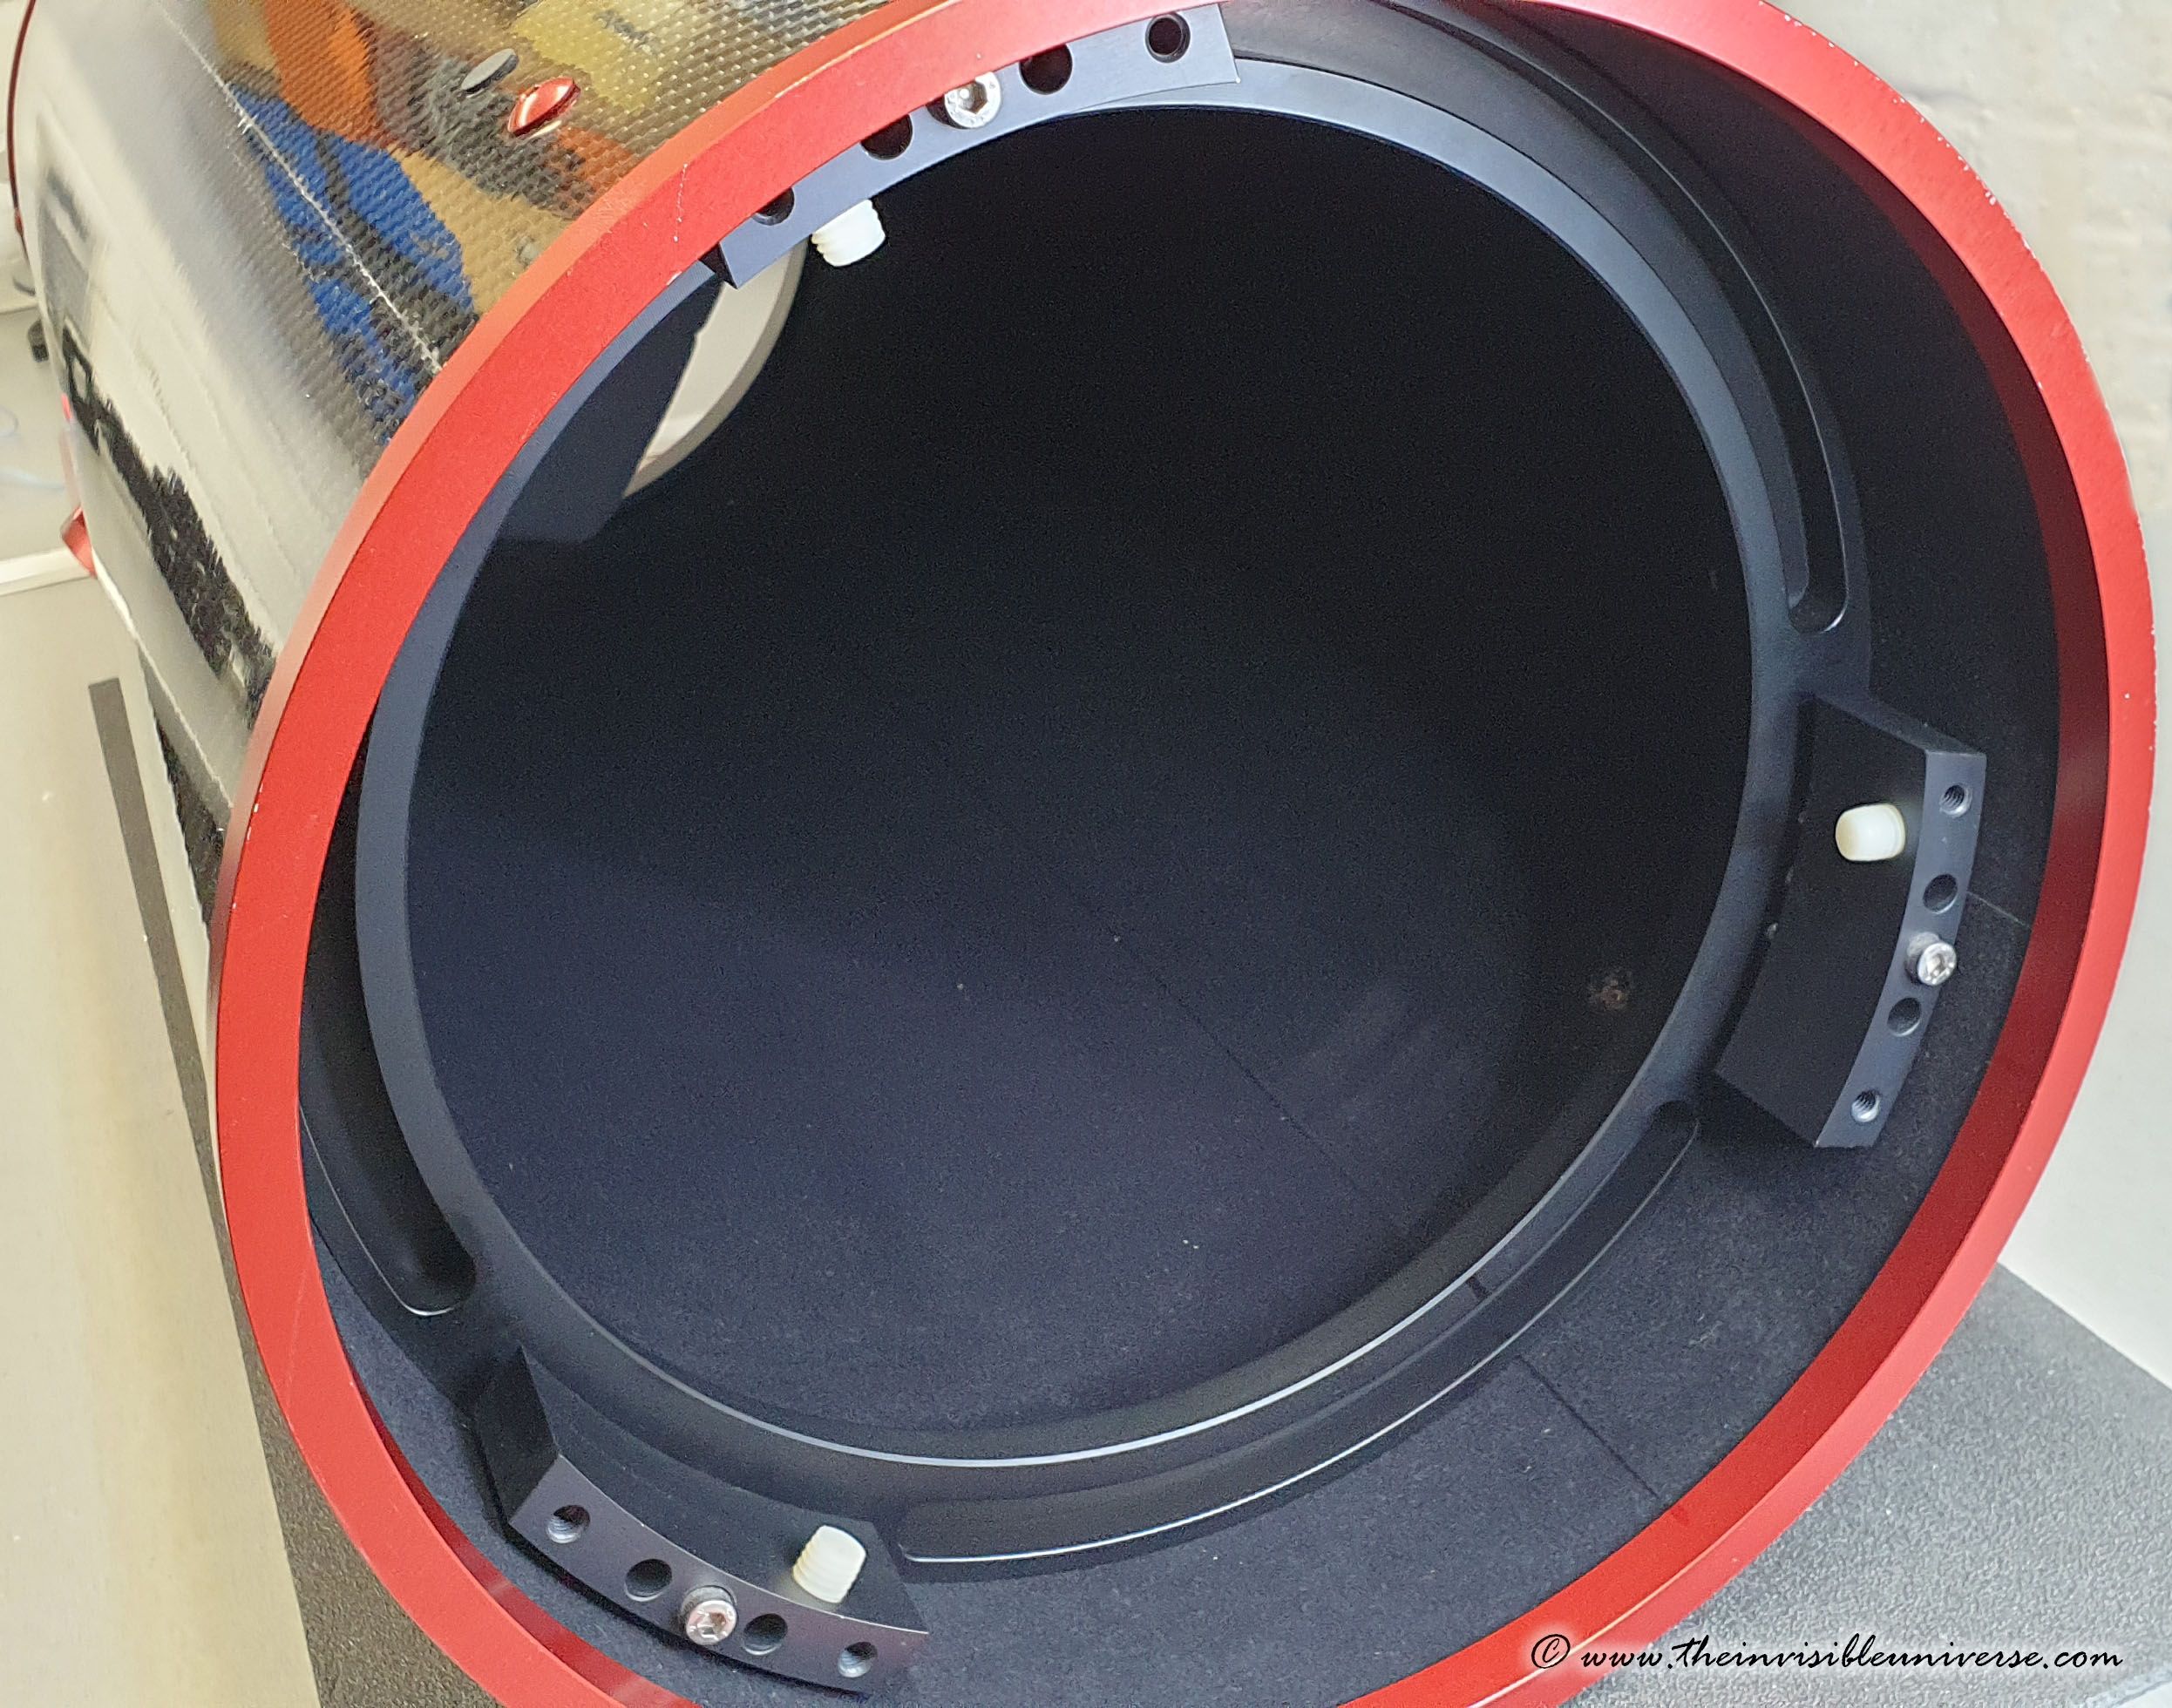
Astrosysteme Austria ASA 10N f3.6 Newton Astrograph
The ASA 10N is probably the best medium-sized amateur astrograph that is unfortunately no longer available - what a pity!
What are the secrets of this telescope:
1. premium optics
2. Large heavy-duty motorized 3 inch focuser
3. High quality 3" Newton corrector
4. Very rigid carbon fiber sandwich tube
The astrograph is capable of illuminating the full-frame format without significant vignetting and with very good star quality across the field.
I have recently upgraded the astrograph and exchanged the original ASA 3" Wynne 0,95x Corrector with a 1.0x Riccardi 3" Newton Corrector. The Riccardi Design is much shorter and thus delivers an image with even less vignetting in the corners of the full frame field.
Here is a review of the ASA 10N Astrograph.
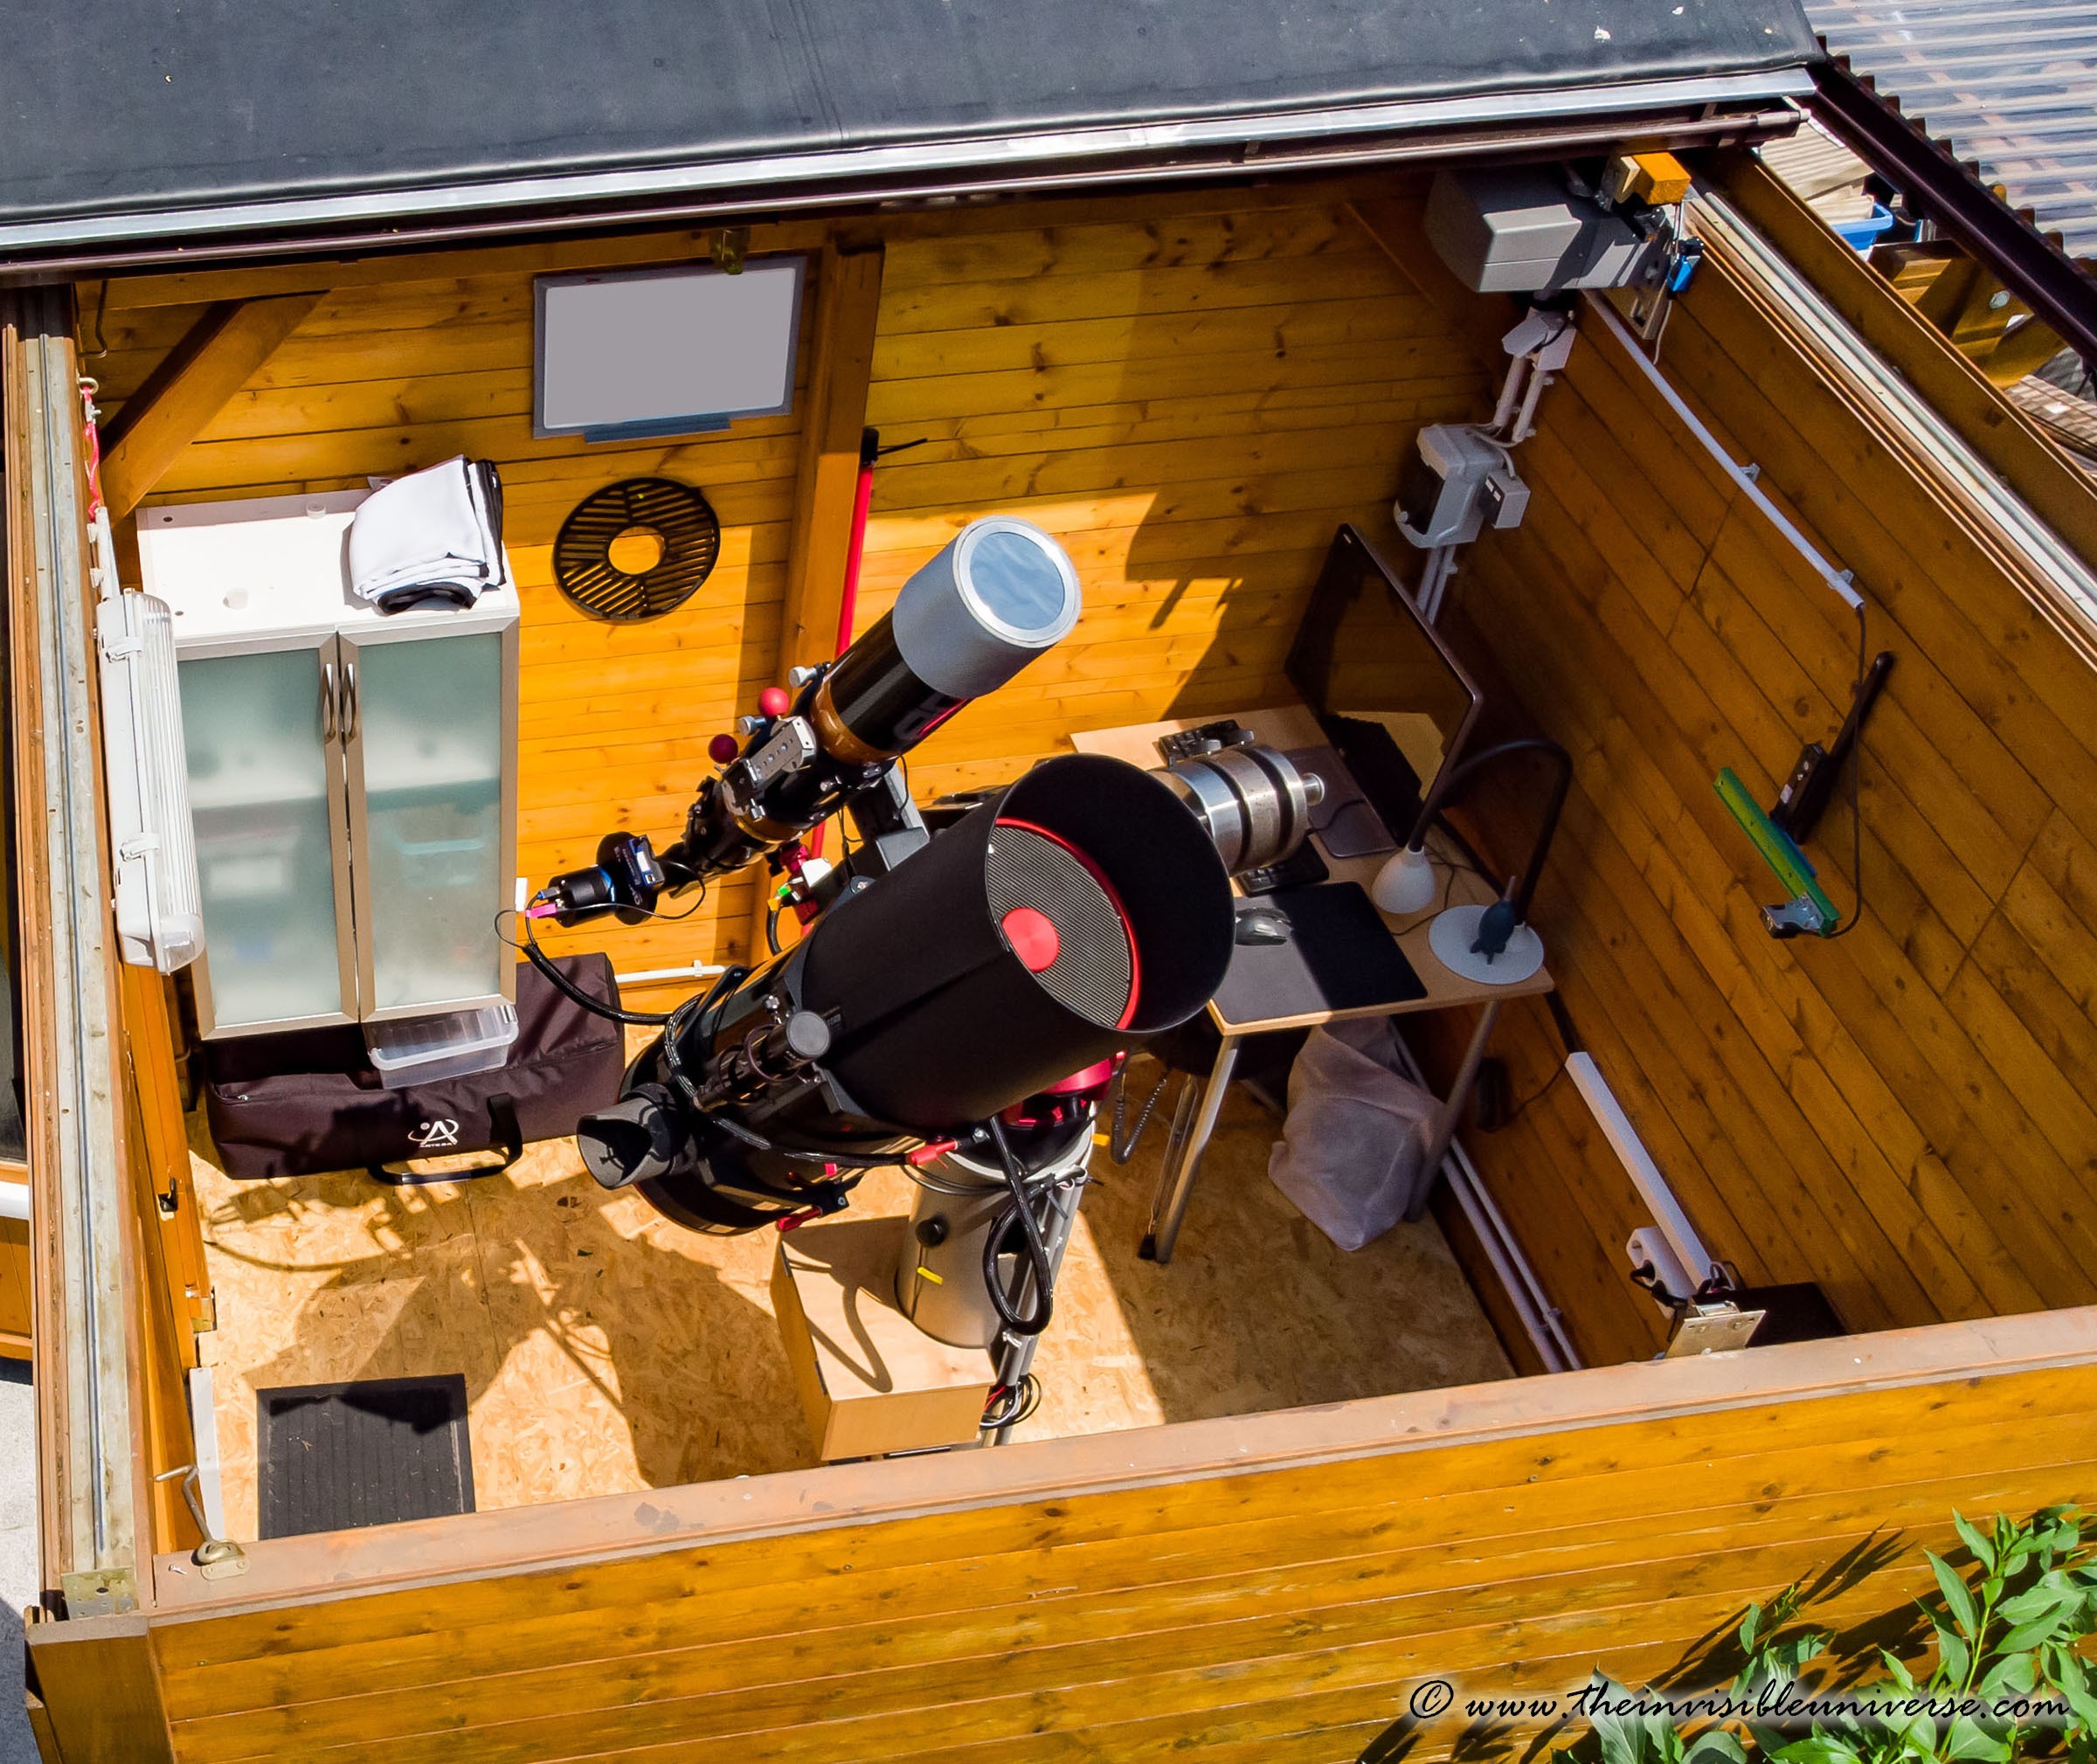
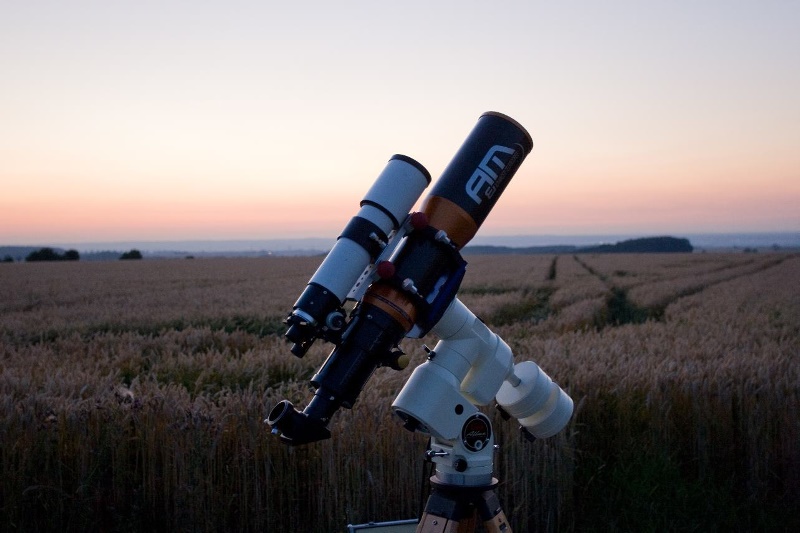
A&M Officiane Stellare Triplet Apochromatic Refractor TMB 115/805
What happes if you put one of the best triplet APO lenses, the TMB 115/805 mm f7 Super Triplet APO, made by LZOS, into a high end Carbon Fiber Tube and attach the best available 3.5" focuser, the Feathertouch made by Starlight instruments? Well, its the A&M (now Officinane Stellare) TMB 115/805 Super triplet APO. Together with the large 3" Riccardi 0.75x APO Reducer it delivers a large full-frame corrected field of view with very little vignetting and 600mm f5.25. It is not only looking nice, it also delivers nice pictures!

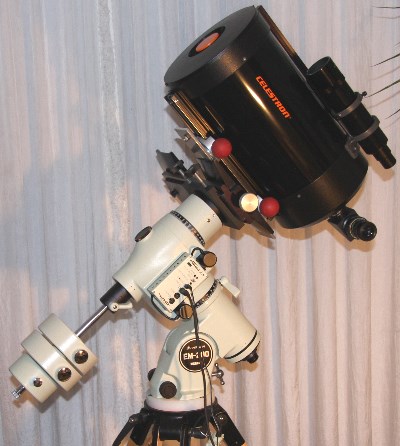
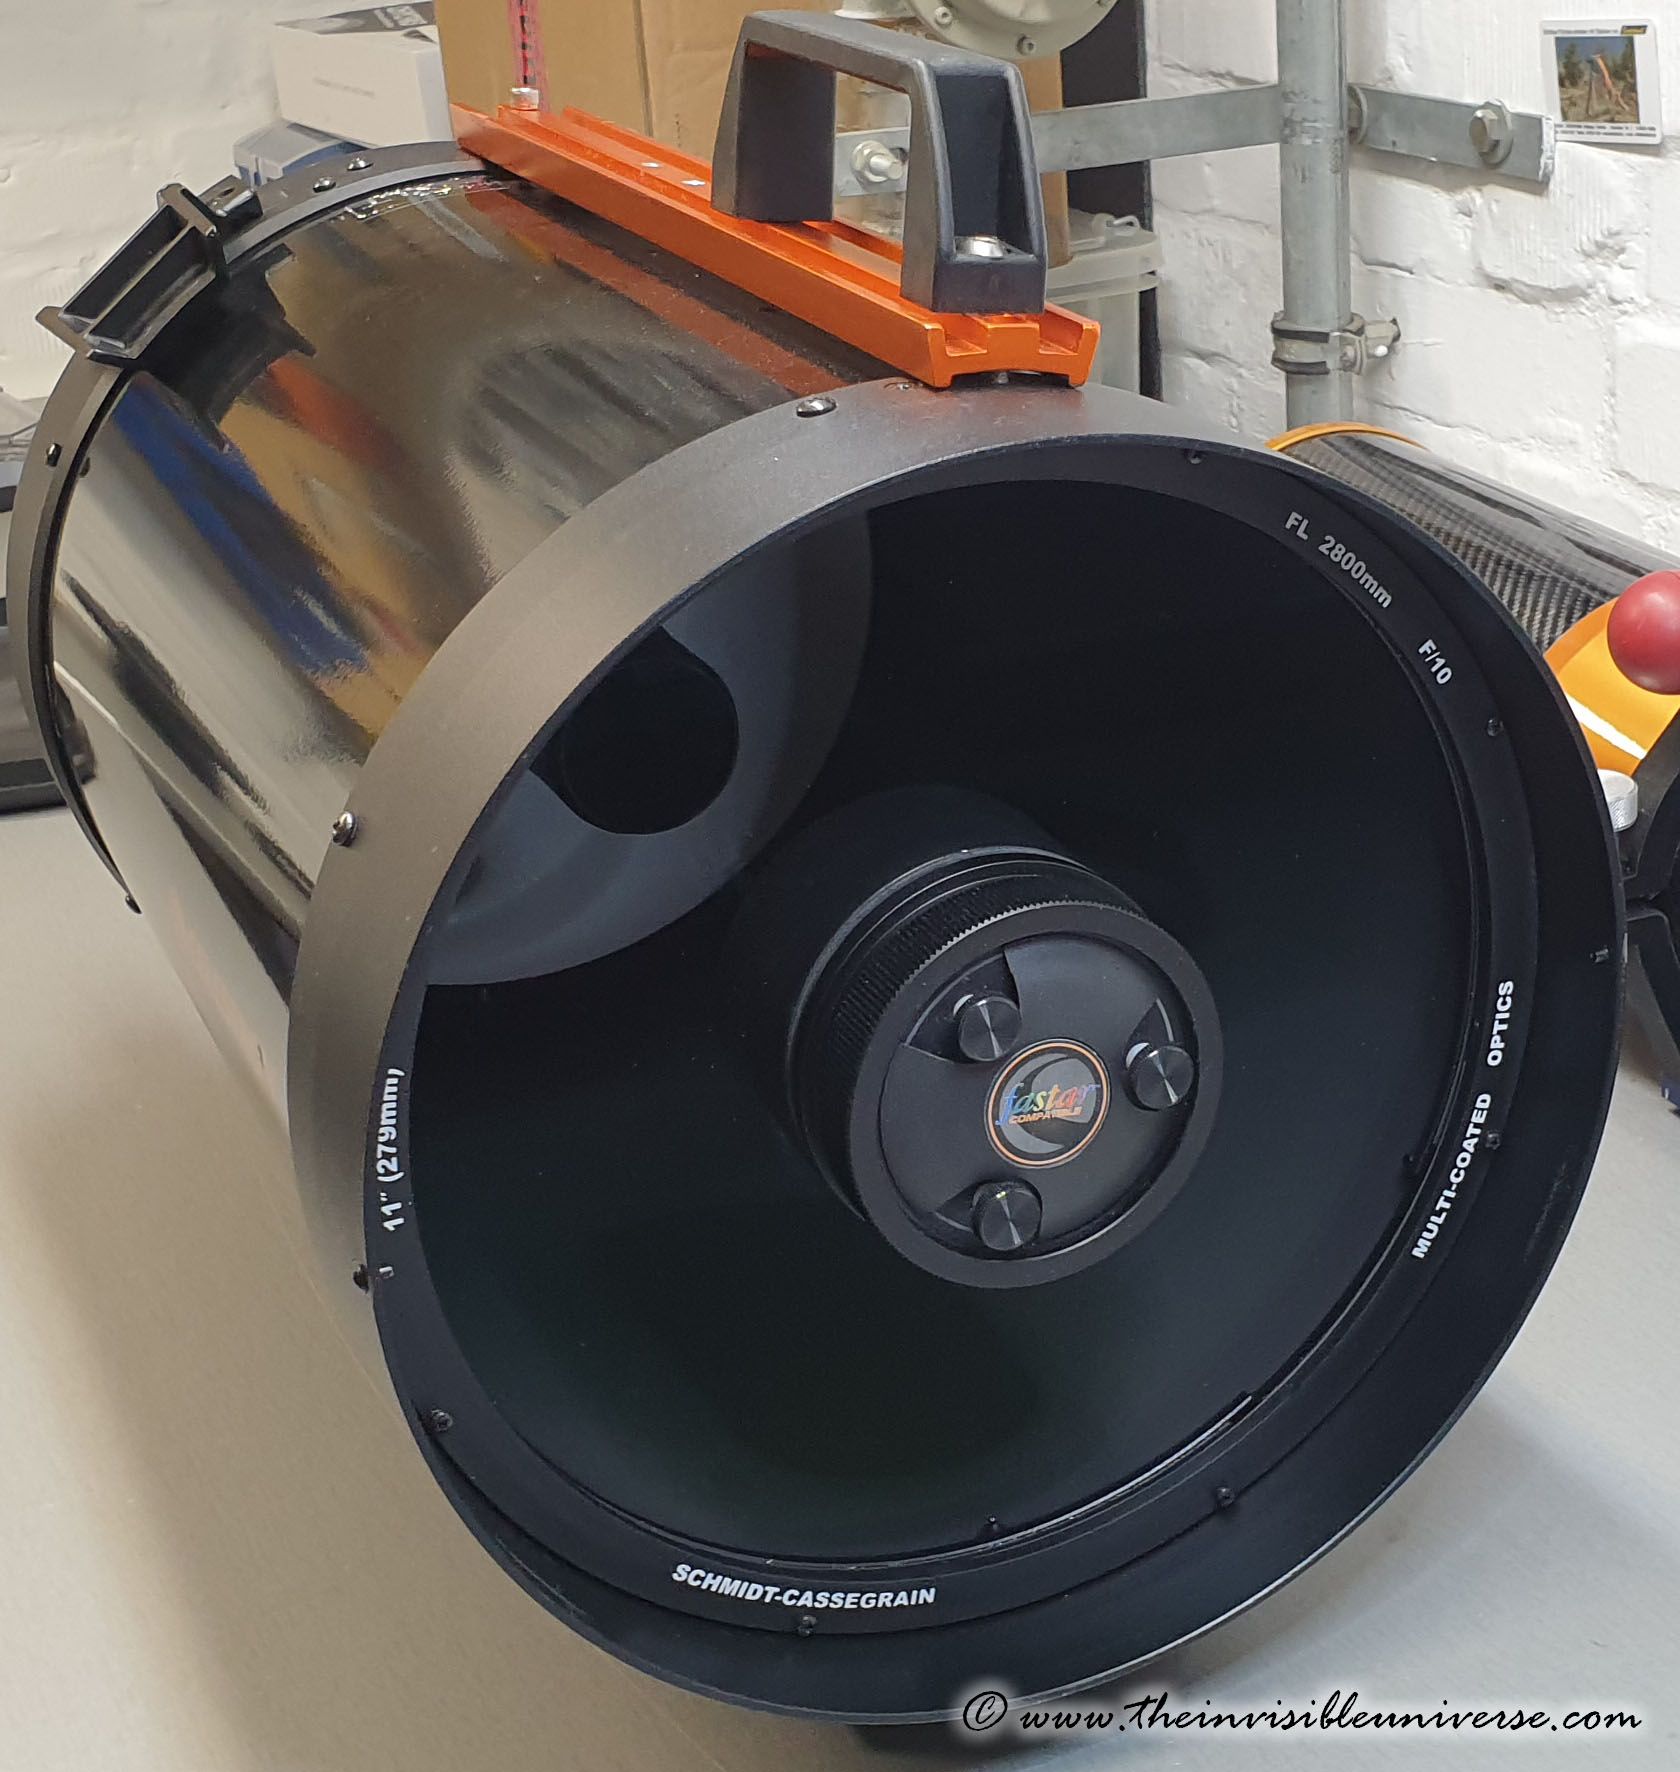
Celestron C11XLT
The Celestron C11 XLT with 2800mm focal length and f10 is one of the classic telescopes of our time. This is already the second C11 that I own. The first one was crap. This second one is quite good. I was able to catch some nice Mars pictures with it in 2020 and Jupiter and Saturn in 2021. However, Schmidt-Cassegrains have their disadvantages when it comes to Deep Sky Imaging. A lack of usable field flatteners and reducers for full-format, and the mirror flop are some of the issues with SCTs.
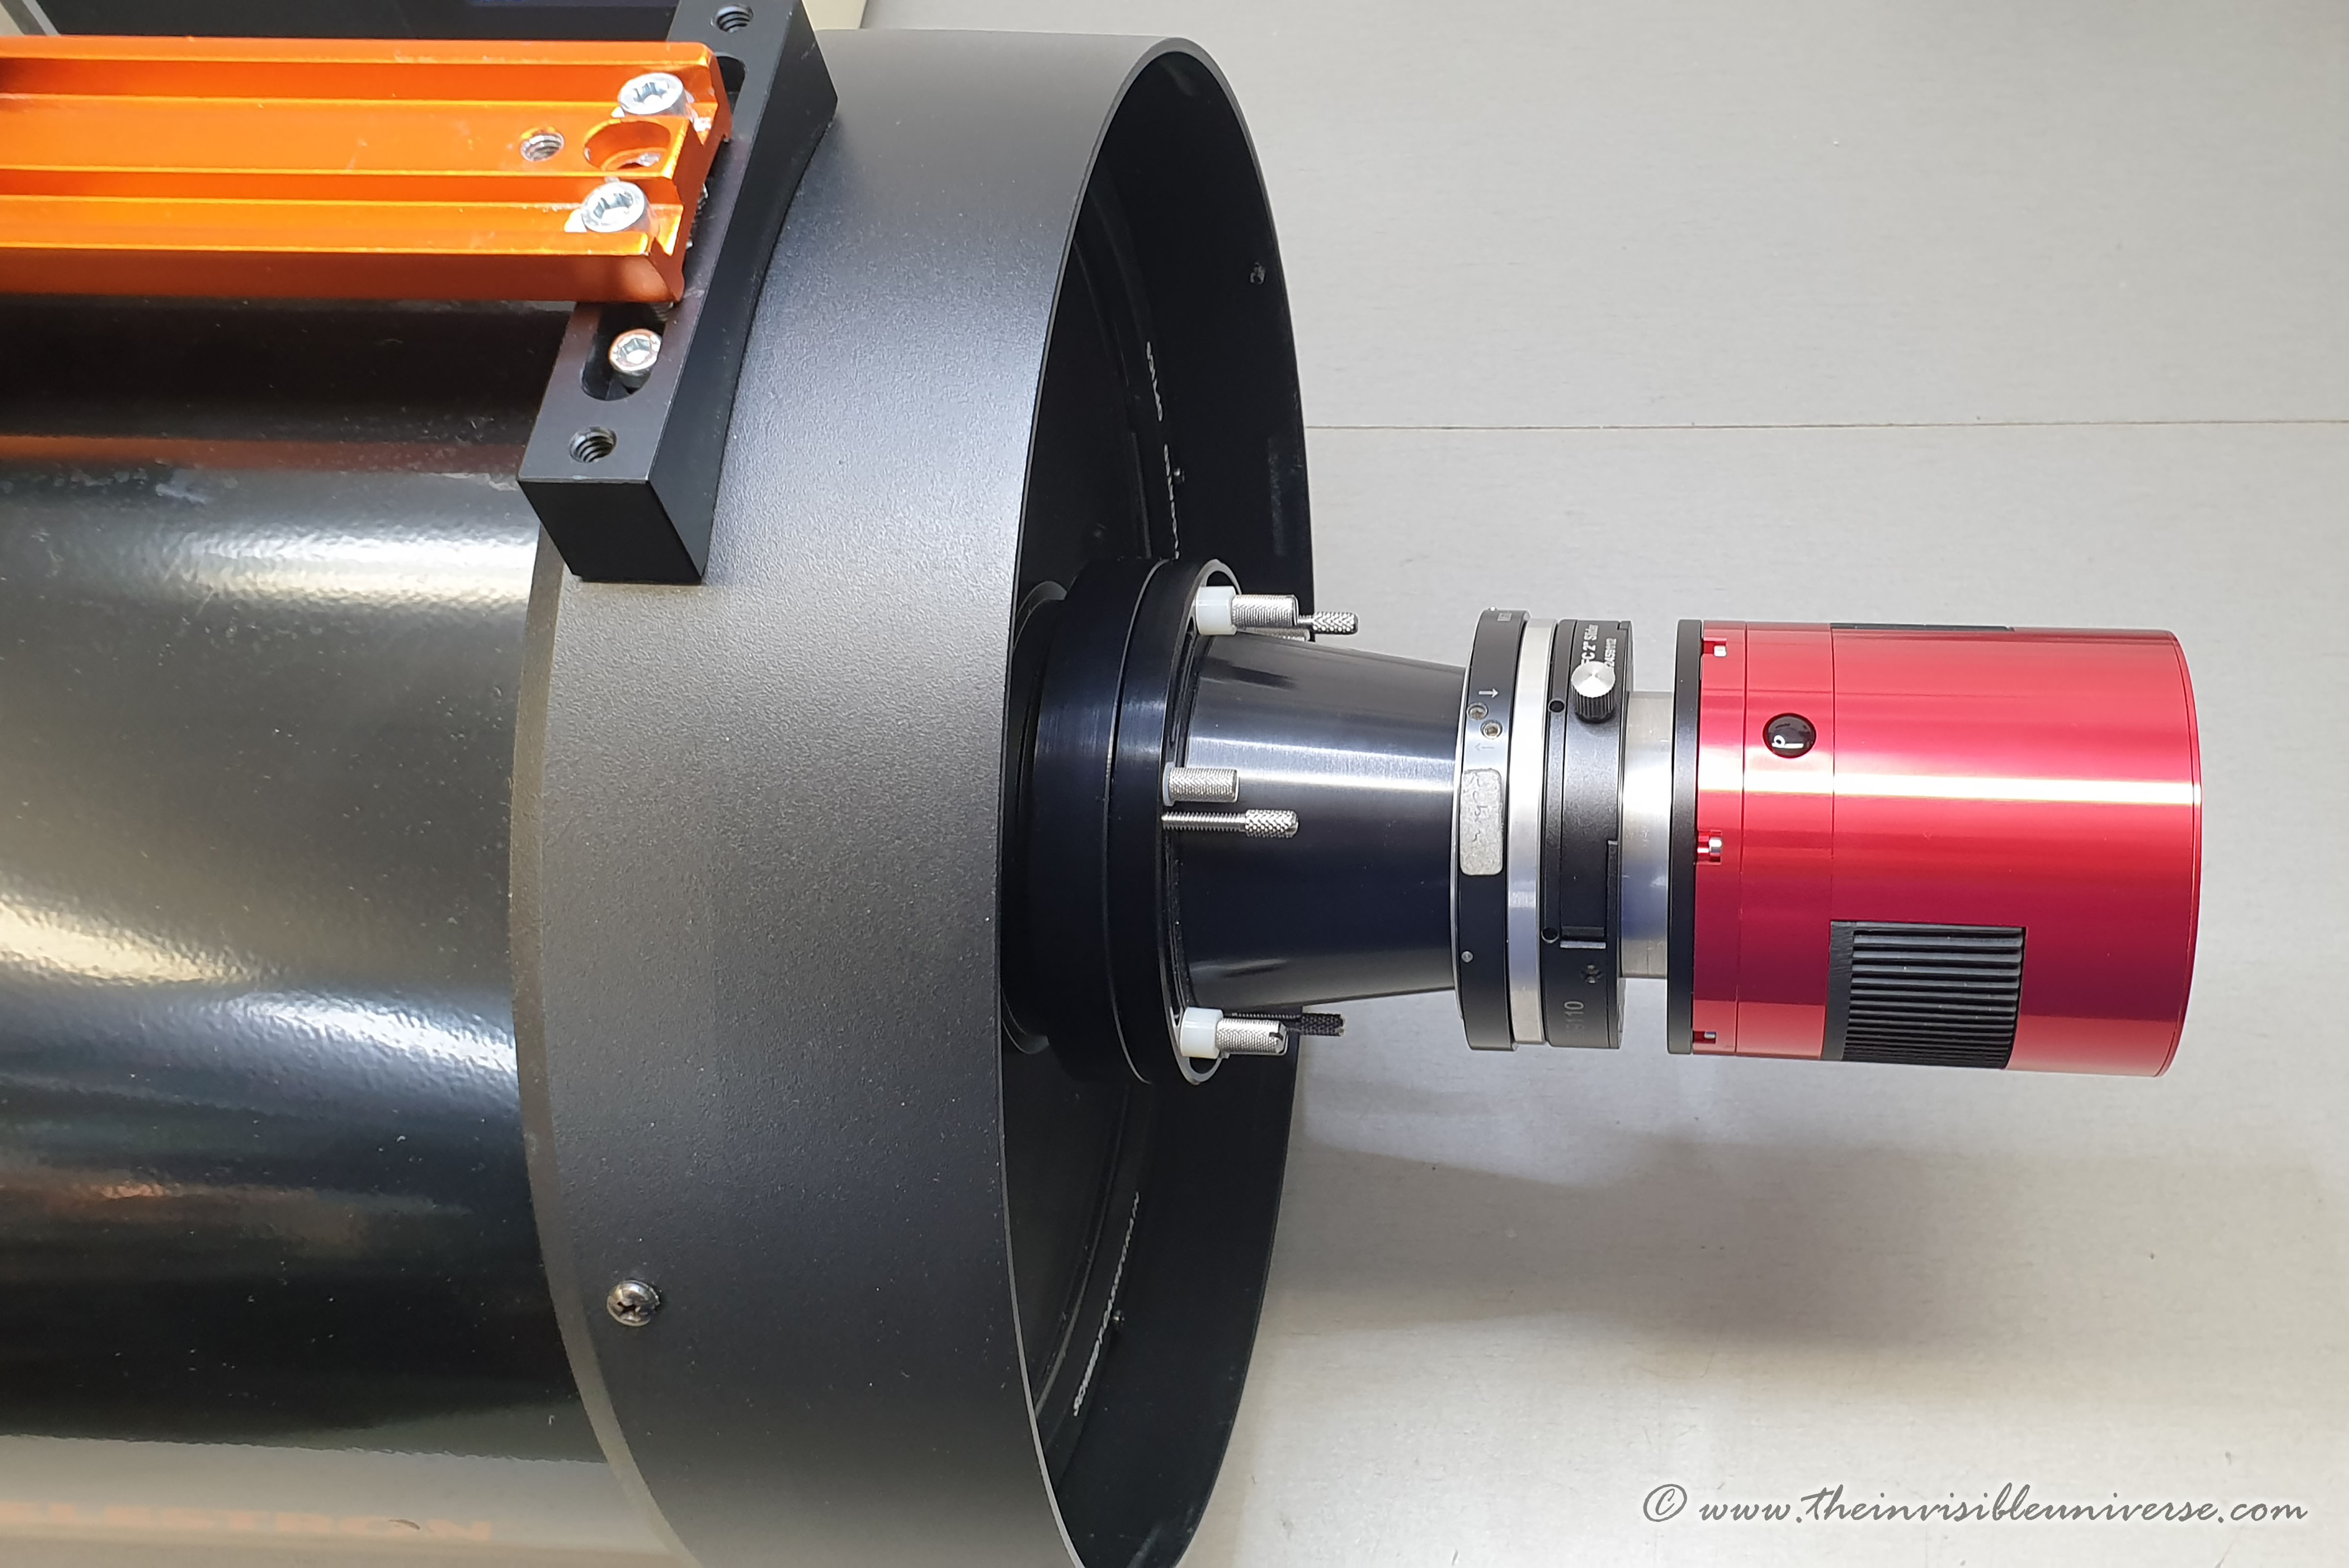
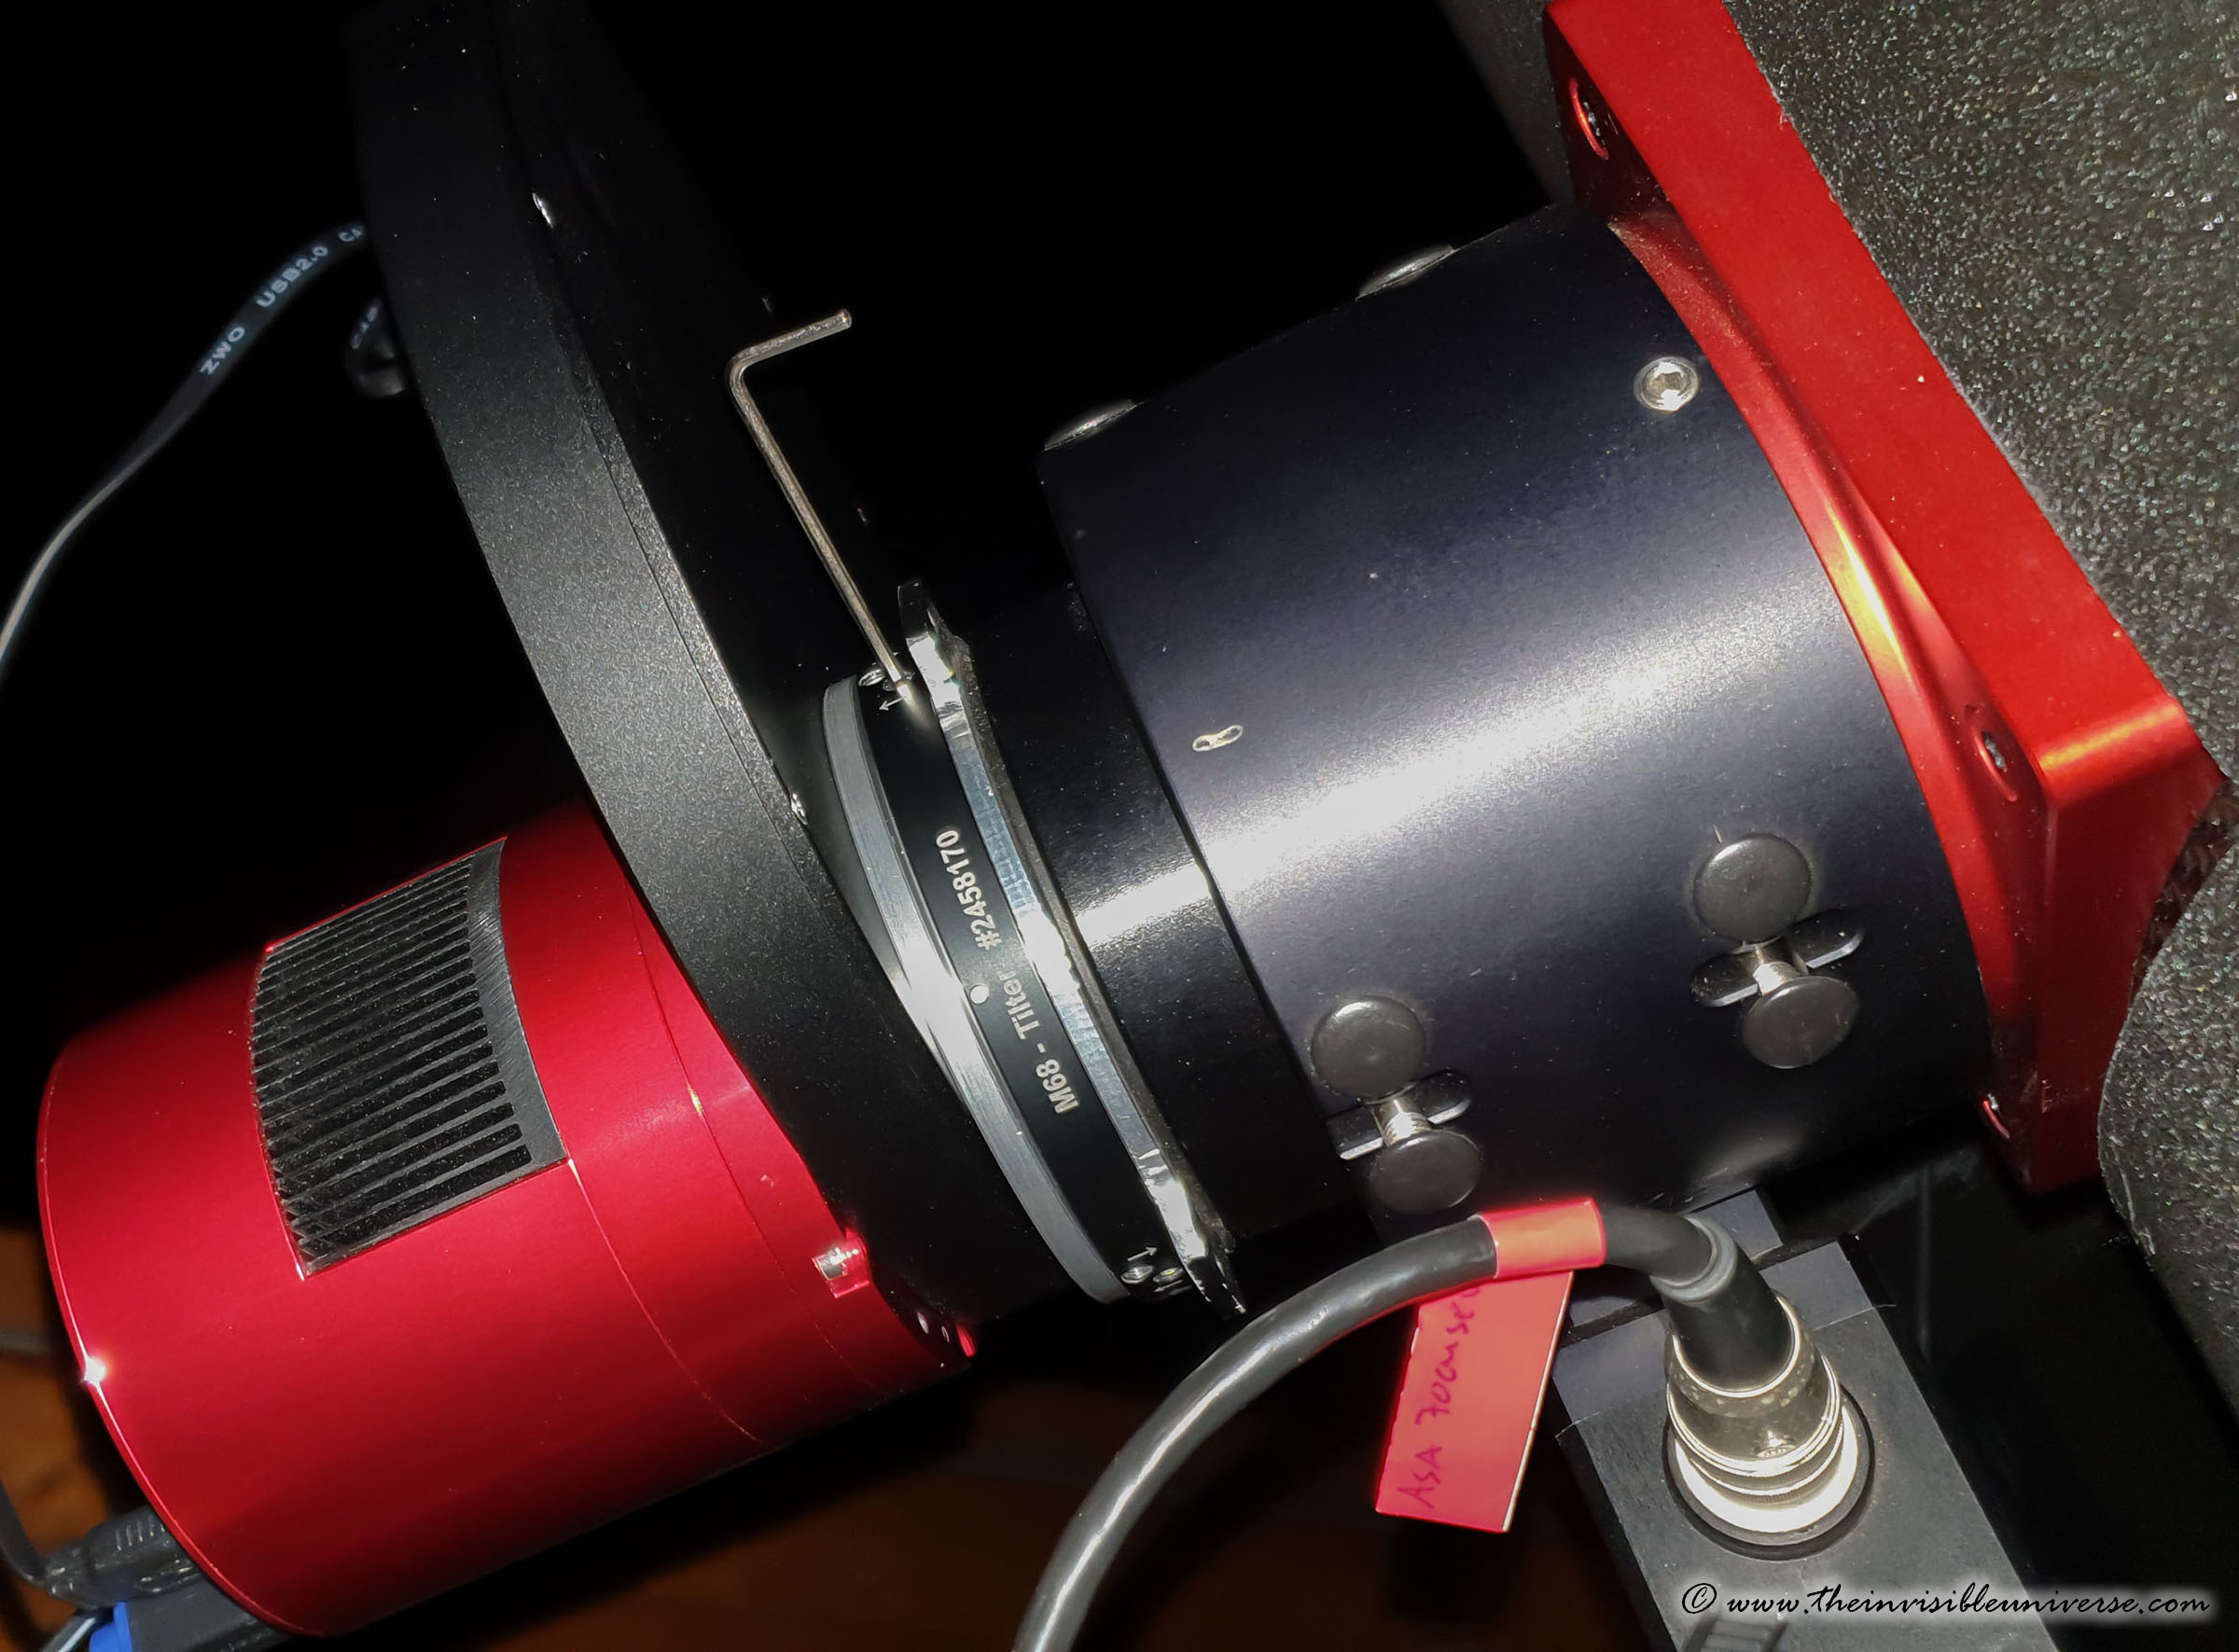
I also have a Starizona Hyperstar C11 version 4 available. I have machined a custom fit to the ASI6200MM plus Baader UFC Filter Changer and the Baader M68 Tilter which is essential to correct the sensor tilt.
I have installed a the Celestron Dew Heater Ring to the Schmidt Plate, as this is probably the best solution for preventing dew. With the dew Heater Ring the C11 can even be used without a Dew shield in normal nights. However, the Dew Heater Ring must be switched off during planetary imaging as it degrades image quality significantly due to thermal air flow. With the dew heater switched on the image of a planet becomes unusable.
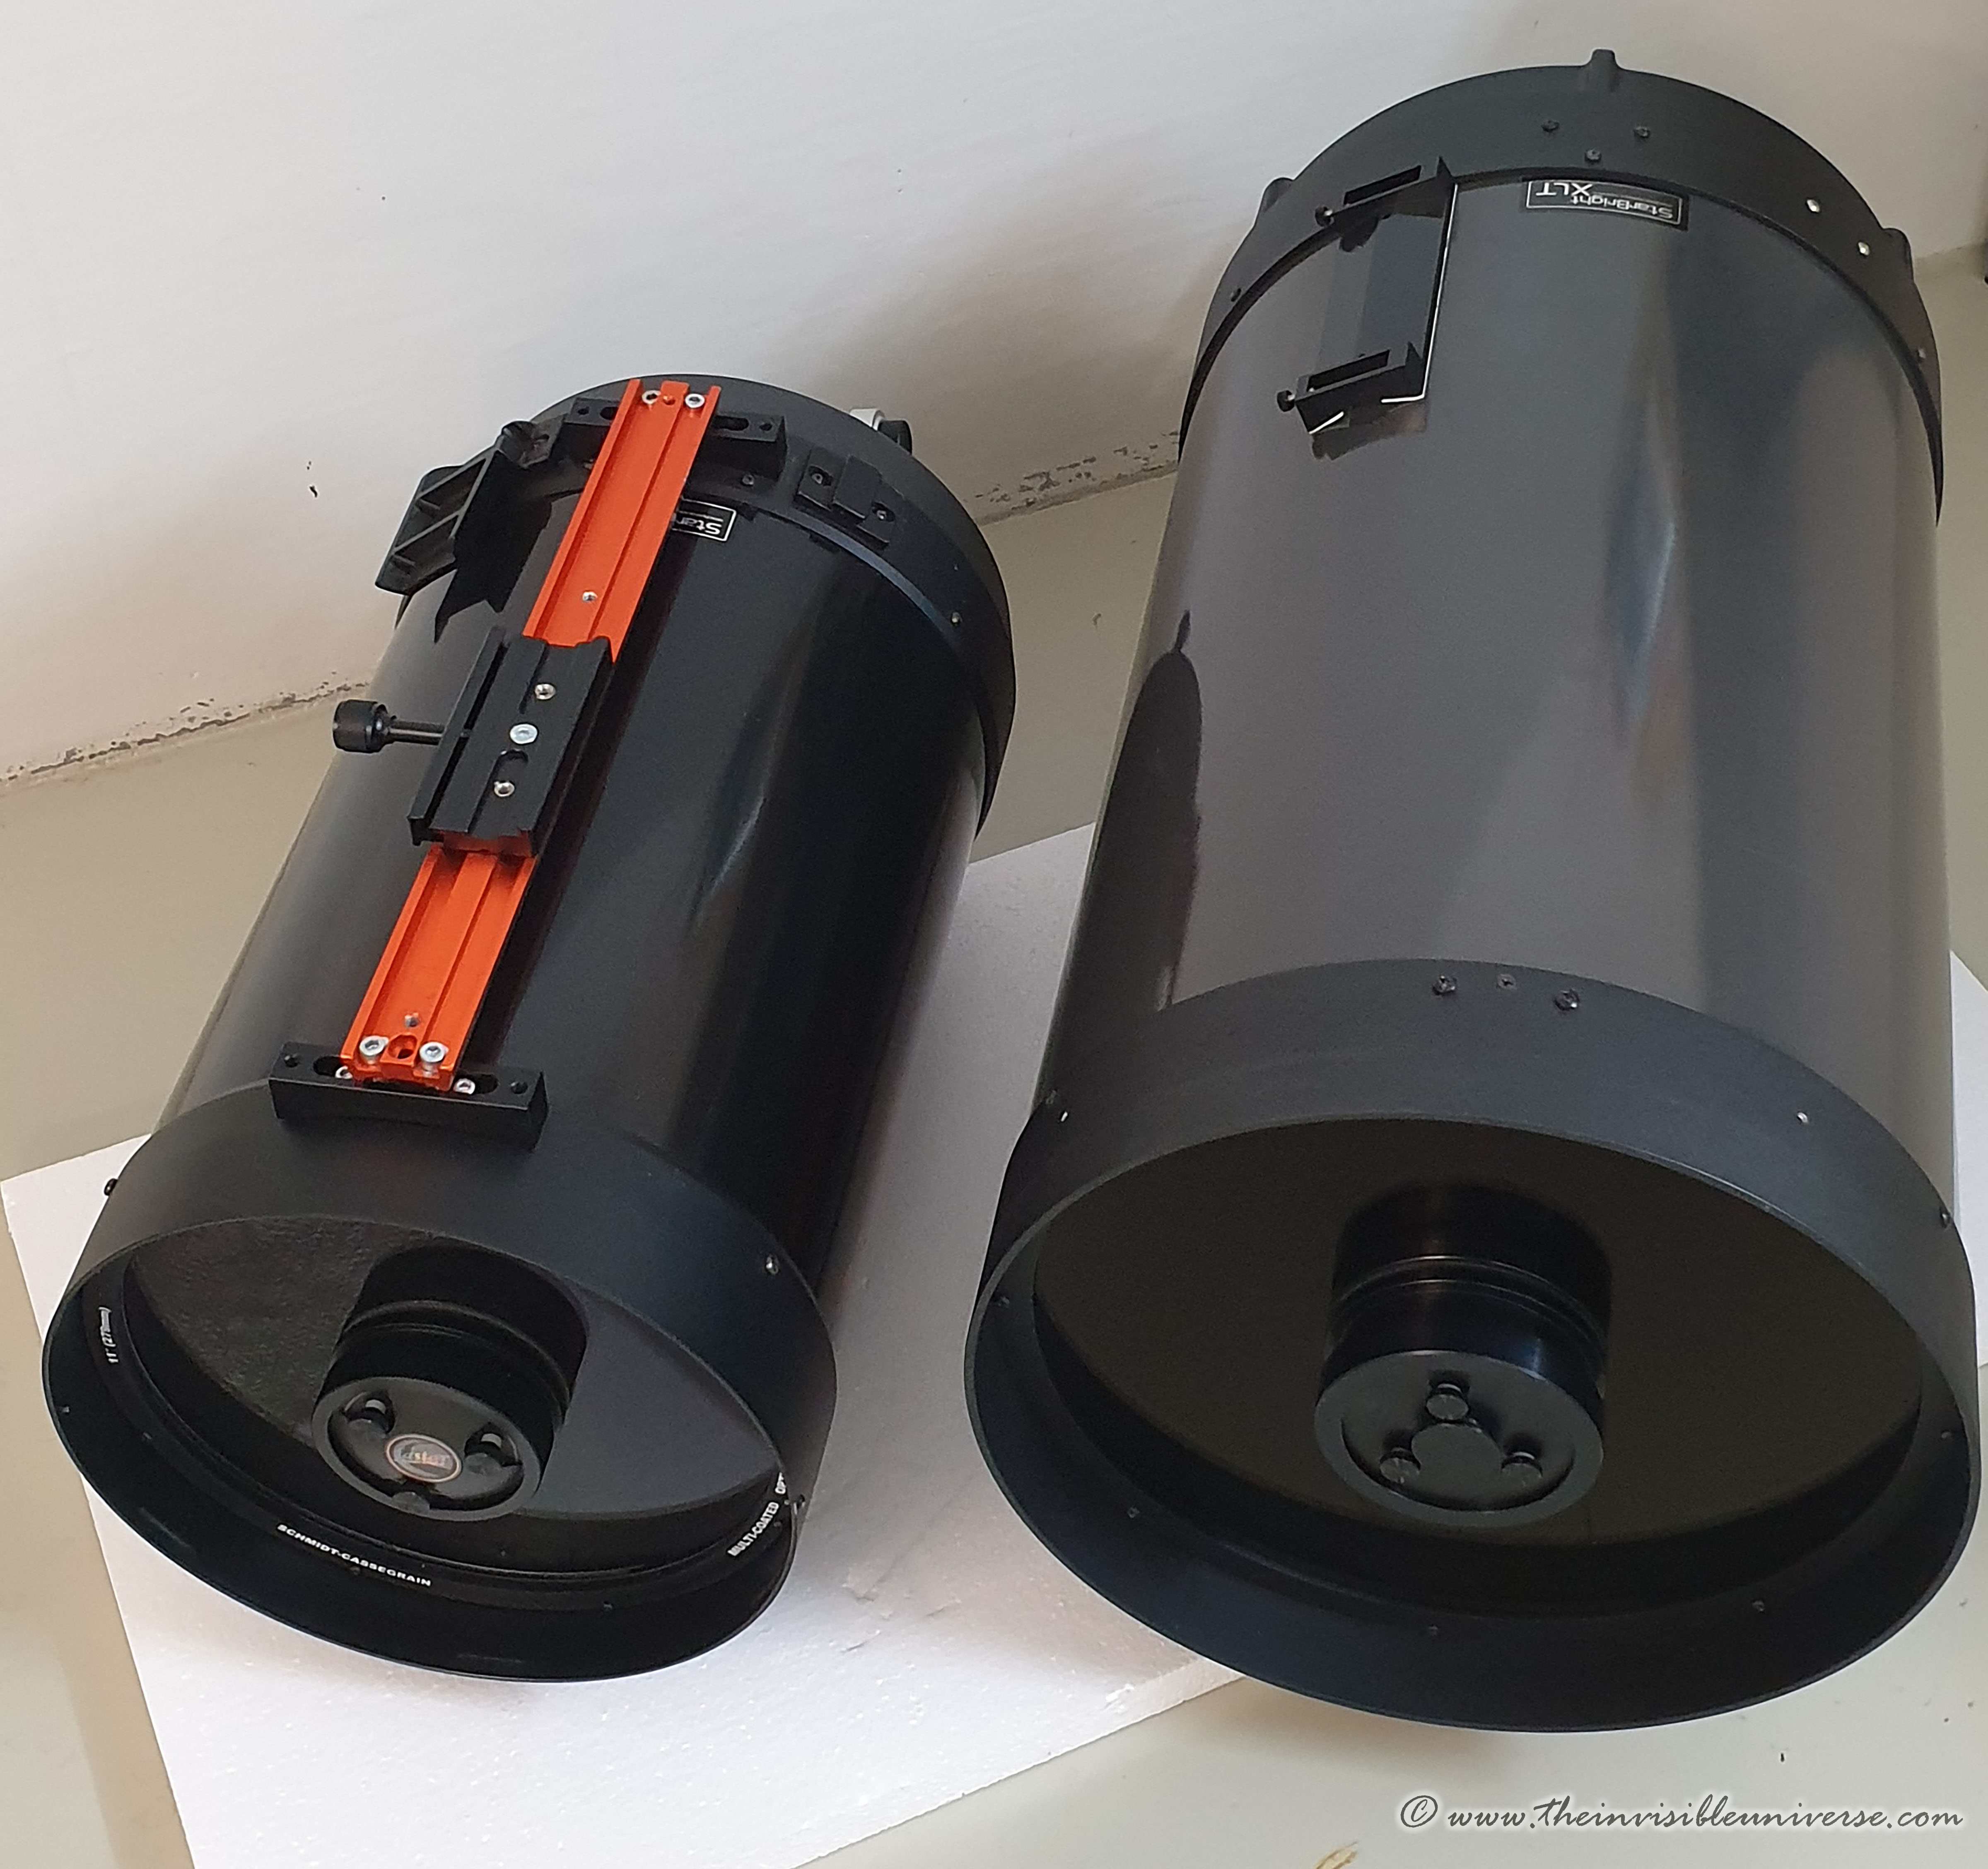
Celestron C14 XLT
Just by chance I got my hands on a reasonably priced Celestron C14 from the early 2000s. My location actually does not have good seeing most of the time, so that the better resolution of the C14 will probably not come into play for planetary imaging. But the better light gathering performance could be an advantage for planetary work. A lack of usable field flatteners and reducers for full-format, and the mirror flop are some of the issues with SCTs.
The C14 dwarfs the C11, which is only 3 inches smaller, in volume and weight. It is a large, heavy telescope, and putting it on the mount is a gamble. The GM2000 QCI is now fully equipped with the C14 combined with the C11 and a Hyperstar system.
I have installed a the Celestron Dew Heater Ring to the Schmidt Plate, as this is probably the best solution for preventing dew - the C14 is very susceptible to dew, much more than the C11. However, the Dew Heater Ring must be switched off during planetary imaging as it degrades image quality significantly due to thermal air flow. With the dew heater switched on the image of a planet becomes unusable.
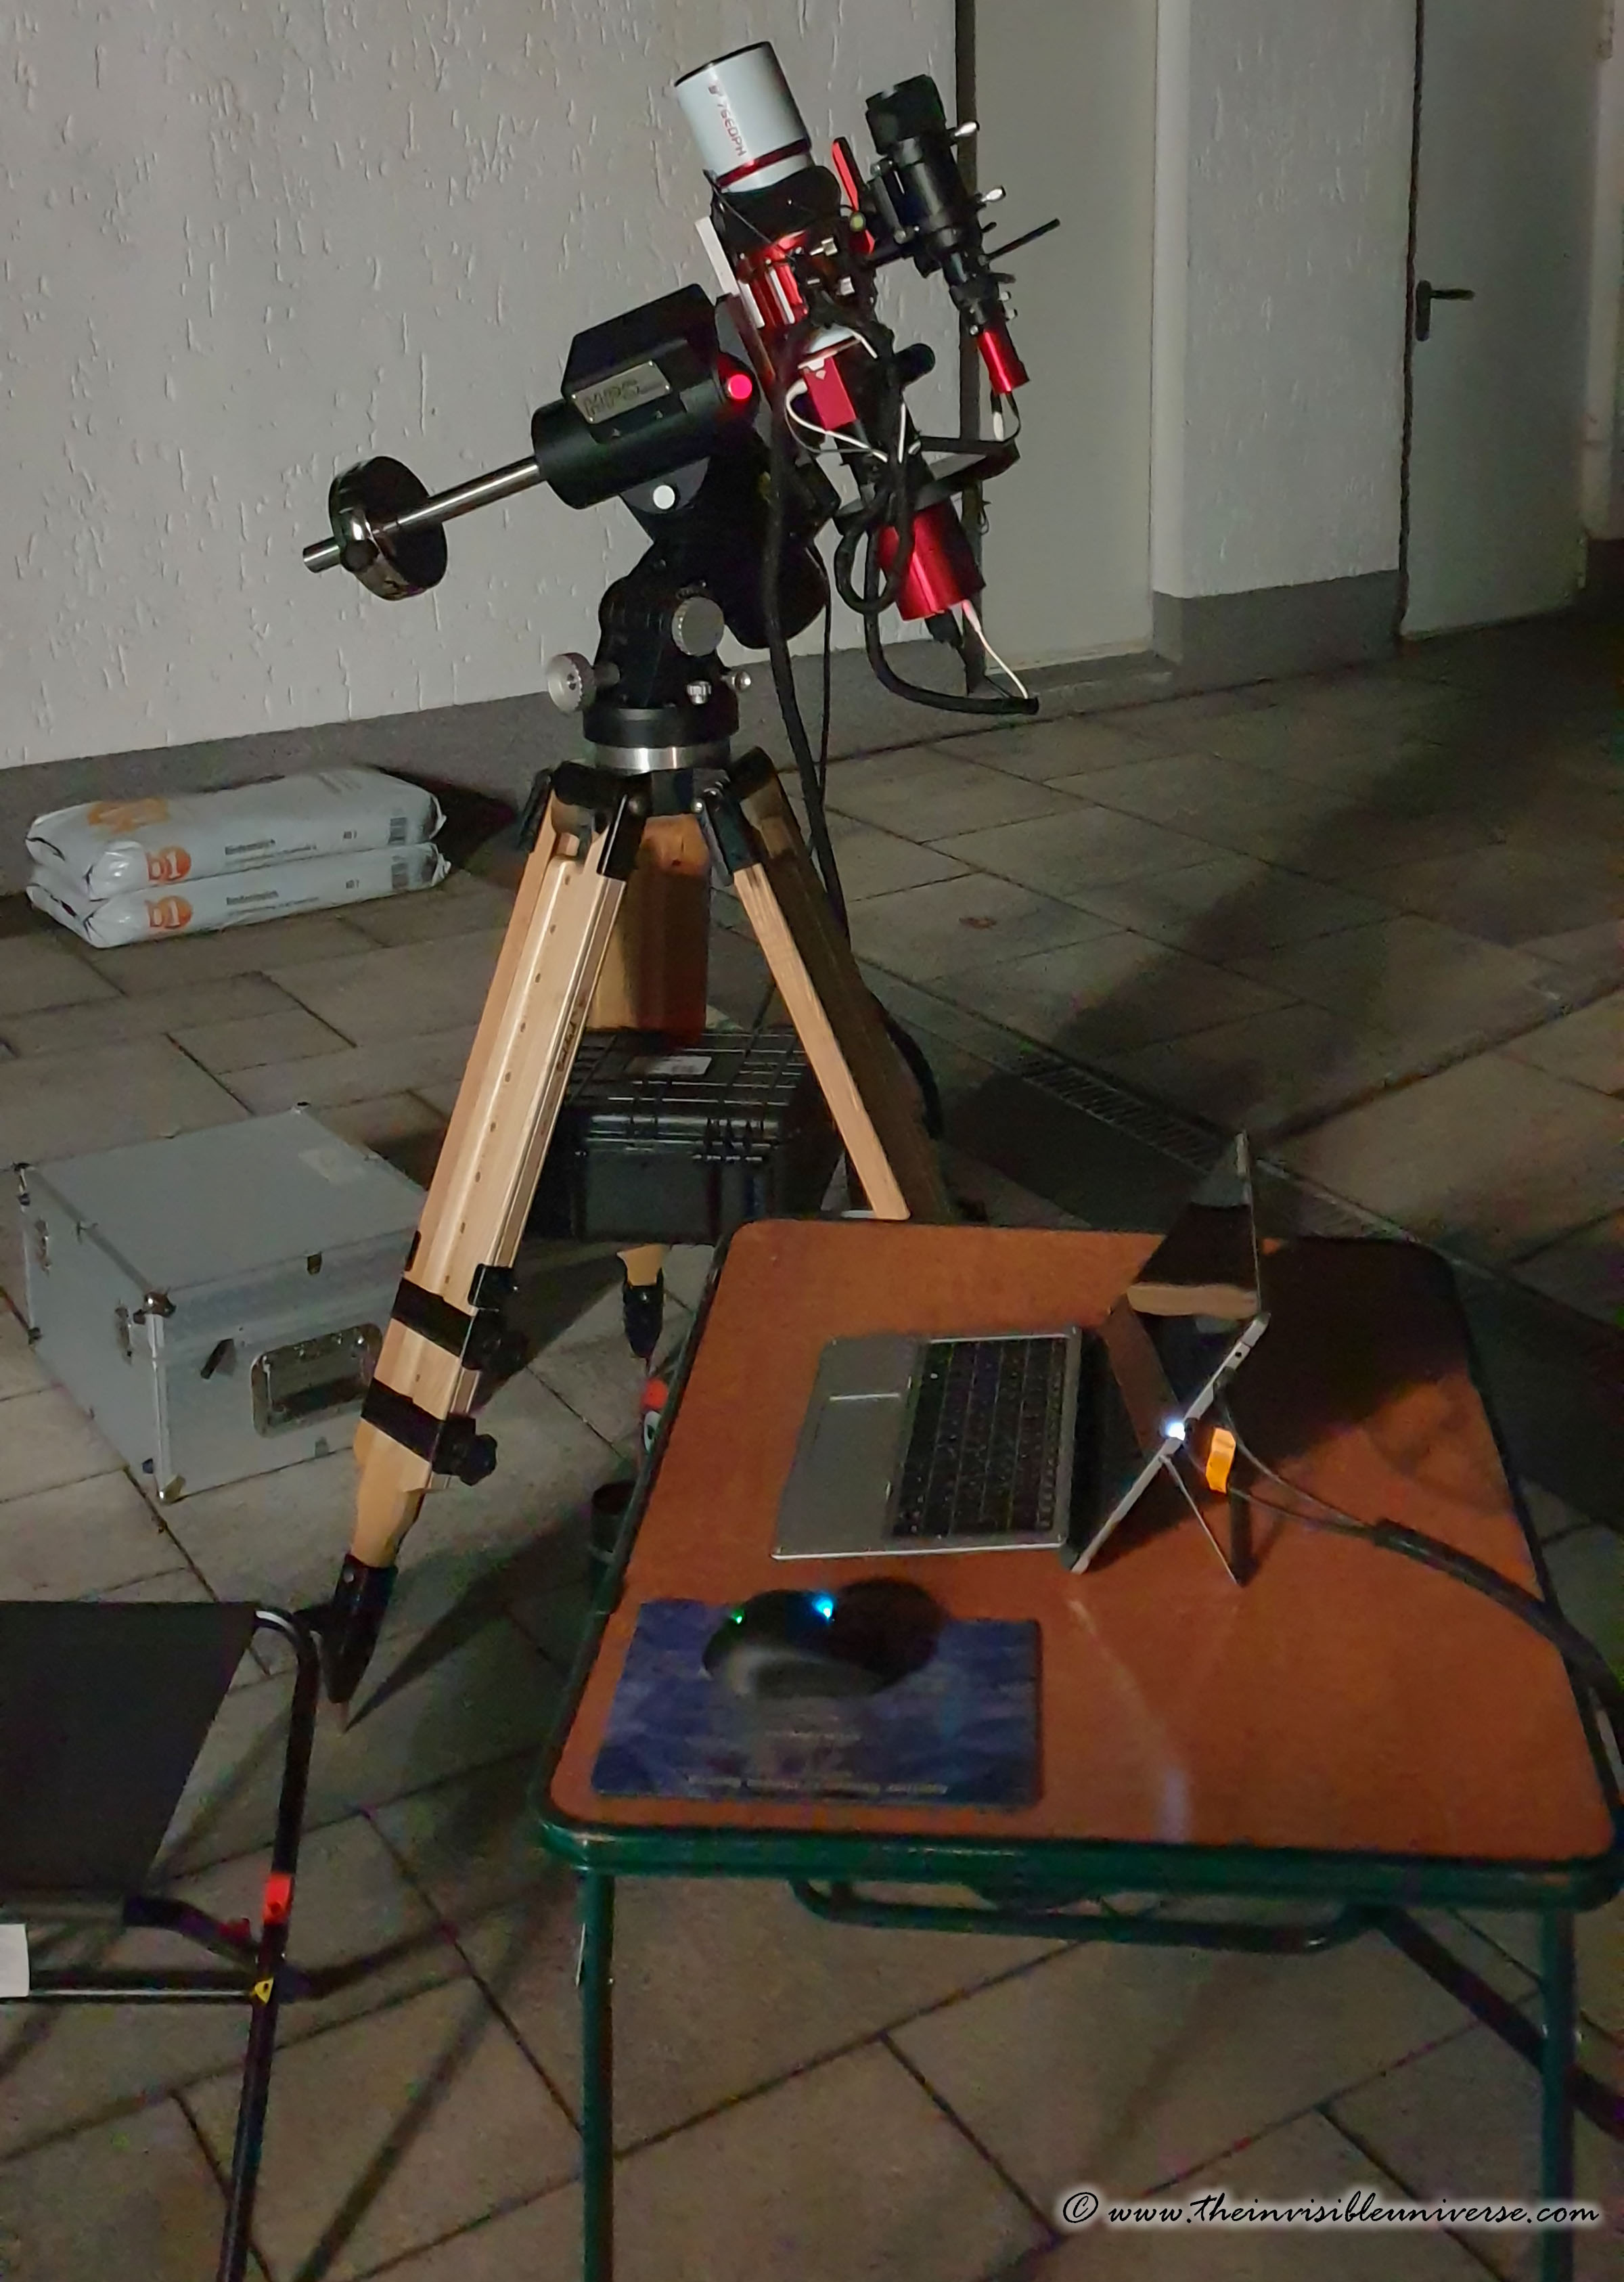
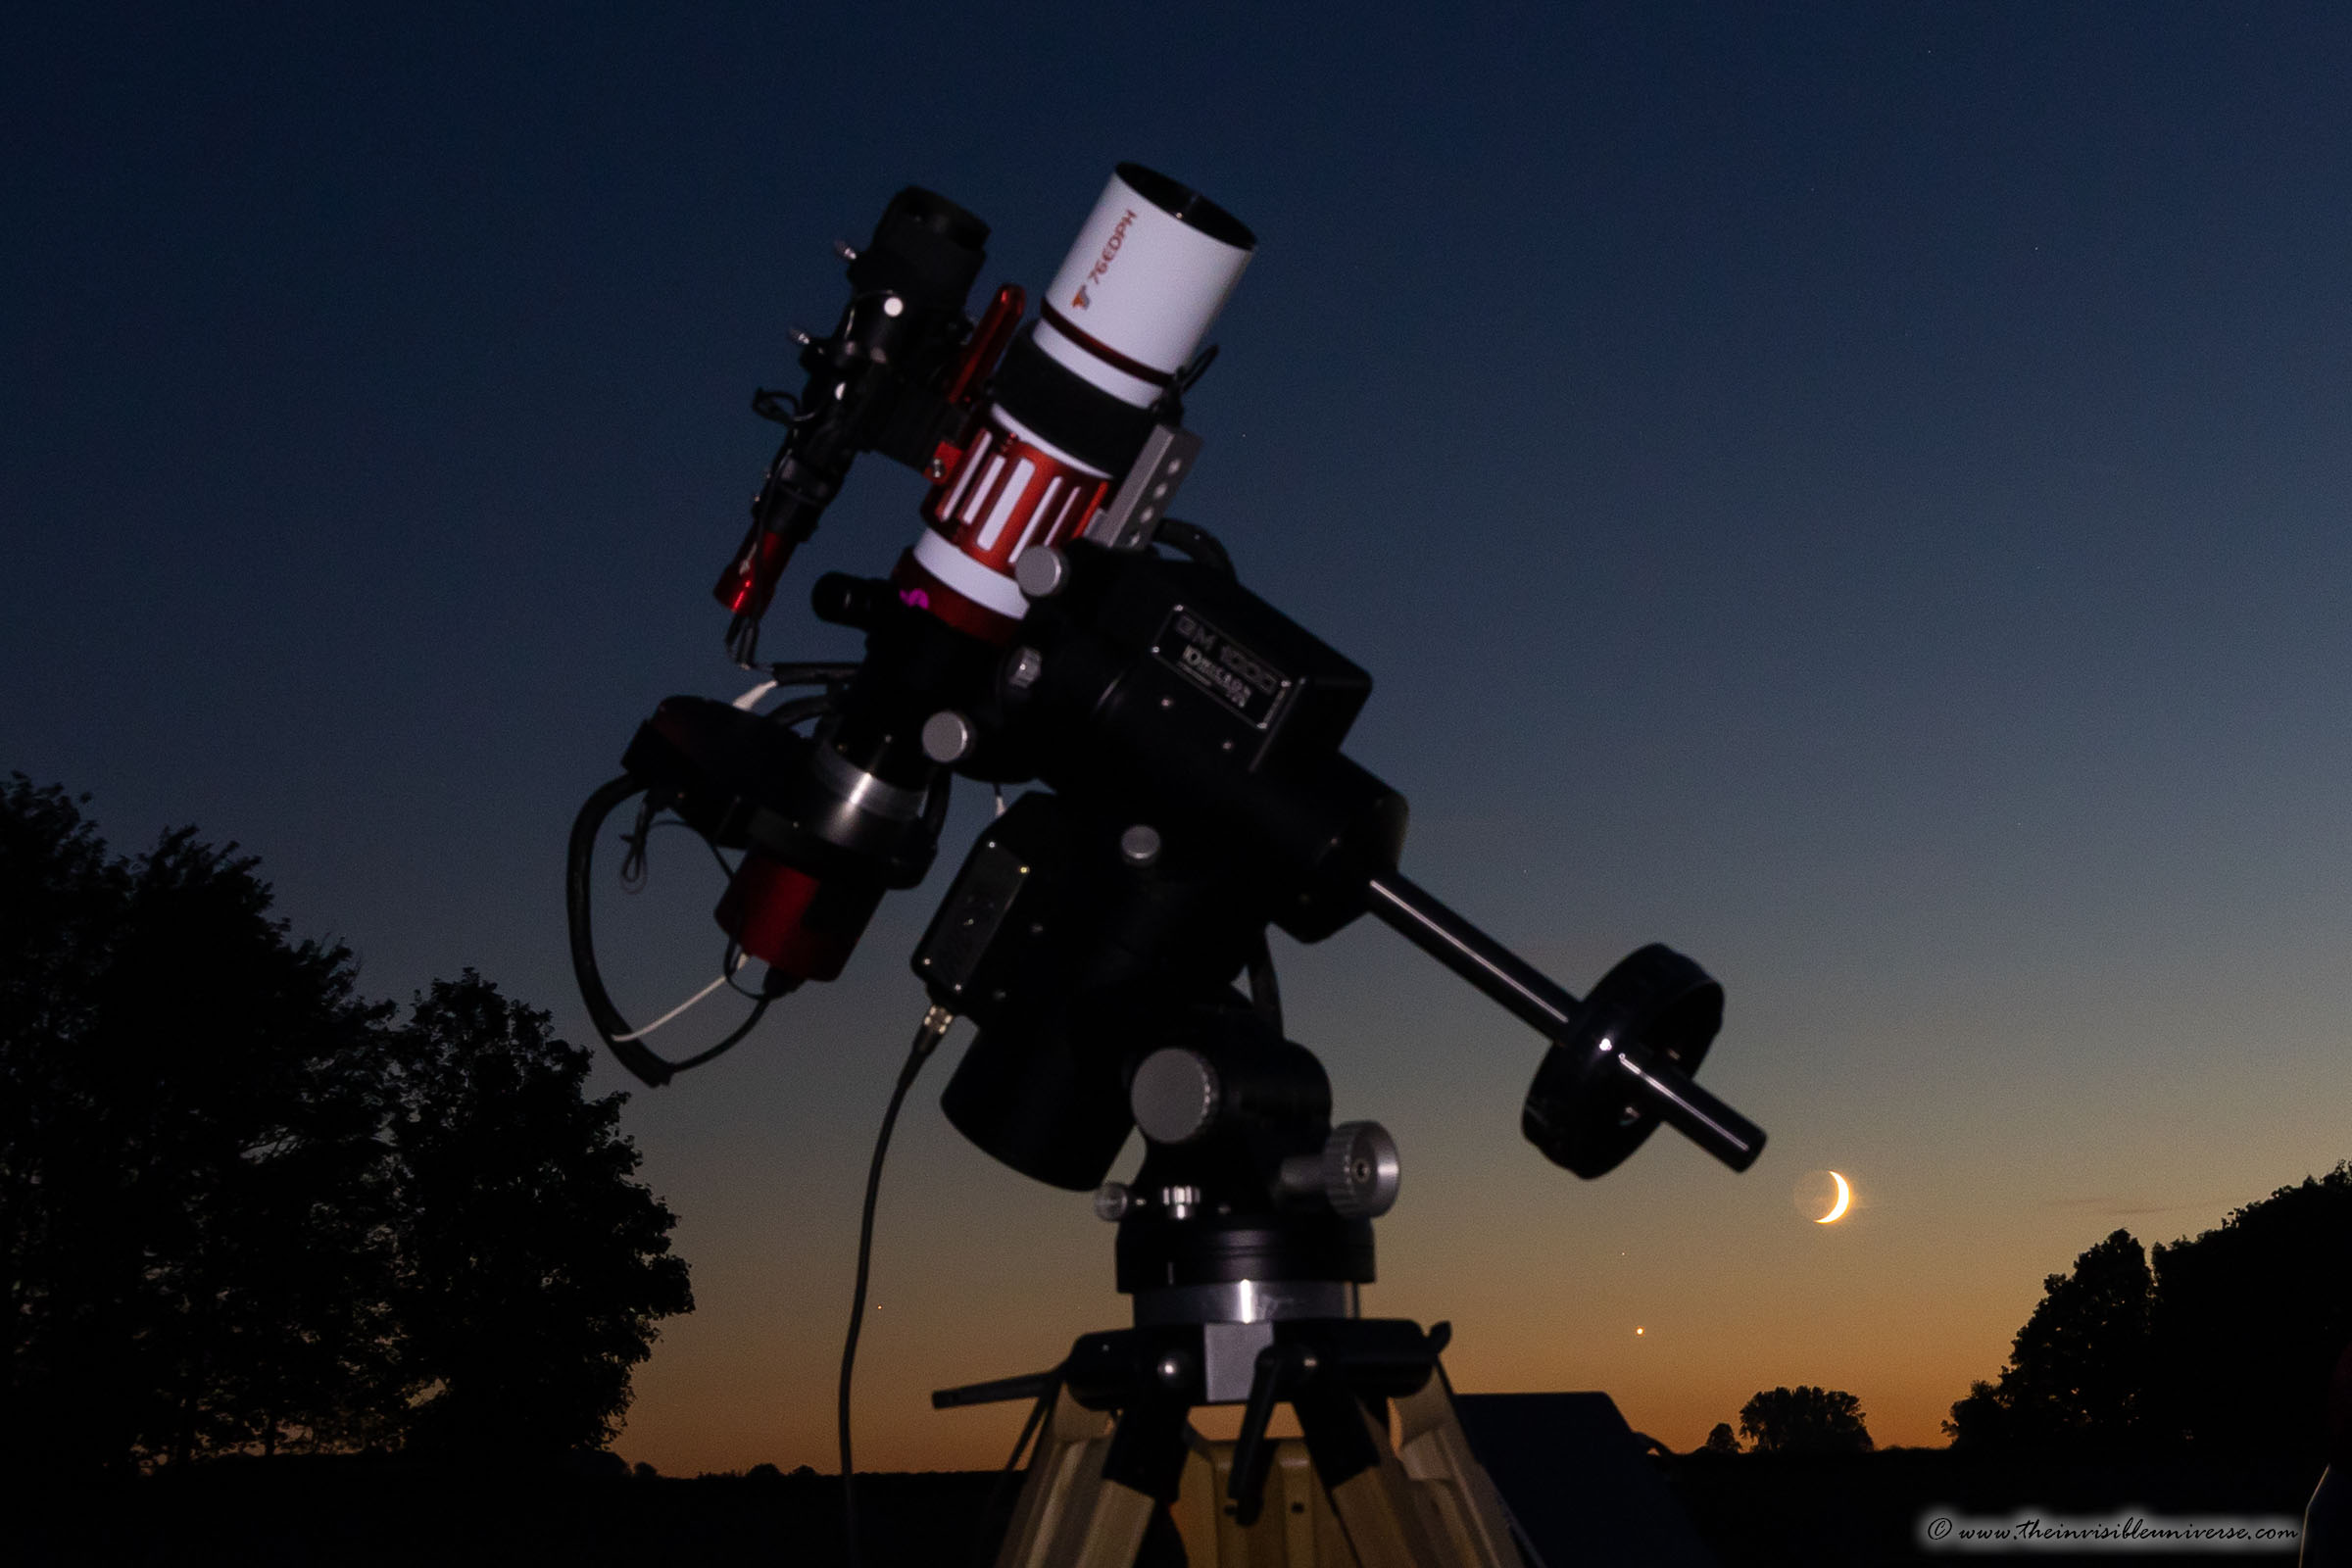
TS Optics 76EDPH f4.5
Why did I buy this device? Well, actually I had bought a 61EDPH II for wide field narrow band imaging of nebulae. The one I received was defective and had very poor star shapes in the edges of the field. Please see my comments on inferior Chinese optics at the top of this page.... You get what you pay for. So I exchanged it for the 76EDPH, hoping to get a better performing scope. Well, the mechanics of this scope are quite good. The field correction across the entire field of view in red and green is fine. Vignetting is also manageable. But in the blue spectral range, the poor design and manufacturing quality shows its ugly side. With a few small adjustments to the chromatic aberration correction in Photoshop, however, the problem can be reduced.

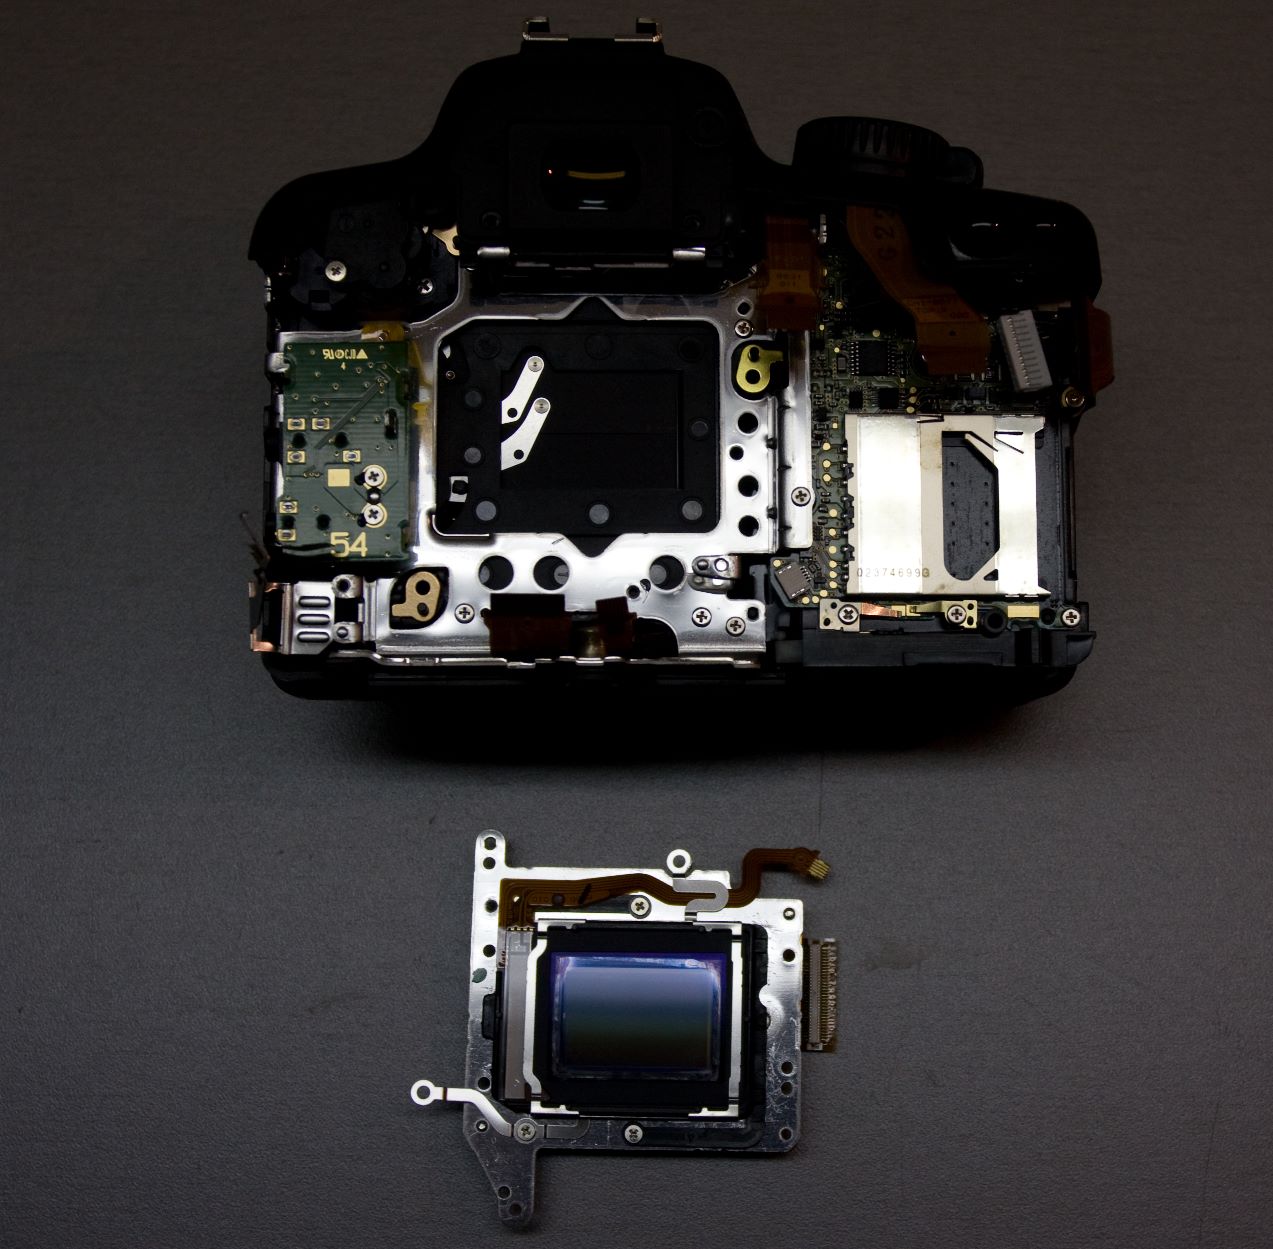
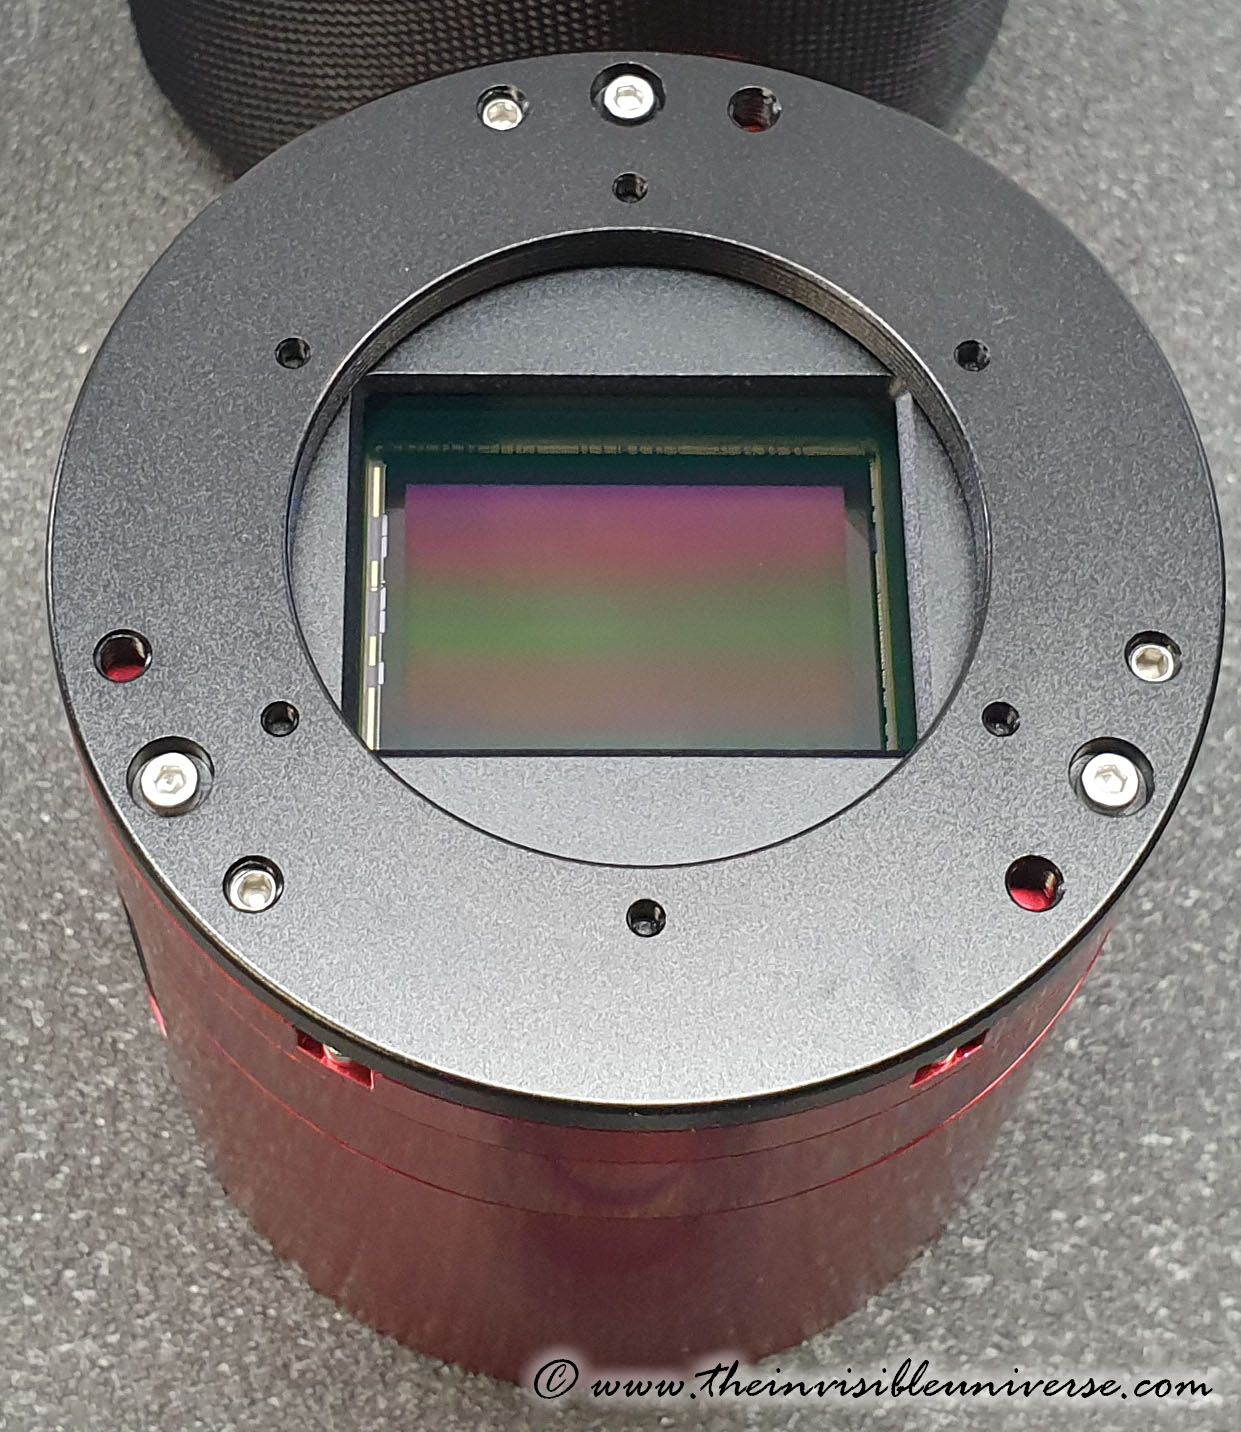
ZWO ASI6200MM Pro Monochrome CMOS Astro Camera with 7x2" Filter Wheel
At the time of writing, the ASI6200MMN Pro is arguably the best amateur astro camera on the market.
A huge full-frame CMOS chip with relatively small pixels and gigantic 60Mpix resolution, negligible readout noise and no amp-glow. These are the unquestionable advantages of this unfortunately also very expensive camera. After retiring my Moravian G2-8300 with the famous Kodak/Truesense KAF-8300 chip, which had served me well for a decade, I switched to a QHY163M. Although the Panasonic 4/3" CMOS chip is better than the Kodak CCD chip, I was unhappy with the considerable amp-glow of the Panasonic chip - a problem not experienced with CCD sensors. I was also annoyed by the poor driver design of QHY. In the end, it proves once again that compromises result in dissatisfaction.
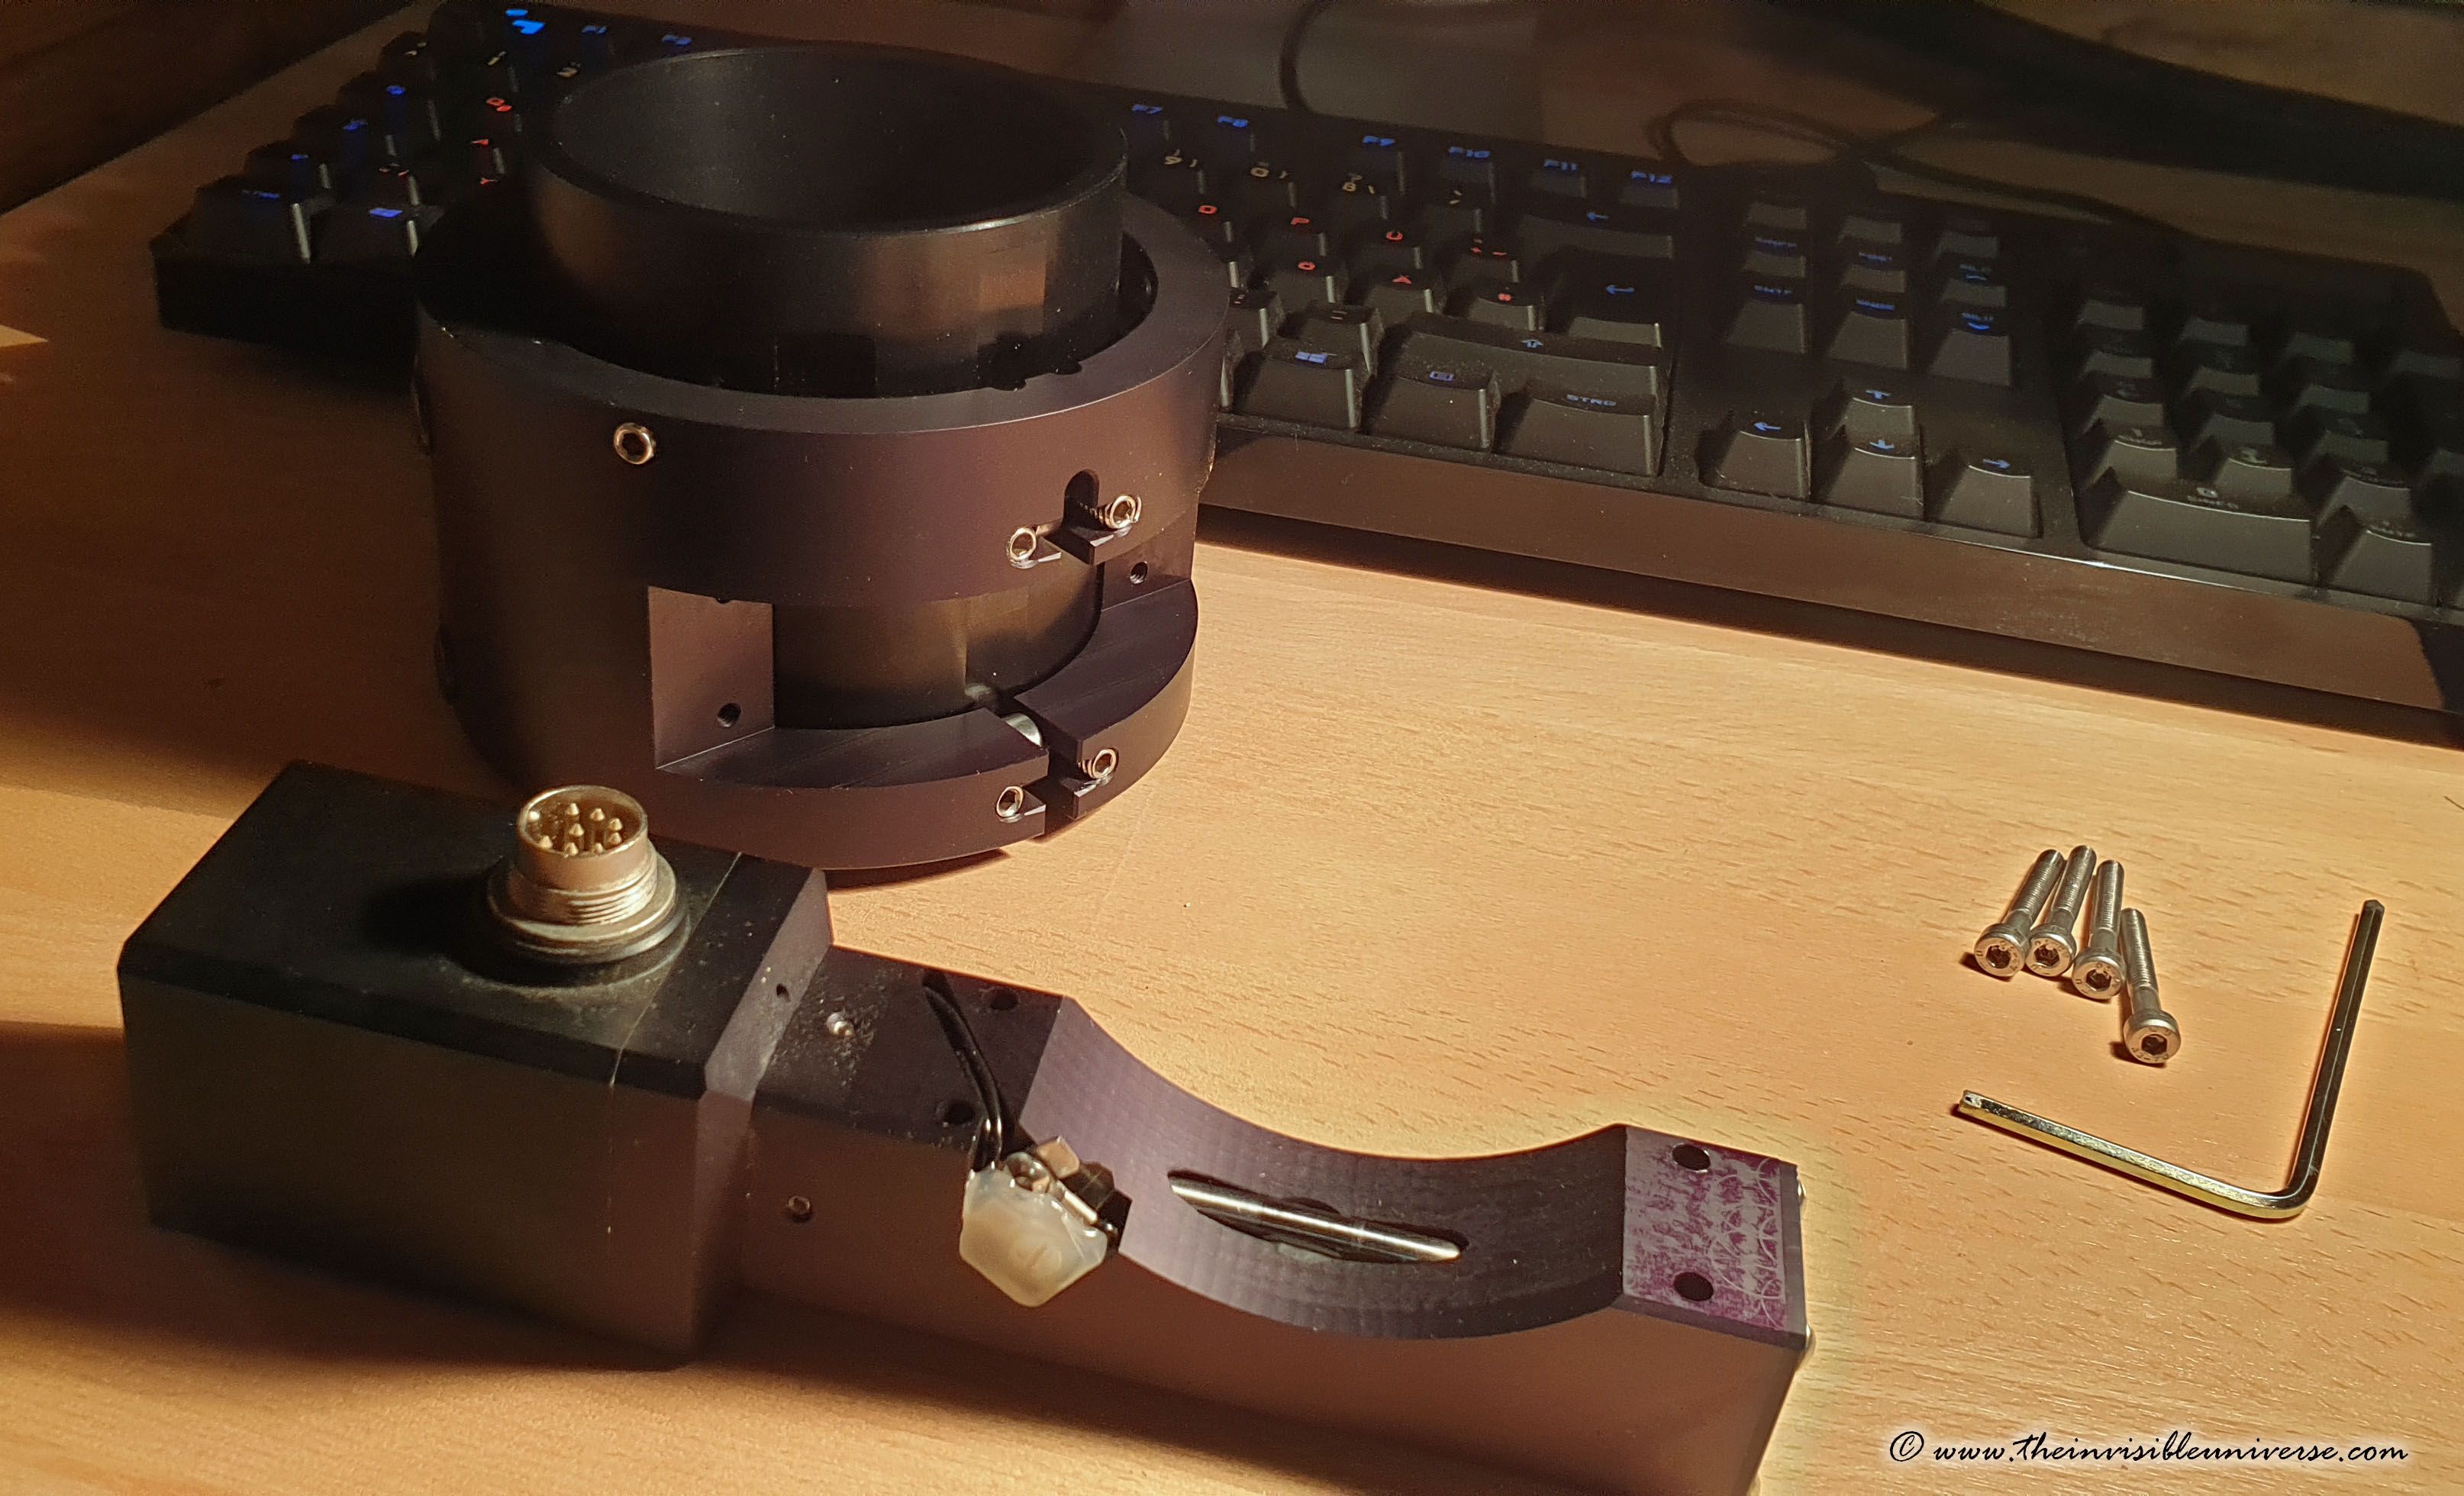
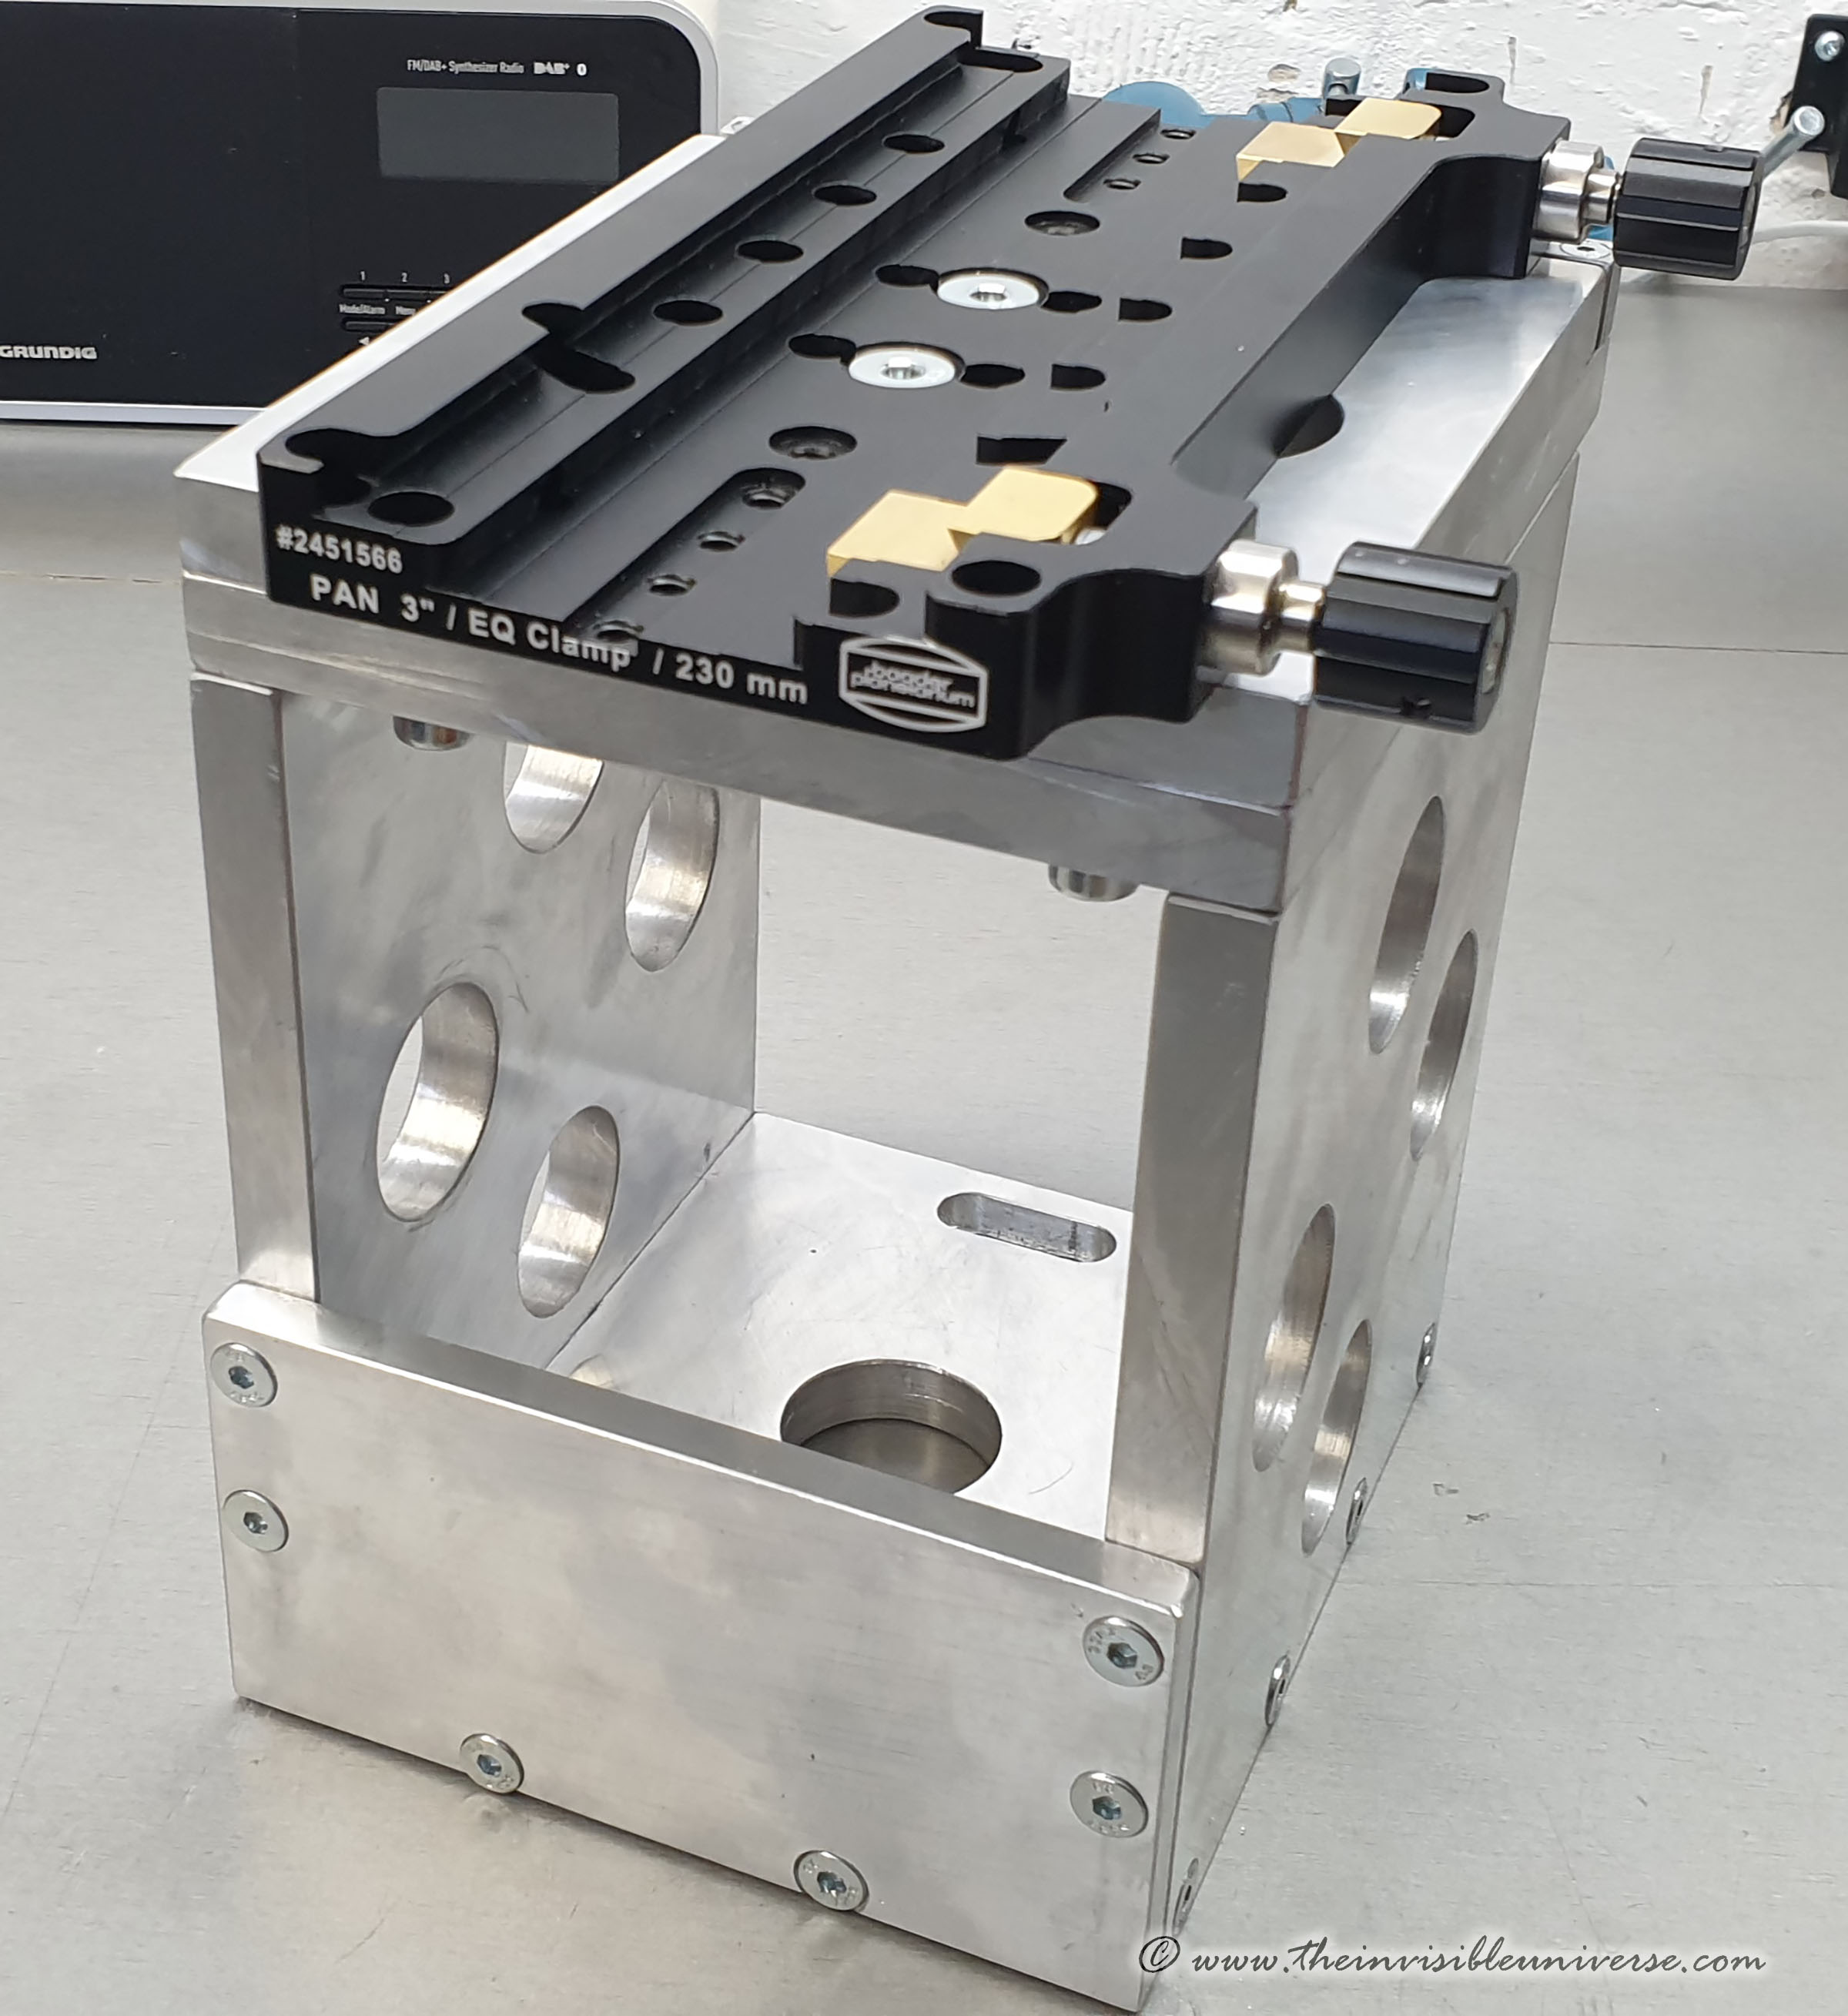
Octogonal Steel Pier and Dual Mounting Plate and Stand-off
The 10micron GM3000HPS requires a heavy steel pier. So I decided to replace my round steel pier with a much more massive one with an octagonal structure, similar to the old Zeiss and white Baader pier. I ordered this from a local machine shop and designed and fabricated a custom 300 mm aluminum mounting plate in my own shop to accommodate the large GM3000.
To mount two telescopes in parallel, I made a double mounting plate in my workshop. I also added a tilt plate for proper alignment of the two telescopes.
Furthermore, I built a stand-off to mount a third big telescope in a triangle above the two other scopes. This stand-off is made from 15mm aluminum plates in my own workshop. A tilt and rotation plate with a Baader Pan EQ clamp allow me to align the third telescope to the two others.


Berlebach Planet Wooden Tripod
The Berlebach Planet wooden tripod is a very stable tripod for medium-sized astronomical mounts. Two versions are available. A short version and a normal version. I prefer the short version because of its compact size for better transportability.

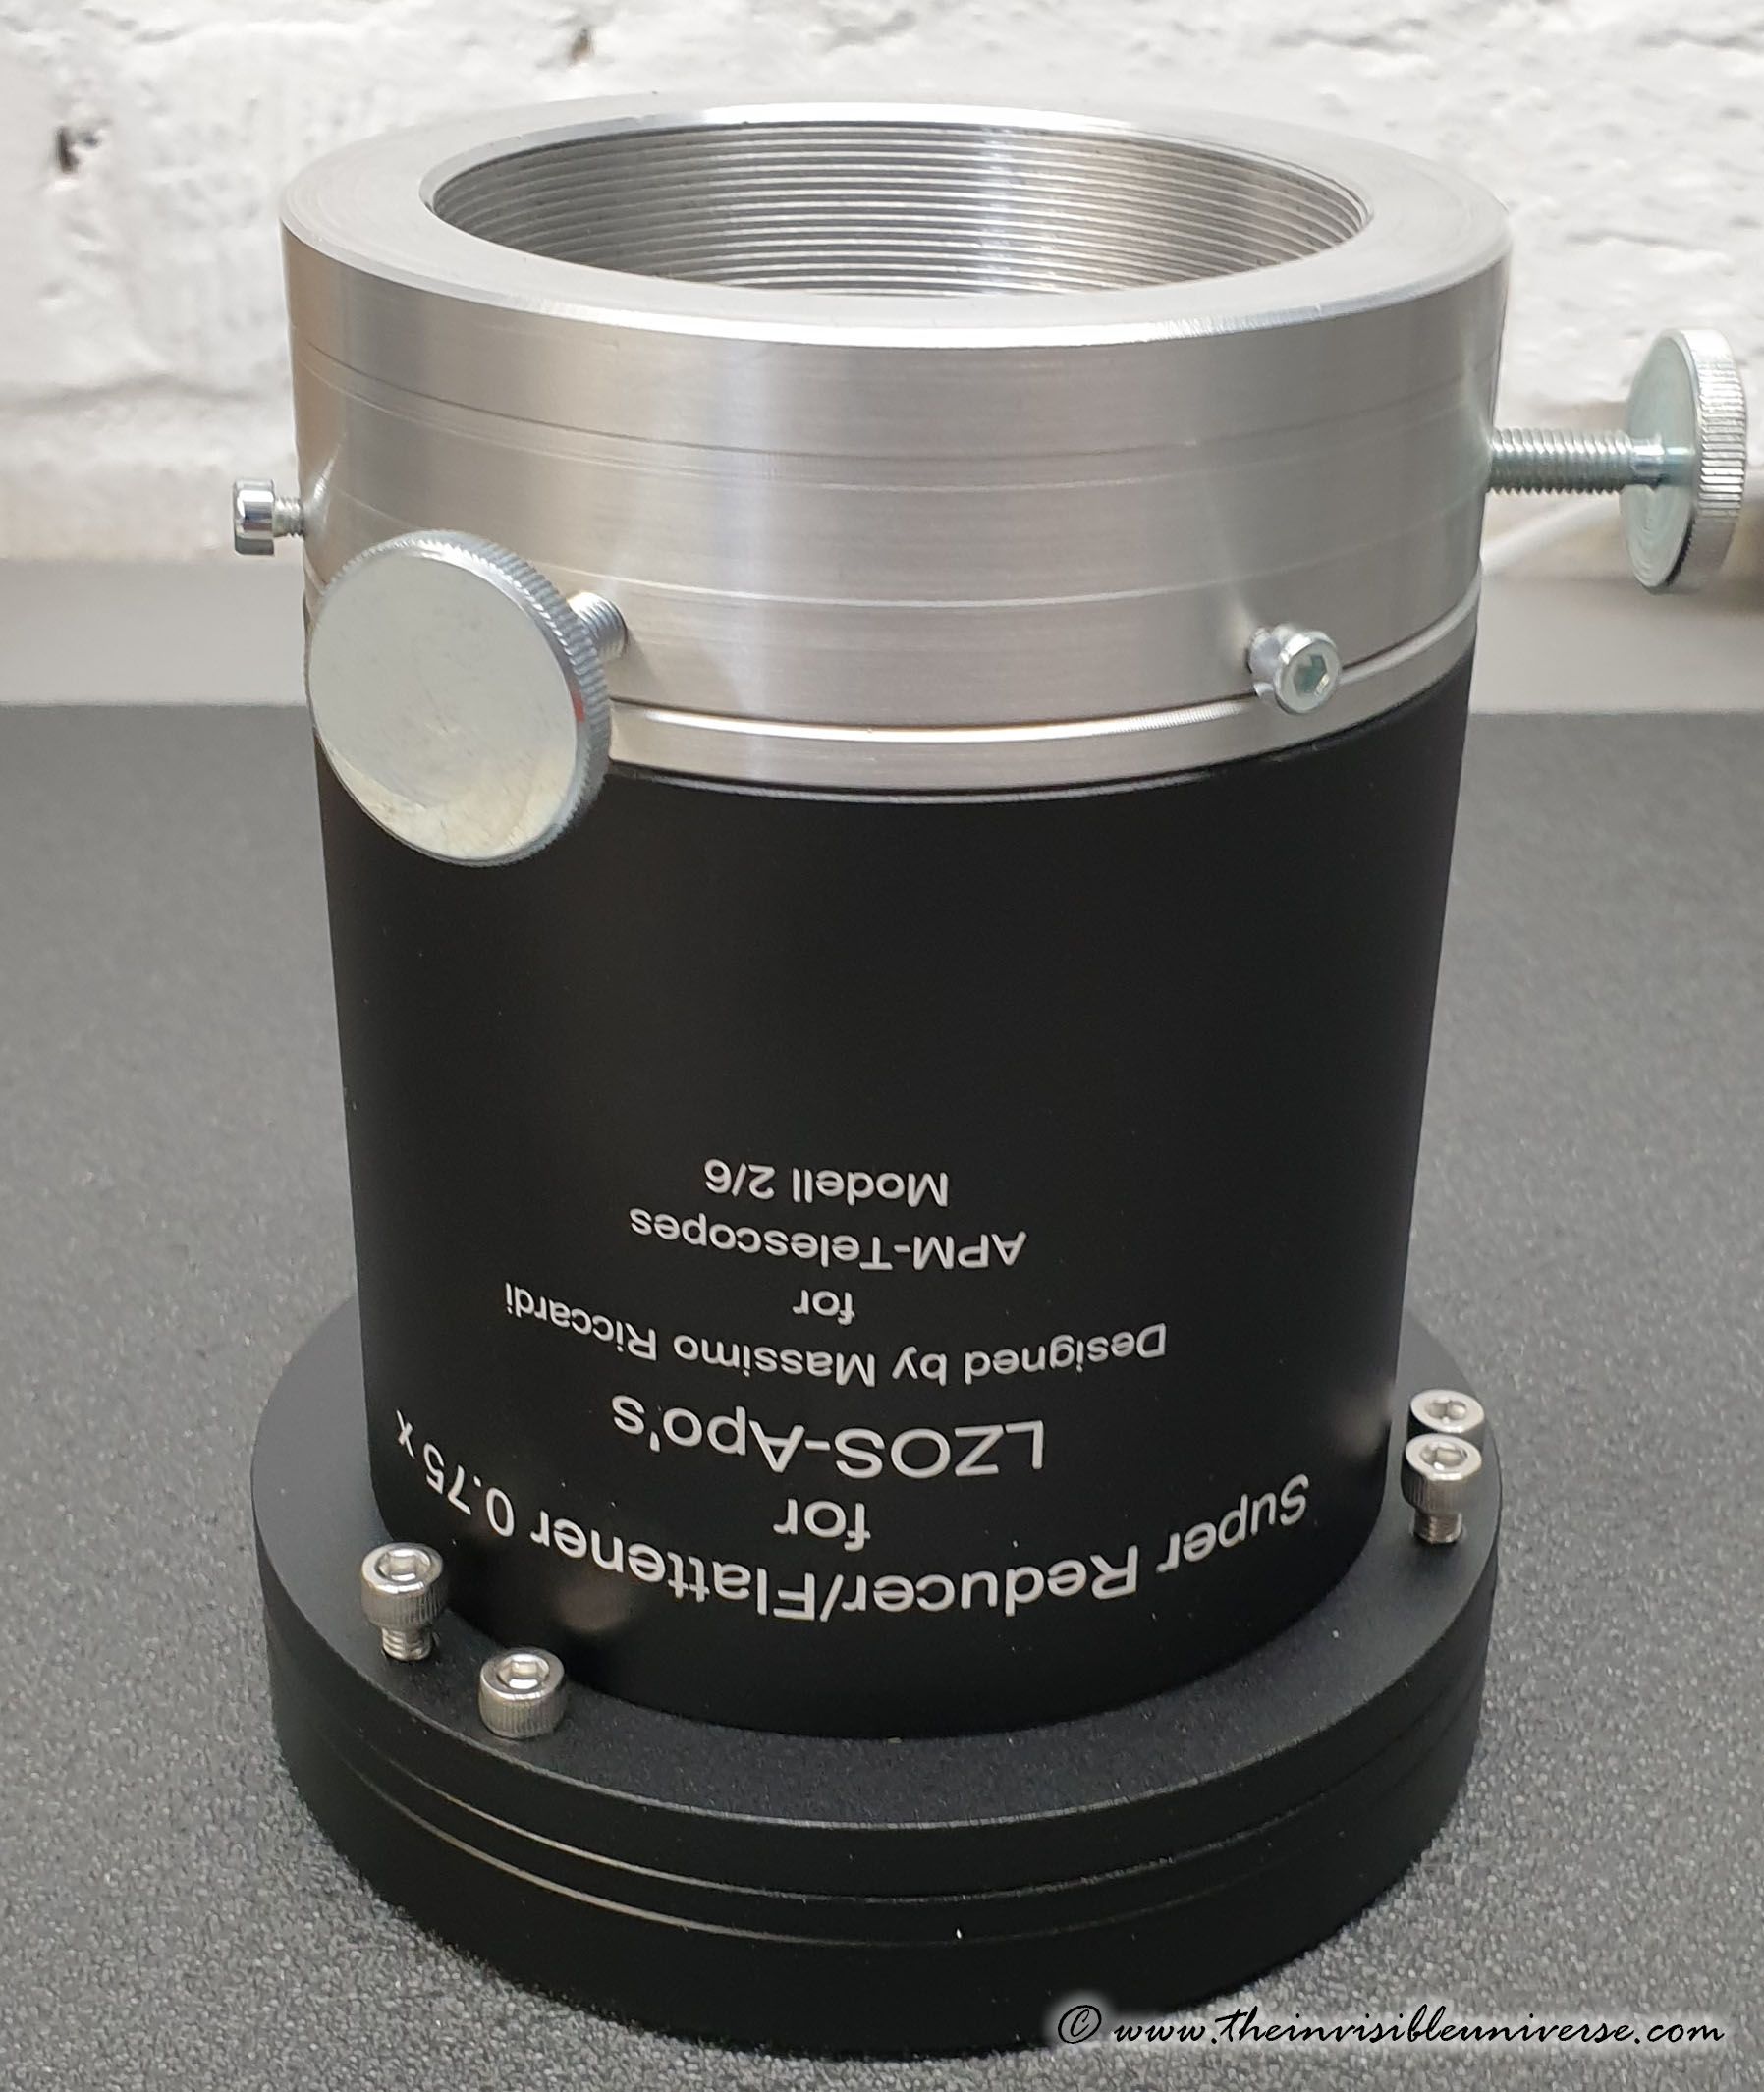
APM-Riccardi Apo-Reducer 0,75 x M82
To avoid or at least reduce vignetting in the corners of a full-frame sensor, a large sized reducer is necessary. The M82 Riccardi reducer with a reduction factor of 0.75x fits perfectly to my TMB 115/805 Triplet APO. A large 3.5" focuser tube however is a precondition for this large reducer optics, which has the size of a small telescope.
To avoid or at least reduce vignetting in the corners of a full-frame sensor, a large-dimension reducer is necessary. The M82 Riccardi reducer with a reduction factor of 0.75x fits perfectly to my TMB 115/805 Triplet APO. However, a large 3.5" focusing tube is a prerequisite for this reducer optic, which is the size of a small telescope.
Any narrowing of the light path before or after the reducer due to, for example, a camera adaptation that is too small will inevitably cause additional vignetting. That is why I have made a special M68 adaptation for my astro camera with my lathe, which additionally allows a field rotation.
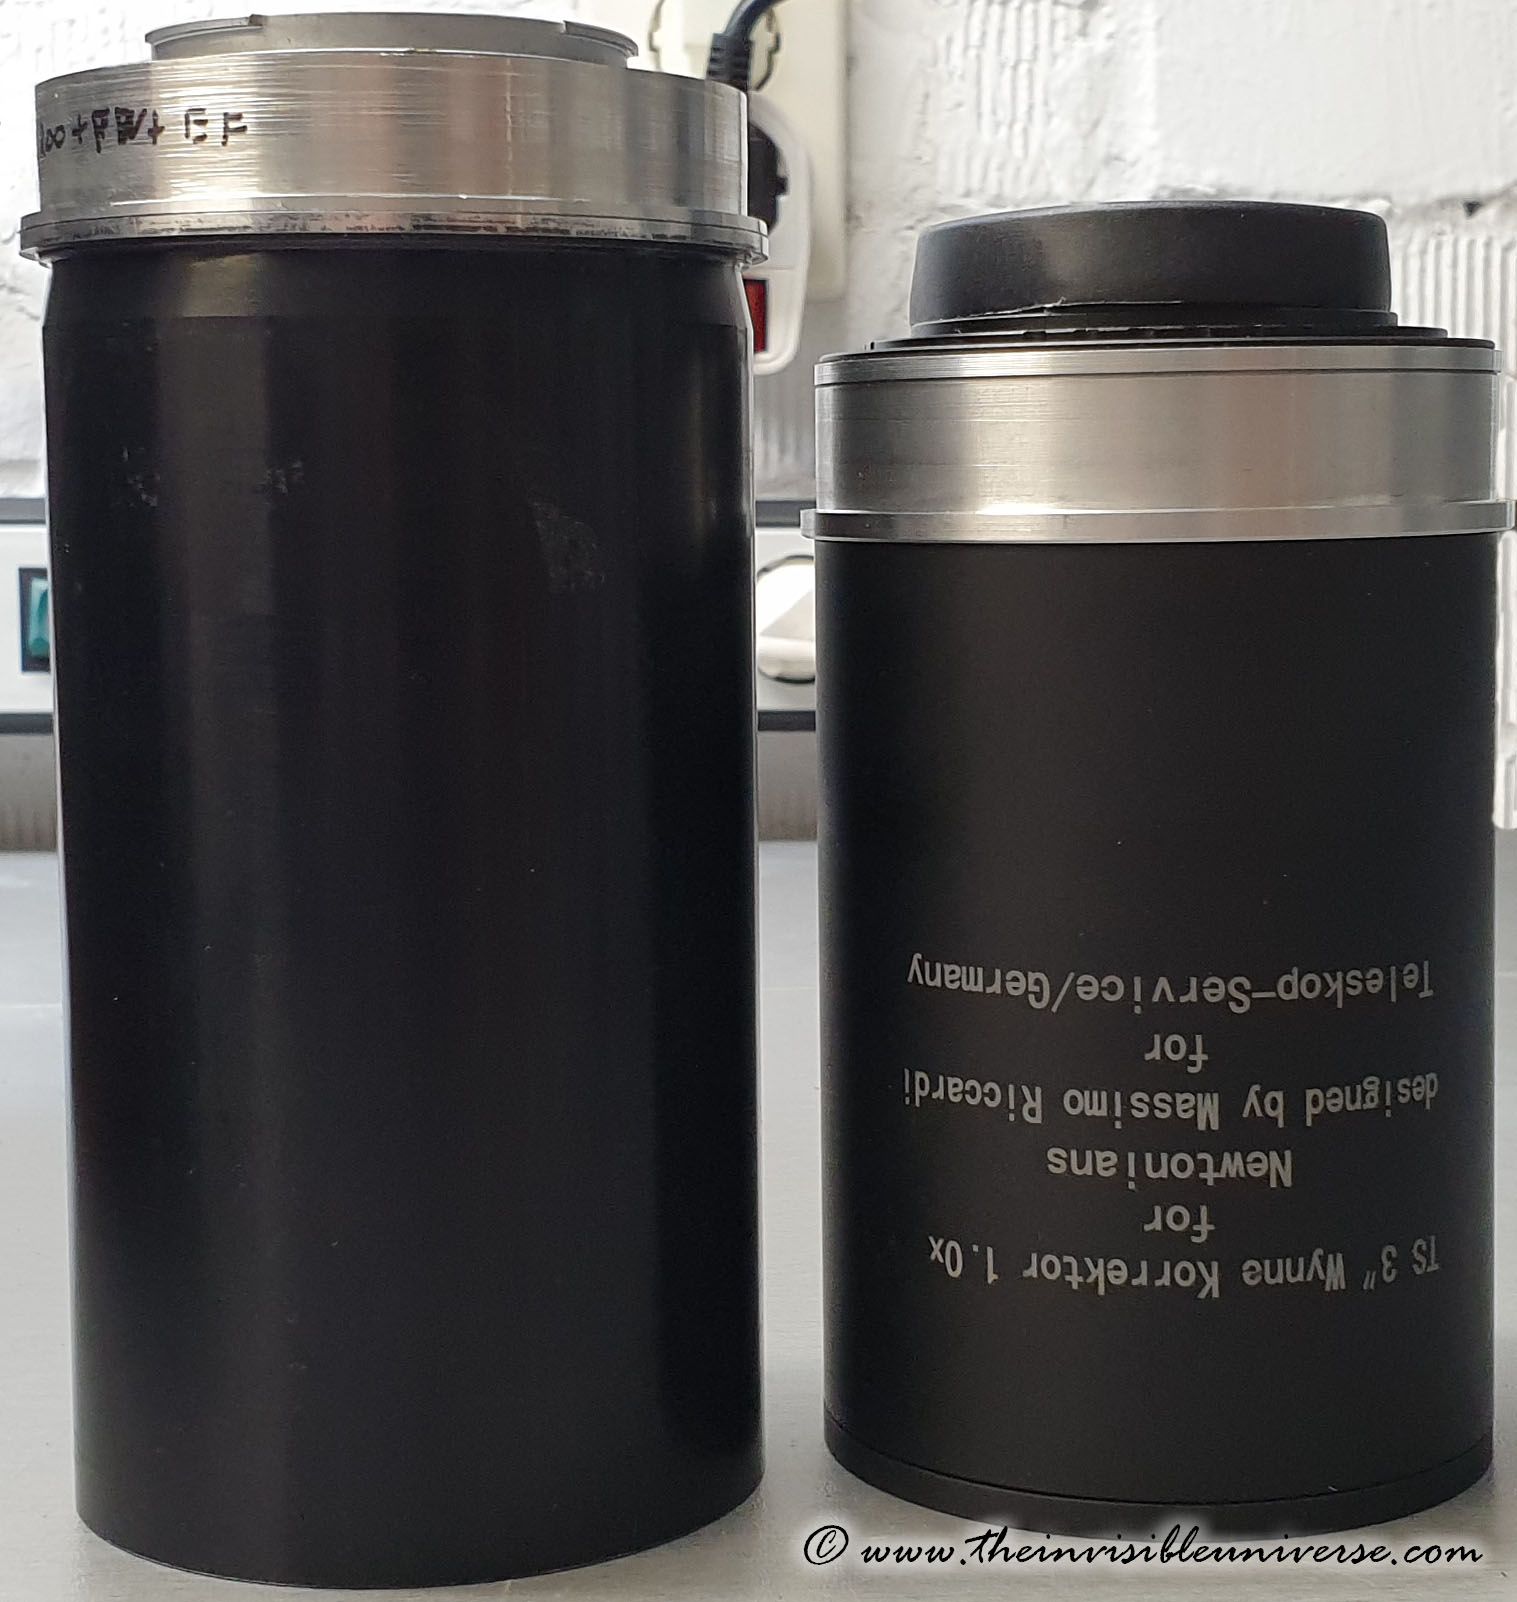
APM-Riccardi 3" Newton 1,0x Corrector
The Italian optic designer Massimo Riccardi has also calculated a large 3" Newton Coma Corrector with a reduction factor of 1.0x. In comparison to the classical Wynne Corrector it is much shorter. Therefore the field lens produces less vignetting than the one in the longer Wynne Corrector. Coma corection and color correction are on par with the ASA Wynne Corrector. I had to manufacture a custom camera adaption with my lathe, that fits to the ASA OK-3 focuser and my ASI6200MM and the large 2" filter wheel.
The Italian optical designer Massimo Riccardi has also calculated a large 3" Newton Coma Corrector with a reduction factor of 1.0x. Compared to the classic Wynne corrector, it is much shorter. Therefore, the field lens produces less vignetting than that of the longer Wynne corrector. The coma correction and the colour correction are comparable to the ASA Wynne Corrector. I had to make a special camera adaptation with my lathe to fit the ASA OK-3 focuser and my ASI6200MM with the large 2" filter wheel.
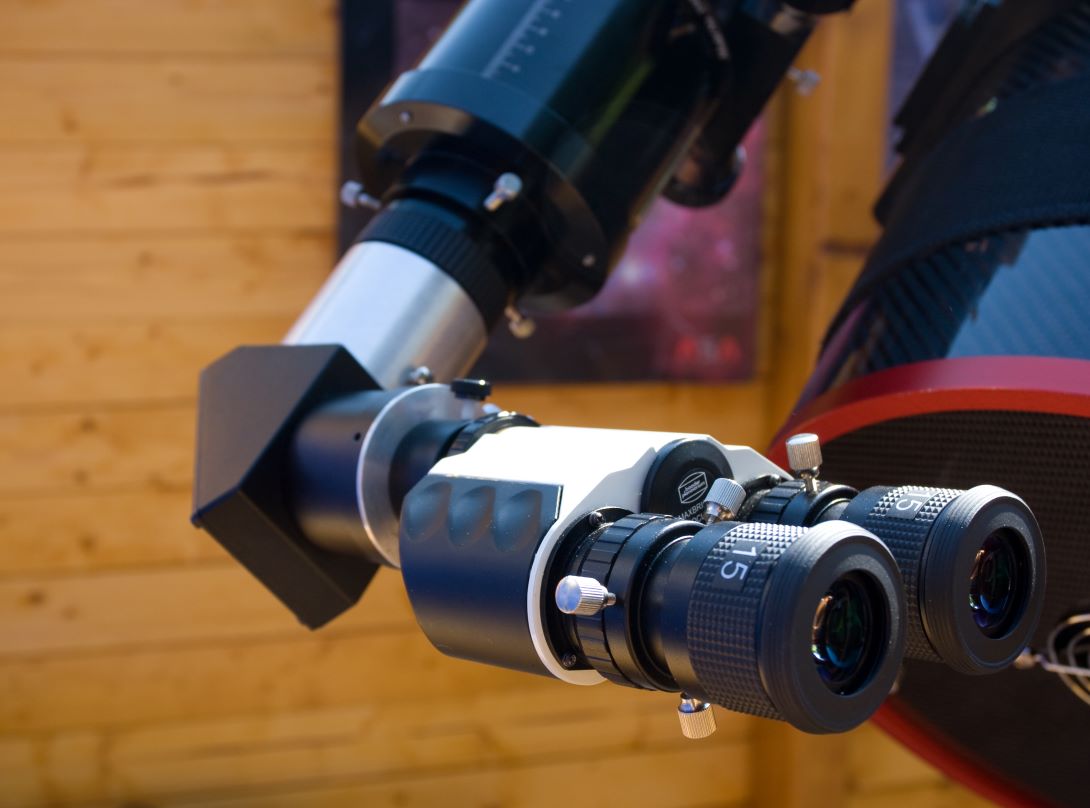
Modified Coronado PST with 1100mm D-ERF Filter
I have modified the Coronado PST for usage with my TMB APO. A Baader 110 mm D-ERF Filter is conjunction with a custom made adaption for the PST ERF and a Baader Maxbright Bino delivers a decent H-Alpha image of the sun..
Autoguding Equipment
For autoguiding I currently use a Svbony 50mm guide telescope and an ASI 120mini guiding camera.
Further Tools
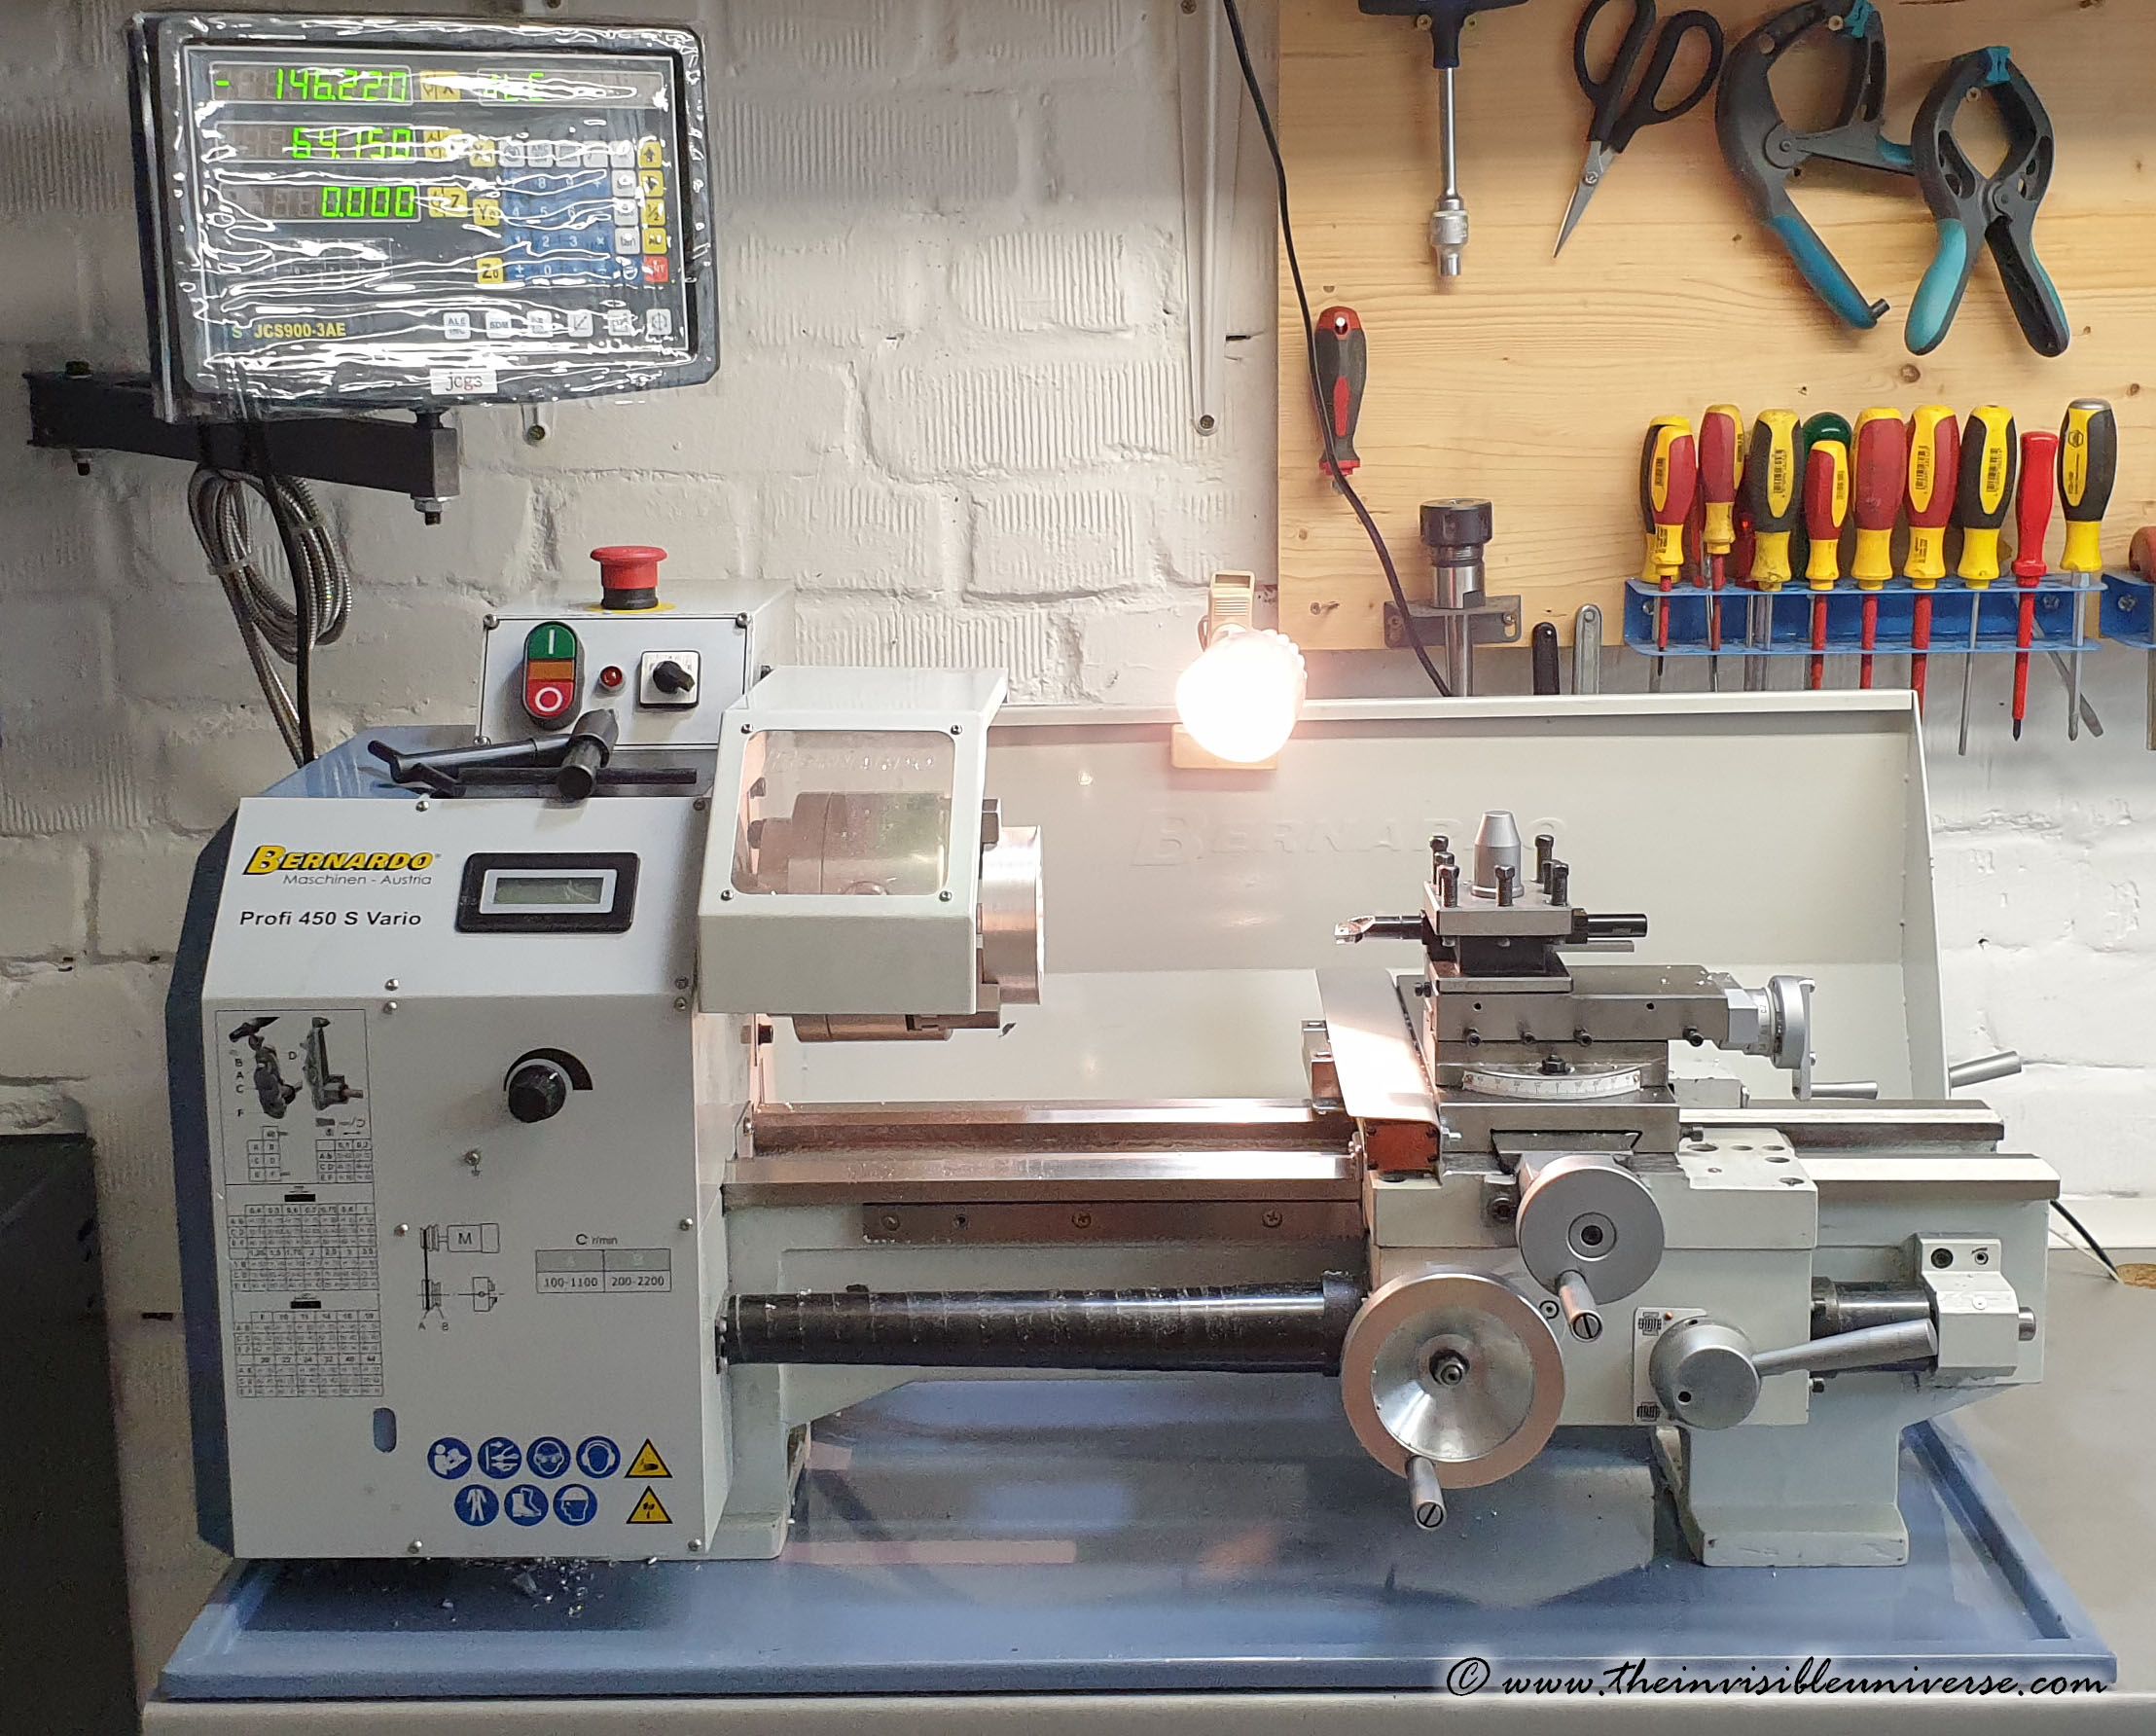
Lathe: To be able to make all the adapters that the various telescopes, correctors and cameras need, I bought a lathe, a Bernardo Profi 450s Vario. This is a medium-sized bench lathe with a weight of about 115 kg, which is just about transportable and fits on my workbench. The machine is sufficient for making camera adapters that are no larger than about 90mm in diameter. If I had bought all the adapters I need or had them made, I would probably have lost more money than the purchase price of this machine. So it's a good investment!
Powerstation for mobile use: I currently use a Tacklife/Poweroak 500Wh LiIon Powerstation, and a 720Wh EcoFlo River Pro, two very convenient and transportable batteries, much more useful than classical lead batteries.
Baader M68 Tilter: I now also use the Baader M68 Tilter, which was recently launched. The main problem with full-frame cameras is the tilt of the image sensor in the camera body. ASI and other camera manufacturers do not do a good job here. To eliminate the tilt, ASI offers a tilt plate, but frankly it is useless because the screws to eliminate the tilt are hidden by the filter wheel and the M68 adaption. I have spent long nights and hours of trial and error trying to eliminate tilt with unsatisfactory results. For each optimisation cycle, I have to unscrew the camera from the telescope, remove the entire filter wheel, make minor adjustments to the tilt plate, put everything back together, screw the camera to the telescope, take a picture and analyse the tilt. Terrible. And now the Baader filter comes into play. The tilt adjustment screws are on the side of the unit, easily accessible with a small Allen key while the camera is taking a live video stream through the telescope. In just one hour, I was able to almost completely eliminate the tilt using the camera's live view. Really convenient!


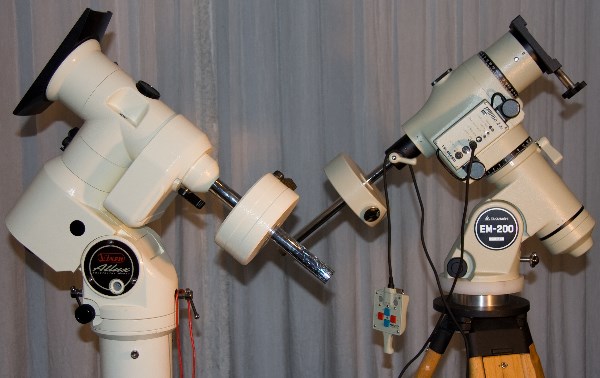
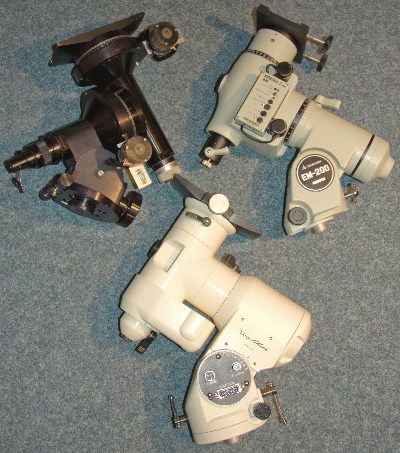
Further Equipment that I have owned over the years
Here are some further pictures of Equipment that I have used over the years. Most of the stuff has been sold again.